
Homeowners: 24–48 Hour Checks to Stop Mould After Insulation
Homeowners: 24–48 Hour Checks to Stop Mould After Insulation
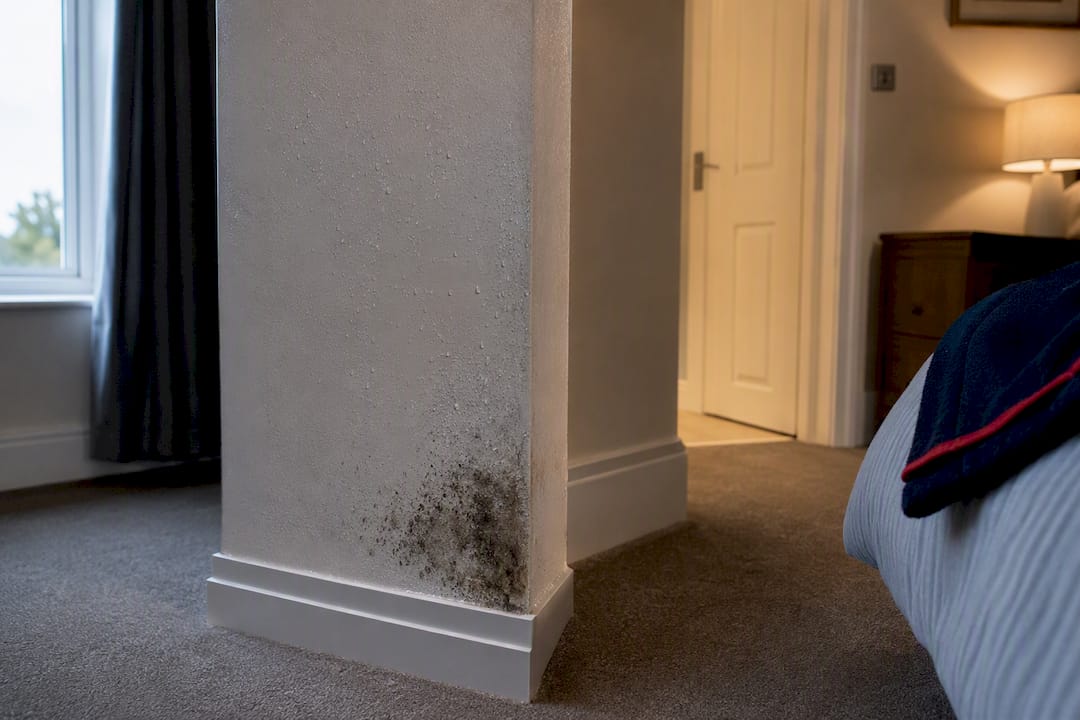
Insulation rarely causes mould on its own. It changes where and how condensation forms, and mould usually follows a ventilation shortfall or an installation fault that let moisture in or trapped it inside. If you can see black or green patches, or smell damp, stop drying washing indoors, ventilate the room, and book a survey with moisture readings before you touch the insulation itself.
TL;DR:
- Proper inspection and moisture measurement are essential before addressing mould issues after insulation to identify the actual moisture sources.
- Common faults include missing vapour control layers, untreated thermal bridges, and reduced ventilation, all of which contribute to interstitial condensation and mould growth.
- Insulation materials saturated for more than 24 to 48 hours generally require removal and replacement, especially porous or organic types like cellulose and mineral wool.
- Fixing the root causes involves restoring ventilation, sealing vapour control layers, and insulating cold spots to prevent recurrence of mould.
- A survey-led approach, including thermal imaging and moisture logging, improves diagnosis accuracy and provides homeowners with actionable solutions and guarantees.
Table of Contents
- How added insulation changes moisture behaviour in a house
- Common installation and site faults that lead to mould after insulation
- Signs to spot: condensation, hidden damp, and visible mould
- What to do the moment you find mould after insulation
- When insulation must be removed or replaced
- Fixing the cause: ventilation, vapour control, and thermal bridges
- Why a survey-led approach prevents mould coming back
- Lessons from decades of damp, mould, and timber work
- Book a damp and timber survey with Quay Point Plastering
- Sources
- FAQ
How added insulation changes moisture behaviour in a house
Insulation stops heat escaping. It does nothing to remove the moisture your household produces every day through cooking, bathing, and breathing. That moisture has to go somewhere, and in a tightly sealed retrofit, the place it used to escape (a beauty gap, an old single-glazed window) may no longer exist.
This is why homes that feel warmer after insulation sometimes develop damp patches they never had before. The Insulation Institute’s guidance and retrofit failure analysis both point to the same mechanism: moisture that once dispersed through natural air leakage now condenses somewhere colder, often out of sight.
Three specific weak points show up repeatedly:
- A missing or poorly sealed vapour control layer lets warm, moist air migrate into the wall or roof structure, where it cools and condenses.
- Thermal bridges, junctions where insulation is interrupted, stay colder than the surrounding fabric and become preferred condensation sites.
- Reduced air movement after sealing works means existing moisture lingers longer against cold surfaces.
Retrofit specialists at The Conversation describe interstitial condensation, moisture forming inside the wall or roof build-up rather than on the visible surface, as one of the most common retrofit failures. It is often invisible until timber or plaster has already been damaged.
Common installation and site faults that lead to mould after insulation
Most post-insulation mould traces back to one of five recognisable faults, and identifying which one applies usually points straight to the fix.
- Missing or untaped vapour control layers. Gaps at joints, service penetrations, or loft hatches let moist air bypass the barrier entirely.
- Insulation unsuited to the cavity. Fill materials pushed into narrow, debris-filled, or exposed cavities can bridge damp or trap moisture against masonry.
- Ventilation quietly reduced. Trickle vents get painted shut, extractor fans get disconnected during works, and nobody reopens them afterwards.
- Thermal bridges left untreated. Window reveals, lintels, joist ends, and loft hatches often get skipped because they’re awkward to insulate properly.
- Insulation installed wet or wetted afterwards. Driven rain during works, or a later roof or pipe leak, soaks material that then can’t dry out inside a sealed structure.
Signs to spot: condensation, hidden damp, and visible mould
Surface condensation on windows or cold walls is usually obvious and often manageable with better airflow. Hidden interstitial condensation is harder to catch because it develops inside the wall or roof build-up, sometimes for weeks, before staining or a musty smell reaches the surface.
Watch for these indicators, and note when they started relative to the insulation work:
- Black or green patches on plaster, timber, or around window reveals.
- A persistent musty odour that doesn’t clear with airing.
- Staining or discolouration on skirting boards, joist ends, or loft timbers.
- Symptoms appearing weeks or months after insulation was fitted, rather than immediately.
Professionals distinguish surface condensation from interstitial damp using a 24 to 48 hour moisture logging window rather than a single spot reading, because surface moisture fluctuates with daily activity like cooking or showering. Combined with thermal imaging, this reveals cold spots and trapped moisture that a quick visual check would miss, according to Protimeter’s survey guidance for building inspectors. Widespread black mould, recurring symptoms after cleaning, or occupants with respiratory issues call for immediate action.
What to do the moment you find mould after insulation
Finding mould after insulation work feels alarming, but the first hour matters more than the first day. Follow a clear sequence rather than reaching for bleach immediately.
- Stop high-moisture activities. Pause indoor drying of washing and reduce steam from cooking and bathing until the source is understood.
- Ventilate carefully. Open windows where weather allows, and run a dehumidifier if you have one, without disturbing the affected material.
- Contain the area. Seal off vents or grilles near the mould and avoid brushing or vacuuming it, which spreads spores into the air.
- Call a professional if the area is large. Anywhere beyond roughly 10 square metres, or a household with young children, elderly occupants, or respiratory conditions, warrants a professional rather than a DIY clean-up, a point echoed in Gov.
Pro Tip: Photograph the affected area and note the date you first noticed it before you clean or cover anything. A surveyor’s moisture readings are far more useful when paired with a clear timeline, and it helps if you later need to support an insurance claim.
When insulation must be removed or replaced
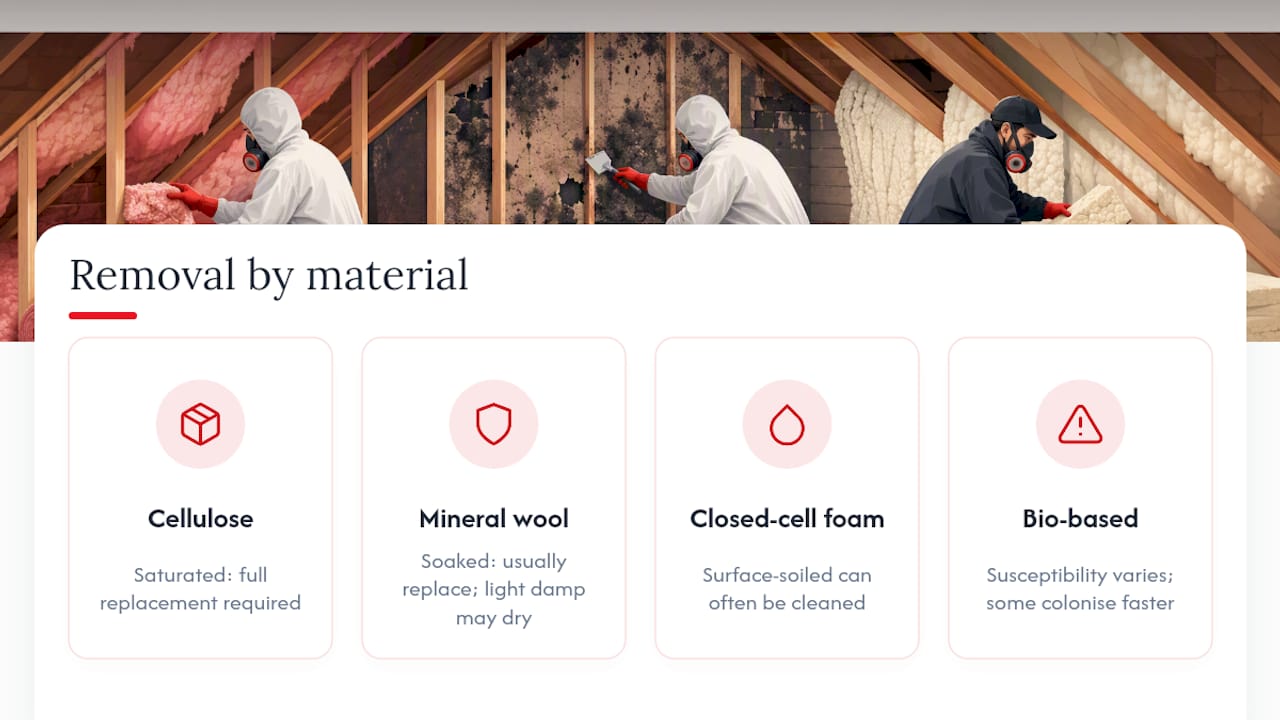
The 24 to 48 hour rule is the industry’s practical threshold: insulation that has been wet for longer than that, or that shows a musty odour or visible colonisation, generally cannot be dried out safely in place and needs replacing, according to the Insulation Institute.
Material type changes the calculation. Cellulose and other organic fills absorb and hold moisture, so they almost always need full replacement once saturated. Mineral wool behaves similarly once soaked through, though light surface dampness sometimes dries without full removal. Closed-cell foam is more forgiving. Surface-soiled foam can often be cleaned rather than stripped out, since it doesn’t absorb moisture the way fibrous materials do.
Laboratory testing shows mould susceptibility varies significantly by material. Mineral wool and EPS perform better under controlled conditions than cork and several organic insulants, a distinction worth raising with any installer before choosing a product.
Bio-based insulation deserves particular caution here. Testing from Aalto University found susceptibility to visible mould growth varies widely across bio-based products, with some colonising faster than conventional mineral or foam alternatives. Safe removal follows a consistent process regardless of material: contain the work area, use a HEPA vacuum rather than a standard one, treat any affected timber, and allow the substrate to dry for 24 to 48 hours before re-insulating, as MoldActionPlan’s remediation guidance sets out. For loft-specific removal and disposal of contaminated material, PestControl24London’s guidance on loft insulation removal covers the practical steps involved.
Fixing the cause: ventilation, vapour control, and thermal bridges
Removing mould without fixing why it appeared invites a repeat performance within a season. A whole-house approach, treating ventilation, insulation, and thermal bridges as one connected system rather than separate jobs, is the standard retrofit specialists recommend to prevent recurrence.
A practical checklist looks like this:
- Reopen or install trickle vents and check extractor fans are wired and working, not just present.
- Consider mechanical ventilation with heat recovery (MVHR) or localised heat-recovery units where airtightness has increased significantly.
- Install or repair a continuous vapour control layer, sealing joints and penetrations rather than leaving them taped as an afterthought.
- Insulate reveals, lintels, and loft hatches properly to remove the cold spots where thermal bridging drives repeat mould.
- Dry any affected structure fully and retest moisture levels before re-insulating or redecorating.
Pro Tip: Don’t sign off remedial work on moisture readings alone. A follow-up inspection several weeks later, after a full heating cycle, confirms whether the fix actually held rather than just masking the symptom temporarily.
If leaks are a suspected contributor rather than condensation alone, a penetrating damp investigation rules out water ingress from outside before you commit to ventilation upgrades that won’t solve the real problem. Persistent condensation on walls after insulation almost always traces back to one of the gaps in this checklist.
Why a survey-led approach prevents mould coming back
Guesswork is the most expensive part of any mould job, because it leads to work that doesn’t address the actual moisture pathway. A proper survey combines several diagnostic steps rather than relying on a single visual check:
- Visual inspection of affected areas and surrounding structure.
- 24 to 48 hour moisture logging to distinguish surface condensation from interstitial damp.
- Spot moisture meter readings at suspected cold bridges.
- Thermal imaging to map temperature variation across walls, ceilings, and reveals.
- A ventilation review covering trickle vents, extractor performance, and airflow patterns.
This is how professionals actually test for damp in practice: measurement first, treatment second. A documented scope of work, tied to what the survey actually found, gives homeowners something to hold a contractor to, and a written guarantee on workmanship gives recourse if symptoms return. Recurring cases of mould after insulation almost always share the same root: someone treated the surface stain without ever measuring the moisture behind it.
Lessons from decades of damp, mould, and timber work
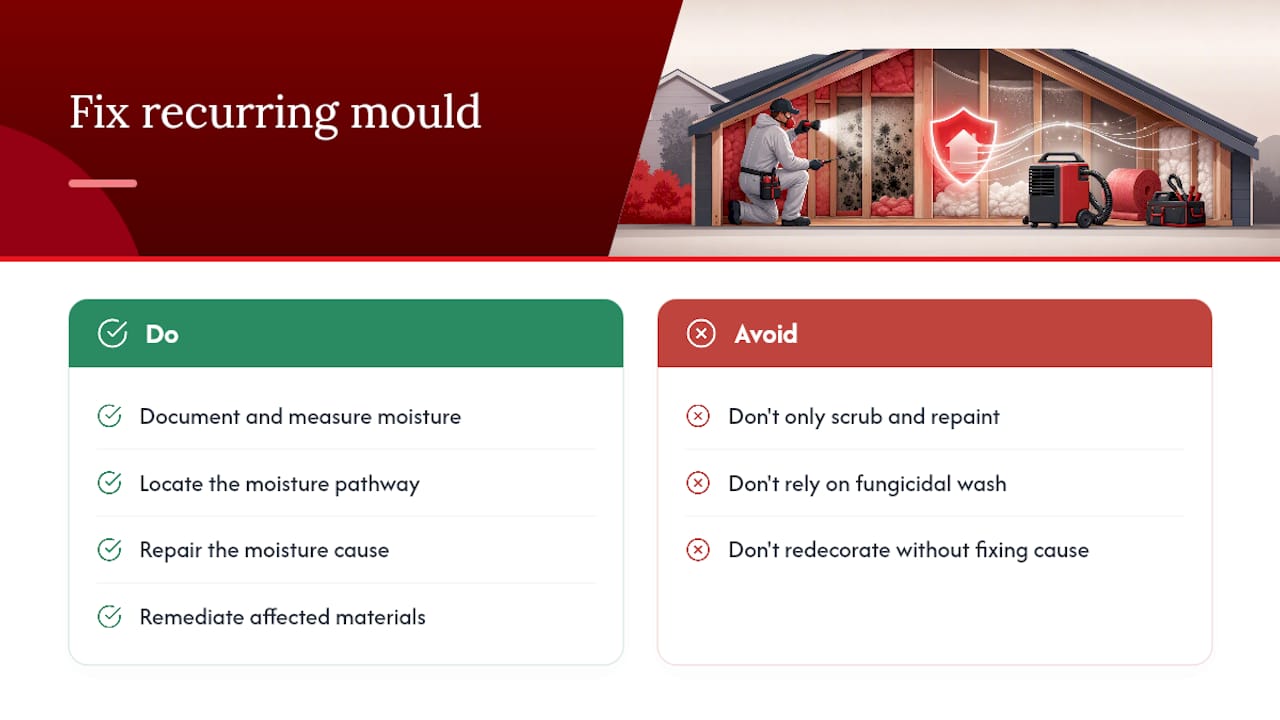
The pattern repeats more than anything else in this trade: an owner scrubs the mould, repaints, and it’s back within months, because nobody measured what was actually happening behind the plaster. Mould is a symptom, not the diagnosis.
The fix that lasts starts with documentation and measurement, not a tin of fungicidal wash. Find the moisture pathway, repair that, then remediate the material affected. Anything else is redecorating over a problem that hasn’t gone anywhere, and black mould that keeps returning is usually the proof of it.
— Quay
Book a damp and timber survey with Quay Point Plastering
If insulation work has left you with damp patches, a musty smell, or visible mould, Quay Point Plastering gives you a documented answer before any treatment starts, not a guess dressed up as a quote. Every job begins with a proper inspection: moisture readings, visual assessment, and a written scope of work, so you know exactly what caused the problem and what fixing it actually involves.

Across Dorset, Hampshire, and Wiltshire, homeowners and landlords use this survey-led method for exactly the situations covered in this article: black mould after retrofit work, condensation that won’t clear, and penetrating damp mistaken for a ventilation issue. The difference is that you get a report you can act on, backed by a written guarantee on any remedial work carried out, rather than a treatment applied on a hunch. If mould has appeared since your insulation was fitted, book a damp and timber survey and get a diagnosis before you spend another penny guessing at the cause.
This article is general information, not a substitute for advice from a qualified doctor. Consult a qualified healthcare professional about your own circumstances before acting on anything here.
Sources
- MoldActionPlan — Mold in insulation: when to remove and replace
- Mould susceptibility of bio‑based insulation materials — Aalto University (2026)
- The Conversation — When insulation goes wrong (2025)
- Gov
FAQ
Can you get mould out of insulation?
It depends on the material and how long it stayed wet. Closed-cell foam that’s only surface-soiled can often be cleaned, but porous materials like mineral wool or cellulose that have been wet beyond 24 to 48 hours usually need replacing rather than cleaning.
What are the signs of a poorly insulated house?
Cold spots on walls or ceilings, condensation on windows that won’t clear, draughts around fittings, and higher than expected heating costs all point to gaps in insulation or ventilation working against each other.
How long does it take for mould to grow on insulation?
Mould can begin colonising damp organic or bio-based insulation within days under the right temperature and humidity conditions, though visible growth on the surface often takes longer to appear.
Can insulation get mouldy?
Yes, particularly organic and some bio-based materials, if moisture reaches it through a missing vapour control layer, a leak, or condensation trapped by poor ventilation. Mineral wool and EPS tend to be less prone to growth in comparative testing, though neither is immune once genuinely saturated.