
Condensation on walls: causes, fixes, and when to call a pro
Condensation on walls: causes, fixes, and when to call a pro
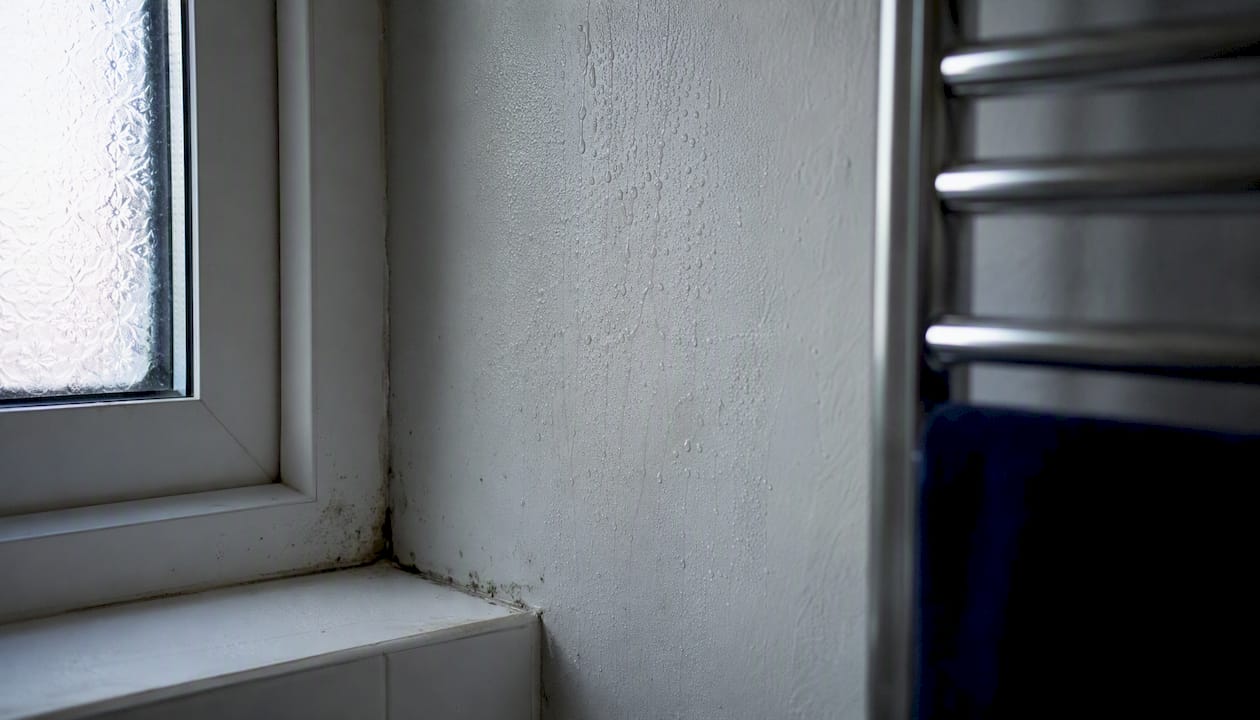
Condensation on walls forms when warm, moist indoor air meets a cold surface and the air temperature at that point drops to its dew point. The moisture in the air turns to liquid water on the wall face. In most UK homes, this is the most common cause of damp patches on internal walls, and the good news is that ventilation and a few habit changes often resolve it without any structural work.
If you have spotted wet patches, do these three things now:
- Open a window in the affected room for ten minutes to drop the humidity.
- Photograph the patch, note the time of day, and check whether it is wet to the touch or just discoloured.
- Wipe the surface dry with an absorbent cloth and check again in 24 hours.
Call a professional today if the plaster feels soft or crumbles when pressed, if the patch is still wet after 48 hours of ventilation, or if it appears or worsens after heavy rain. Those signs point away from condensation and towards a leak or penetrating damp that needs a professional damp investigation.
Pro Tip: Before touching anything, photograph the patch with your phone. A timestamped photo taken before cleaning is the single most useful piece of evidence a surveyor can receive.
Key takeaways
Condensation on internal walls is caused by warm, moist air meeting cold surfaces; fixing it requires reducing indoor humidity, raising surface temperatures, and calling a professional when the problem persists beyond basic ventilation measures.
| Point | Details |
|---|---|
| Diagnose before treating | Check whether the patch dries with ventilation; if not, it may be a leak or penetrating damp, not condensation. |
| Ventilate at source | Extract fans in kitchens and bathrooms, used consistently, resolve the majority of condensation problems without structural work. |
| Keep humidity below 60% | A digital hygrometer (under £15) lets you monitor relative humidity and act before mould takes hold. |
| Survey before insulating | Internal wall insulation fitted to a damp or air-leaky wall can trap moisture and cause structural damage. |
| Quaypointplastering | Provides survey-led diagnosis, written reports, and guaranteed remedial work across Dorset, Hampshire, and Wiltshire. |
Table of Contents
- What causes condensation on internal walls?
- How can you tell if it is condensation or a leak?
- How to remove surface condensation and treat mould safely
- Practical prevention: ventilation, humidity control and daily habits
- Long-term thermal fixes: insulation, thermal bridging and glazing
- When should you book a damp or condensation survey?
- Typical costs and how long fixes usually take
- Condensation on windows and ceilings: what to do
- Your condensation checklist: what to do right now
- Dew point, air leakage and the two-thirds rule explained
- Quay Point Plastering’s approach to condensation diagnosis
- Persistent condensation? Here is what a survey covers
- Sources
What causes condensation on internal walls?
Every cubic metre of indoor air carries water vapour. When that air touches a surface cold enough to bring its temperature below the dew point, the vapour condenses into liquid water on the wall face. The colder the surface, the higher the dew point threshold, and the more likely condensation is to form.
The physics is straightforward. A kitchen at 20°C with 65% relative humidity has a dew point of roughly 13°C. Any wall surface below that temperature will collect moisture. North-facing walls, corners behind furniture, and areas around window frames are the most common cold spots because they receive little solar gain and poor air circulation.
Common indoor moisture sources include:
- Cooking without lids or an extractor fan
- Showering or bathing in a poorly ventilated bathroom
- Drying clothes on radiators or airers indoors
- Unvented tumble dryers exhausting directly into the room
- Large numbers of indoor plants
- Breathing and perspiration from occupants overnight
A family of four can release a substantial amount of water vapour into the air each day through these activities alone. That figure is not unusual; it is simply what normal domestic life produces. The problem is not the moisture itself but where it ends up when ventilation cannot carry it outside.
Pro Tip: Check cold corners and the wall behind large wardrobes first thing on a winter morning. If you see a faint grey bloom or feel slight dampness, that is a thermal bridge — a point where the wall surface temperature drops below the dew point before the rest of the room warms up.
Thermal bridges are spots where heat escapes faster through the structure: the junction between an external wall and an internal floor, the reveal around a window, or a concrete lintel set into a masonry wall. These surfaces stay colder than the surrounding wall and collect condensation first.
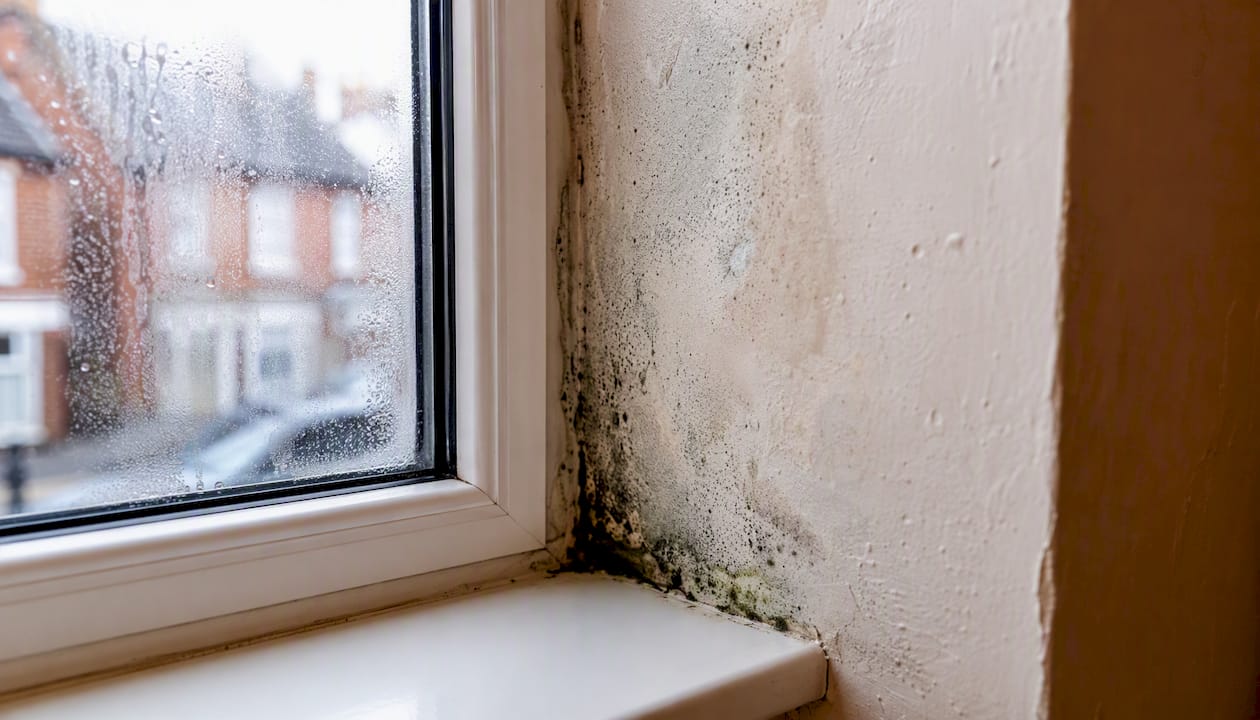
How can you tell if it is condensation or a leak?
Distinguishing condensation from a plumbing leak or penetrating damp is the most important diagnostic step before spending money on any treatment. The pattern, timing, and location of the wet patch each tell a different story.
Work through this checklist before calling anyone:
- Time of day: Does the patch appear or worsen overnight and on cold mornings? Condensation follows temperature cycles.
- Weather correlation: Does the damp appear or grow after rain? If yes, penetrating damp or a roof/gutter fault is more likely. Check our guide on why walls get damp after rain for more detail.
- Height on the wall: Rising damp rarely climbs above one metre. Condensation can appear anywhere, especially high on walls and in corners.
- Salt or tide marks: A horizontal tide mark with white salt deposits (efflorescence) suggests rising or penetrating damp, not condensation.
- Surface pattern: Condensation tends to cover a broad area evenly. A leak usually produces a defined wet run or drip trail from a fixed point.
- Plumbing proximity: Is the patch near a pipe chase, radiator, or bathroom? A slow plumbing leak can look identical to condensation until you check the pipework.
| Feature | Condensation | Penetrating damp | Rising damp |
|---|---|---|---|
| Typical height | Any height, often high or in corners | Variable, follows water path | Below 1 metre |
| Weather link | None — follows temperature swings | Worsens after rain | Worsens after prolonged wet periods |
| Seasonality | Worst in autumn and winter | Worst after rain, any season | Persistent, worse in winter |
| Surface appearance | Even film, grey or black mould | Defined wet patch or run | Tide mark, salt deposits, peeling paint |
| Dries with ventilation | Yes, within hours to days | No — returns after rain | No — persistent |
| Smell | Musty if mould present | Earthy, sometimes musty | Earthy, mineral |
If the patch does not dry within 48 hours of improved ventilation, or if it correlates clearly with rainfall, arrange a professional damp and timber survey. A surveyor using a moisture meter and thermal imaging camera can separate these causes in a single visit, saving you the cost of treating the wrong problem. You can also read more about how professionals test for damp before booking.
How to remove surface condensation and treat mould safely
Small patches of surface mould caused by condensation can be treated at home, provided the area is limited and no vulnerable occupants are present. Follow these steps in order.
- Ventilate the room first. Open windows and doors before starting. Never clean mould in a sealed room.
- Put on PPE. Wear disposable gloves, a close-fitting dust mask (FFP2 or better), and eye protection. Mould spores become airborne when disturbed.
- Dry the surface. Use an absorbent cloth or paper towels to remove standing moisture. Bag and dispose of used cloths immediately.
- Clean the mould. For small patches (less than one square metre), a solution of warm water with a small amount of washing-up liquid works for initial cleaning. Wipe rather than scrub to avoid spreading spores. White vinegar applied undiluted and left for ten minutes is an effective non-bleach option for surface mould on painted walls.
- Apply a fungicidal wash. A proprietary fungicidal solution, available from most builders’ merchants, kills residual spores. Follow the manufacturer’s dwell time before wiping.
- Allow to dry fully. Do not repaint until the wall is completely dry, which may take several days in a well-ventilated room.
- Repaint with anti-mould paint. Standard emulsion will not prevent recurrence. Use a paint containing a fungicidal additive for the first coat at minimum.
- Monitor for four weeks. If mould returns within a month despite improved ventilation, the underlying cause has not been resolved and a survey is needed.
Do not attempt DIY mould removal if: the affected area exceeds one square metre; the mould is black and spreading rapidly; anyone in the household has a respiratory condition, is immunocompromised, pregnant, or under five years old; or the mould is behind plasterboard or inside a cavity. In these cases, professional black mould removal with containment and HEPA extraction is the appropriate route.
Local authority guidance consistently recommends ventilation and heating as the first steps alongside cleaning, because cleaning alone without addressing the moisture source will result in mould returning within weeks.
Pro Tip: Photograph the mould patch before you clean it — including a ruler or coin for scale. That image, combined with the location and date, gives a surveyor far more to work with than a freshly cleaned wall.
Practical prevention: ventilation, humidity control and daily habits
The most cost-effective fix for condensation is almost always a change in how the home is ventilated, not a structural repair. UK government guidance is clear on this: extract fans used consistently at source resolve the majority of condensation problems in existing homes without any building work.
Daily habits that make a measurable difference:
- Use pan lids when cooking and run the extractor fan throughout cooking, not just when steam is visible.
- Run the bathroom extractor fan during and for at least 20 minutes after showering.
- Dry clothes outside or in a vented tumble dryer. If drying indoors is unavoidable, open a window in the same room.
- Move large furniture at least 50mm away from external walls to allow air to circulate behind it.
- Keep trickle vents on windows open, even in winter. The heat loss from a trickle vent is negligible compared with the moisture it removes.
- Maintain a background heating temperature of at least 15°C in unoccupied rooms during cold weather. A cold, unheated room is far more prone to condensation than one kept at a modest background temperature.
Devices worth considering:
- Extractor fans: Fit humidity-sensing fans in bathrooms and kitchens if the existing fans are manual or absent. A humidity-sensing fan activates automatically when moisture rises and switches off once the air clears.
- Dehumidifiers: Portable refrigerant dehumidifiers are useful in rooms where ventilation cannot be improved structurally, such as a basement or a room without an openable window. Run one in the bedroom overnight if condensation is worst there.
- Mechanical ventilation with heat recovery (MVHR): Whole-house MVHR systems extract stale, moist air and supply fresh air, recovering up to 90% of the heat in the process. These are most cost-effective in new builds or whole-house retrofits, but single-room heat-recovery units are available for individual problem rooms.
For bathrooms specifically, the choice of internal door can affect how moisture moves through the house. A well-fitted door with a suitable bathroom door design that includes an undercut or ventilation gap prevents humid air from being trapped while still providing privacy.
Long-term thermal fixes: insulation, thermal bridging and glazing
Ventilation and habits address the moisture in the air. Insulation addresses the cold surfaces that cause condensation to form. Both are needed for a lasting solution.
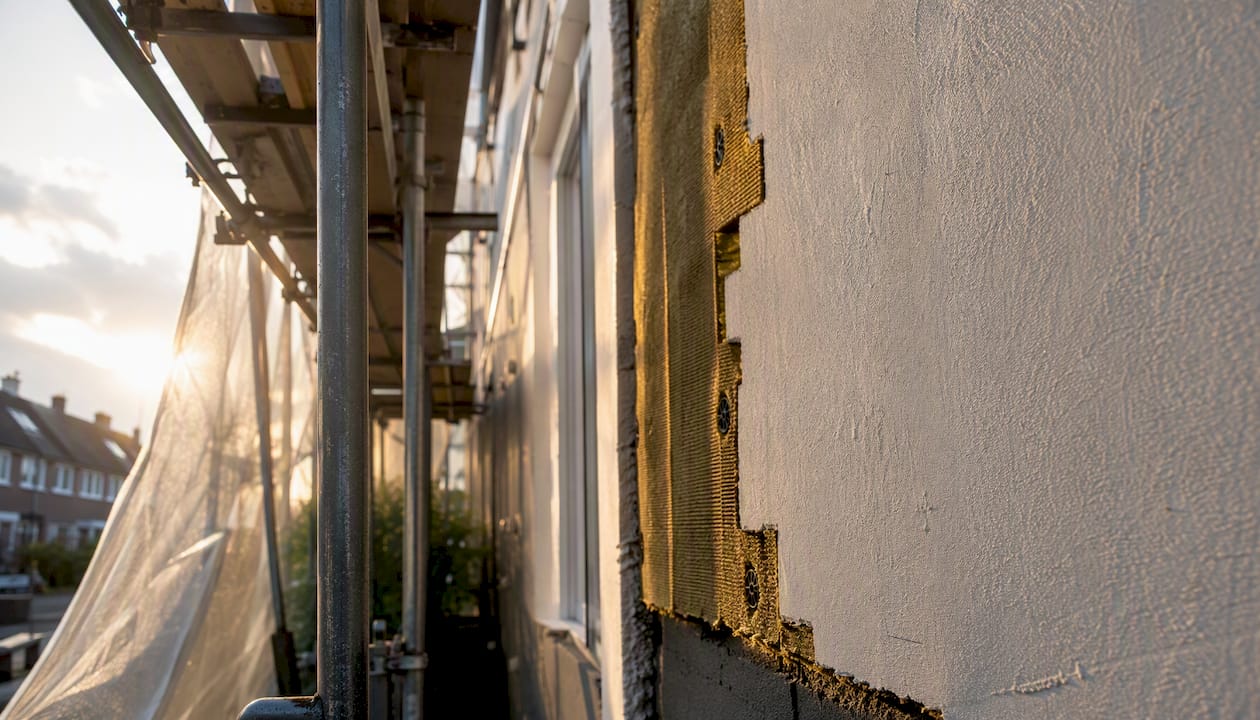
The core principle is simple: raise the temperature of the wall surface above the indoor dew point and condensation cannot form. External wall insulation does this most reliably because it wraps the structure from outside, keeping the masonry warm. Building science research confirms that adding exterior continuous insulation warms the critical sheathing or masonry surface and substantially reduces the risk of cold-weather condensation, provided an effective air barrier is also in place.
External wall insulation (EWI): Boards of mineral wool or expanded polystyrene fixed to the outside face of the wall, finished with a render coat. EWI raises internal wall surface temperatures, eliminates most thermal bridges at floor and roof junctions, and does not reduce internal floor area. It is the most effective single measure for solid-wall properties.
Cavity wall insulation: For properties built after roughly 1920 with a cavity, filling the cavity with mineral wool or injected foam raises wall surface temperatures at relatively low cost. The cavity must be in good condition and free from penetrating damp before filling; a survey is required first.
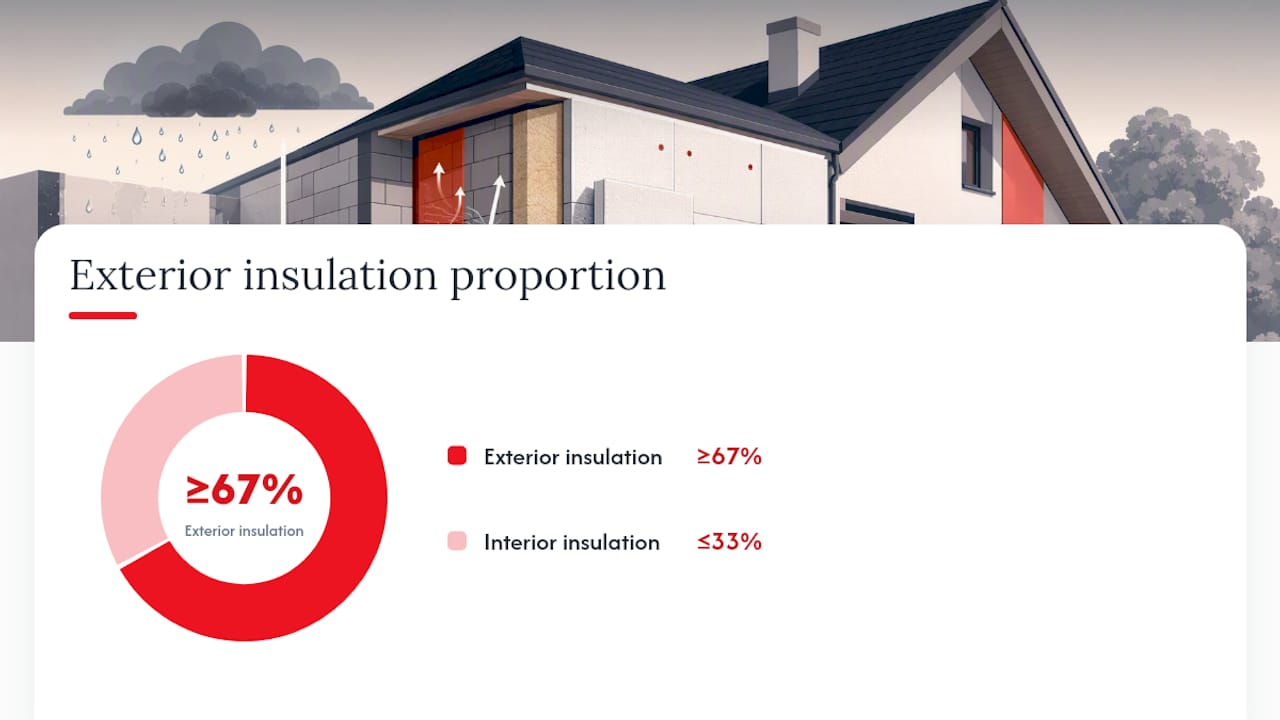
Internal wall insulation: Insulated plasterboard or a studwork frame with mineral wool can be fitted to the inside face of an external wall. This raises the surface temperature of the new internal face, but it also makes the original wall colder. The two-thirds rule explains why: to prevent interstitial condensation inside the wall assembly, at least two-thirds of the total insulation value should sit on the exterior side of any vapour control layer. Internal insulation alone places all the insulation on the wrong side of the wall, which can drive the dew point into the wall structure itself.
Pro Tip: Never fit internal wall insulation to a wall that is already damp or has air leaks around sockets and service runs. Sealing a wet wall behind insulation traps moisture and can cause timber decay within the structure. A survey of internal wall insulation options and a moisture check should always come first.
Improved glazing and thermal breaks: Single-glazed windows and metal window frames are among the coldest surfaces in any room. Upgrading to double or triple glazing, or fitting secondary glazing internally, raises the glass surface temperature significantly. Draught-proofing doors and windows also reduces cold air infiltration at floor level, which chills wall bases and contributes to condensation in corners. Winterising external doors, including threshold seals and draught excluders, is a low-cost step that reduces both heat loss and cold-surface condensation risk.
When should you book a damp or condensation survey?
Some problems respond to ventilation and cleaning. Others need professional diagnosis before any money is spent on treatment. Book a survey when any of the following apply:
- Mould returns within four weeks of thorough cleaning and improved ventilation.
- The plaster feels soft, hollow, or crumbles when pressed.
- Damp patches appear or worsen after rain, regardless of ventilation.
- There are tide marks, salt deposits, or staining at low level on walls.
- You can smell damp in a room even when no visible moisture is present.
- Electrical fittings, skirting boards, or floor joists near the affected wall show signs of moisture.
- You are about to fit internal insulation and are unsure whether the wall is dry.
- A tenant has reported mould and you need a documented inspection for compliance purposes.
A professional surveyor will carry out moisture readings with a calibrated meter, use thermal imaging to identify cold spots and air leakage paths, and produce a written report with a defined scope of work. Ask specifically for itemised findings rather than a single-line recommendation, and ask whether the company issues written guarantees on remedial work. A guarantee is only worth having if it is backed by a named company with a verifiable trading history.
Air leakage around sockets, service runs, and pipe penetrations is often the primary route for moisture into wall cavities, and it is invisible without thermal imaging. A surveyor who does not use a thermal camera is working with incomplete information.
Typical costs and how long fixes usually take
Costs vary considerably depending on property size, wall construction, and the extent of any damage. Always request itemised, staged quotes so you can compare like for like and understand exactly what each line covers.
| Remediation step | Typical timeframe |
|---|---|
| Cleaning and anti-mould repainting (small area) | 1–2 days |
| Humidity-sensing extractor fan (supply and fit) | Half a day |
| Portable dehumidifier (purchase) | Immediate |
| Professional damp and mould survey | Half a day on site; report within a week |
| Cavity wall insulation (average semi-detached) | 1 day |
| Internal wall insulation (per room) | 2–5 days |
| External wall insulation (average semi-detached) | 2–4 weeks |
| Full condensation treatment and replastering | 3–7 days |
These figures are indicative ranges based on typical UK trade pricing and should be treated as a starting point for budgeting, not a fixed quote. Costs in London and the South East tend to sit at the upper end of each range.
Pro Tip: Ask for a staged quote: survey findings first, then a separate itemised quote for remedial works. This protects you from paying for treatments that may not be necessary until the diagnosis is confirmed in writing.
Condensation on windows and ceilings: what to do
Windows and ceiling-to-wall junctions are the two most common condensation trouble spots, and each has a slightly different cause.
Windows and bay windows collect condensation because glass surface temperatures drop far below room temperature on cold nights, particularly with single glazing or poorly sealed double-glazed units. Bay windows are worse because their three exposed faces lose heat rapidly and the internal corners trap still air.
What to try first:
- Open trickle vents or the window itself for 10–15 minutes each morning to clear overnight moisture.
- Fit secondary glazing on the inside face of single-glazed windows; this raises the inner glass temperature significantly.
- Check whether double-glazed sealed units have failed (a persistent mist between the panes that does not clear indicates a broken seal, not condensation).
- In bay windows, move any furniture or curtains that block air circulation across the glass face.
Ceiling and wall junctions are thermal bridges where the external wall meets the ceiling or roof structure. Cold air from the loft or roof space chills the junction from above, and warm moist room air condenses there.
What to try first:
- Check loft insulation depth at the eaves. Insulation that stops short of the eaves leaves the ceiling edge cold.
- Improve loft ventilation to reduce the temperature differential between loft and room.
- In flat-roofed extensions, check that the roof insulation is continuous and that there are no gaps at the wall-to-roof junction.
- Move furniture away from external corners to allow air to circulate and warm the surface.
A short checklist for both locations:
- Open windows briefly each morning.
- Keep trickle vents open year-round.
- Check loft insulation reaches the eaves.
- Move furniture away from external walls and corners.
- Upgrade single glazing or fit secondary glazing where budget allows.
Your condensation checklist: what to do right now
Work through these actions in order of priority.
- Now (10 minutes): Open windows in affected rooms to ventilate and drop humidity. Wipe down wet surfaces with an absorbent cloth.
- Now (10 minutes): Photograph every damp or mouldy patch with a ruler for scale. Note the time, date, and weather conditions.
- Today: Check whether extractor fans in the kitchen and bathroom are working and vented to outside. Run them during and after cooking and showering.
- This week: Move large furniture away from external walls by at least 50mm. Stop drying clothes on radiators or airers indoors if possible.
- This week: Buy a digital hygrometer (under £15 from most hardware retailers) and place it in the worst-affected room. Aim to keep relative humidity between 40% and 60%.
- Within two weeks: If fans are absent or ineffective, arrange for humidity-sensing extractor fans to be fitted in the kitchen and bathroom.
- Within a month: If mould has returned after cleaning, or if the patch did not dry with ventilation, book a professional survey. Bring your photographs and humidity readings.
- Medium term (months): Consider cavity fill or external wall insulation if the property has solid or unfilled cavity walls and condensation is recurring despite good ventilation.
- Before any insulation work: Commission a moisture survey to confirm walls are dry before fitting internal insulation.
- Ongoing: Keep a simple log of humidity readings and any recurrence. This record is useful evidence for a surveyor and for any insurance or landlord compliance purposes.
Dew point, air leakage and the two-thirds rule explained
Understanding why the practical recommendations above work helps you make better decisions about which fixes to prioritise.
Dew point is the temperature at which air becomes saturated and water vapour condenses into liquid. It depends on both the air temperature and the relative humidity. At typical UK winter indoor conditions (around 20°C and 55–65% relative humidity), the dew point sits between 10°C and 13°C. Any wall surface below that temperature will collect condensation. Raising the surface temperature above the dew point, by insulating the wall or improving heating, stops condensation forming at that surface.
Air leakage versus diffusion: Most people assume moisture moves through walls by diffusing slowly through the material. In practice, air leakage through small gaps around sockets, pipe penetrations, and service runs carries far more moisture into cavities than diffusion through solid materials. Sealing these penetrations with appropriate fire-rated or acoustic sealant is a high-value, low-cost retrofit step that is often overlooked.
The two-thirds rule is a practical guide for wall assembly design. To keep the inner face of the external sheathing or masonry above the dew point in cold weather, at least two-thirds of the wall assembly’s total insulation value should sit on the exterior side of any vapour control layer. Internal insulation alone violates this rule, which is why a survey and careful detailing are required before fitting it.
| Parameter | Recommended range | Why it matters |
|---|---|---|
| Indoor relative humidity | 40%–60% | Below 60% significantly reduce condensation risk on typical UK wall surfaces |
| Wall surface temperature | Above dew point (typically above 15°C in winter) | Surface below dew point will collect moisture regardless of ventilation |
| Exterior insulation proportion | At least two-thirds of total R-value | Keeps sheathing warm and above dew point in cold weather |
| Ventilation rate (wet rooms) | Minimum 15 litres/second extract | Removes moisture at source before it reaches cold surfaces |
A hygrometer costs less than £15 and gives you a real number to work with rather than a guess.
Quay Point Plastering’s approach to condensation diagnosis
At Quaypointplastering, the starting point is always observation, not assumption. When a homeowner describes damp patches on internal walls, the first question is whether the pattern, timing, and location are consistent with condensation, a plumbing leak, or penetrating damp. Getting that diagnosis right before any treatment is specified is what separates a lasting fix from a repeat call-out.
The survey-led approach means arriving with calibrated moisture meters, a thermal imaging camera, and a structured inspection protocol rather than a standard treatment recommendation. Findings are documented in writing, with photographs, moisture readings, and a clear scope of work. Every remedial contract includes a written guarantee on workmanship, so homeowners and landlords have a record they can rely on.
Across more than 35 years of work in Dorset, Hampshire, and Wiltshire, the team at Quaypointplastering has seen condensation misdiagnosed as rising damp and penetrating damp misdiagnosed as condensation, in roughly equal measure. Both errors are costly. A property where black mould keeps returning after cleaning almost always has an unresolved moisture source that a visual inspection alone will not identify. Thermal imaging and a moisture meter change that picture quickly.
Providers worth choosing are those who issue itemised written reports, separate the survey cost from the remedial cost, and back their work with a named guarantee. Ask to see the guarantee document before signing any contract.
Persistent condensation? Here is what a survey covers
If ventilation and cleaning have not resolved the problem, a professional survey is the most cost-effective next step. Quaypointplastering’s damp and mould treatments begin with a thorough on-site inspection: visual assessment of all affected surfaces, calibrated moisture readings at multiple points, thermal imaging to identify cold spots and air leakage paths, and a written report setting out findings and recommended options.

Remediation work, where needed, is carried out under a written guarantee. Whether the outcome is improved ventilation, anti-mould treatment and replastering, or a referral for insulation or structural work, the scope is defined before any work begins. No guesswork, no open-ended costs.
To book a survey across Dorset, Hampshire, or Wiltshire, visit the damp and timber survey page or call the team directly. If you are a landlord dealing with a tenant’s mould report, the landlord damp and mould inspection service provides the documented findings you need for compliance.
Sources
The sources below were used to verify the building-science principles, diagnostic guidance, and practical recommendations in this article. They range from official UK government guidance to peer-reviewed building science research and local authority fact sheets.
- Gov
- Condensation control for walls in cold weather — BASC/PNNL resource guide
- Why your walls get wet: building science and dew point guide - Ecohome
- It’s Wet. Is It a Leak, or Is It Condensation? — Copeland Building Envelope Consulting