
Mould on north walls: causes, fixes and when to call a survey
Mould on north walls: causes, fixes and when to call a survey
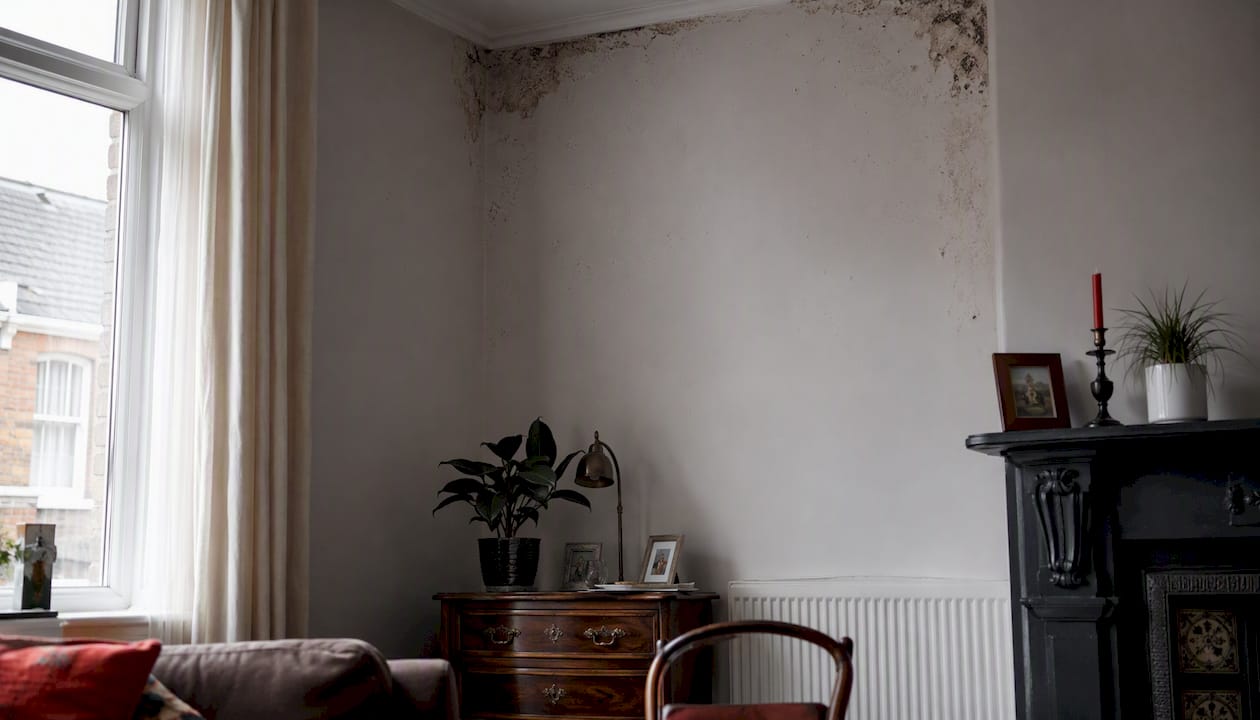
Most mould on north-facing walls is condensation-driven surface mould. Cold internal surfaces meet warm, moisture-laden air, and the result is the dark speckling you see in corners, behind furniture, or along window reveals. The good news: if you catch it early, ventilate properly and clean it correctly, you can resolve it yourself. The caution: if it returns within a few weeks, sits low on the wall, or comes with soft plaster and a musty smell, you need a survey, not a scrubbing brush.
Before you do anything else:
- Put on a mask rated FFP2 or higher, plus gloves. The NHS advises prompt remediation for persistent indoor mould, particularly if anyone in the household has asthma or a weakened immune system.
- Open windows and doors to ventilate the room immediately.
- Pull furniture and wardrobes at least 50mm away from the affected wall.
Quick decision checklist:
- Speckled patches in corners or behind furniture, no soft plaster, no tide marks → clean it, improve ventilation, monitor for four weeks.
- Regrowth within weeks, lower-wall bands, bubbling paint, soft or crumbling plaster, or spread across more than one room → book a damp and timber survey.
Key takeaways
Mould on north-facing walls is most often condensation-driven surface mould, fixable with ventilation and cleaning, but persistent or lower-wall patches need a survey-led diagnosis to identify and fix the structural cause.
| Point | Details |
|---|---|
| Condensation is the most common cause | Cold north-facing surfaces and warm indoor air combine to produce surface mould; improve ventilation and heating first. |
| Pattern tells you the cause | Speckled upper corners suggest condensation; lower-wall tide marks or salt deposits point to rising or penetrating damp. |
| DIY cleaning has clear limits | Surface mould under roughly 1m² on solid plaster can be cleaned safely with PPE; soft substrate or regrowth needs a professional. |
| Monitor for four weeks after cleaning | If mould returns within two to three weeks, the root cause has not been fixed and a survey is the correct next step. |
| Quaypointplastering offers survey-led diagnosis | Written findings, a defined scope, and guaranteed remedial works across Dorset, Hampshire, and Wiltshire. |
Table of Contents
- Why north-facing walls get mould more than other walls
- How to tell condensation mould from penetrating damp, rising damp, or outside algae
- Immediate safety steps to take before cleaning or calling for help
- A safe, step-by-step DIY cleaning method for condensation mould
- Long-term prevention: ventilation, heating, insulation and external maintenance
- Signs that you should book a damp and mould survey
- What a professional damp and mould survey involves
- A professional perspective on common homeowner mistakes
- Quay Point Plastering: survey-led mould diagnosis for north-facing walls
- Sources
Why north-facing walls get mould more than other walls
North-facing walls receive little or no direct sunlight throughout the year. That means the wall surface stays cooler than south or west-facing walls, dries more slowly after rain, and is far more susceptible to condensation forming on the internal face. The physics is straightforward: warm indoor air carries water vapour; when that air contacts a cold surface, it cools below its dew point and deposits moisture as tiny droplets. Mould spores, which are present in virtually every home, germinate in those droplets within 24–48 hours if conditions persist.
The condensation cycle on a north wall: Warm, humid indoor air → contacts cold wall surface → cools below dew point → water droplets form on the surface → mould spores germinate and colonise the damp patch. Break any link in that chain and you stop the cycle.
The orientation effect is compounded by several other factors that are worth checking on your own property:
- Poor insulation or cold bridging. Solid brick or block walls with no cavity insulation conduct cold from outside to inside. Structural elements like lintels, window frames, and floor joists that bypass the insulation layer create cold spots where condensation concentrates.
- Inadequate ventilation. Rooms with no extractor fan, sealed trickle vents, or furniture pushed flush to external walls trap humid air against the coldest surface in the room.
- Internal moisture sources. Cooking without lids, drying clothes indoors, and even breathing add significant moisture to indoor air. Indoor drying of clothes adds significant moisture to the indoor air.
- External factors. Blocked gutters allow water to saturate the wall face repeatedly. Dense vegetation growing against the wall keeps the surface permanently shaded and damp. Cracked pointing or failed render lets rainwater penetrate the masonry, which then shows as internal moisture.
North-facing walls stay cooler and dry more slowly than walls with solar gain, making the micro-climate on their internal face consistently more favourable to mould growth. That is why the same level of indoor humidity that causes no problem on a south wall can produce visible mould on a north wall within a single winter.
How to tell condensation mould from penetrating damp, rising damp, or outside algae
Pattern recognition is your first diagnostic tool. Where the mould appears and what it looks like tells you a great deal about the likely cause before you touch a moisture meter.
| Location and pattern | Most likely cause | Typical next step |
|---|---|---|
| Speckled patches in upper corners, behind furniture, around window reveals | Condensation | Improve ventilation, clean surface mould, monitor |
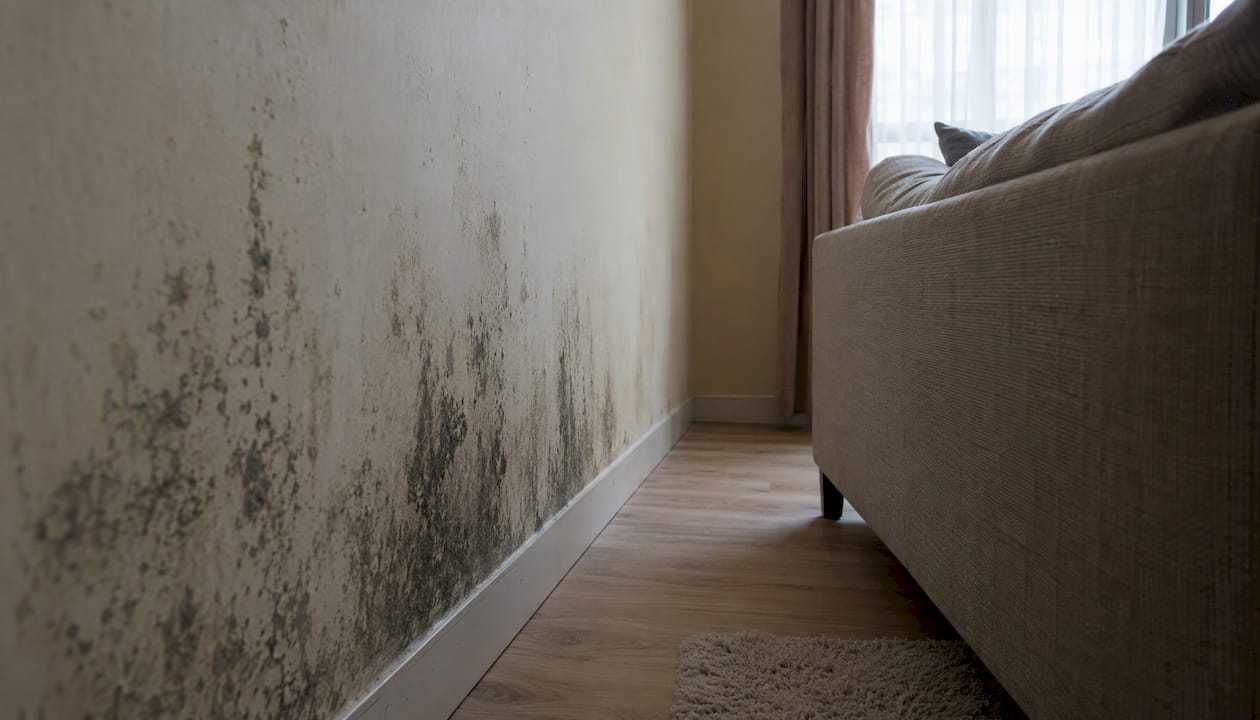
| Band of discolouration along the lower third of the wall, salt deposits, tide marks | Rising or penetrating damp | Book a damp survey |
| Large persistent patch with visible water marks, often after heavy rain | Penetrating damp | Check gutters, pointing, render; book a survey |
| Slimy bright green or black growth on the outside face of the wall | External algae | External cleaning and ongoing maintenance |
The pattern of speckled upper-corner patches or growth behind furniture strongly suggests condensation, while a band along the lower third or tide marks points toward moisture rising or penetrating from below or outside.
For the external face, bear in mind that discolouration on outside walls is often algae rather than the same mould found indoors. External algae growth typically needs cleaning and ongoing external maintenance, not interior condensation fixes. If you can see it from the street but the internal wall feels dry and solid, treat it as an external maintenance issue first.
The press test. Press firmly on the plaster with your thumb. Solid and unyielding means the substrate is intact. Any give, sponginess, or a hollow sound when you tap it suggests the plaster has been compromised by moisture, and that warrants a professional inspection rather than DIY cleaning.
Red flags that mean call a surveyor now:
- Mould returns within two to three weeks of cleaning.
- Discolouration or damp patches sit in the lower third of the wall.
- Paint is bubbling or peeling away from the wall.
- Plaster feels soft, sounds hollow, or is visibly crumbling.
- A persistent musty smell even when the room is ventilated.
- Growth has spread across more than one room.
Mould that returns quickly after surface cleaning usually indicates the root cause has not been addressed. Condensation mould tends to be localised and speckled; structural damp produces larger, persistent patches, often with visible water marks. Knowing which you are dealing with determines whether ventilation alone will solve the problem or whether a structural repair is needed. You can read more about distinguishing condensation from rising damp on the Quaypointplastering advice pages.
Immediate safety steps to take before cleaning or calling for help
Act on these steps within 24–48 hours of spotting the problem. They reduce the risk of spore spread and lower humidity while you decide on your next move.
Personal protection first. Wear a mask rated at least FFP2 (the equivalent of N95), disposable gloves, and goggles if you are cleaning or disturbing the growth. Avoid dry brushing the mould, which launches spores into the air and spreads contamination to other surfaces.
NHS guidance is clear: prolonged exposure to indoor damp and mould can aggravate respiratory conditions including asthma and bronchitis. Anyone with a pre-existing respiratory condition, young children, or elderly residents should leave the room during cleaning and stay out until it is dry and ventilated.
Short-term humidity control:
- Open windows in the affected room and in adjacent rooms to create cross-ventilation.
- Run extractor fans continuously in kitchens and bathrooms, even when those rooms are not in active use.
- If you have a dehumidifier, place it in the affected room and empty it daily.
- Leave internal doors open to prevent humid air from pooling in one space.
Furniture and airflow:
- Pull wardrobes, sofas, and beds at least 50mm away from external walls. This allows air to circulate behind them and prevents the cold-wall micro-climate that feeds mould growth. For more detail on why this matters, see why mould grows behind furniture.
- Prop trickle vents open if they have been sealed or blocked.
- Wipe any visible condensation from window glass and wall surfaces with a dry cloth each morning.
What not to do:
- Do not repaint over active mould. Paint traps moisture and the mould will return through the new coat within weeks.
- Do not use undiluted bleach on porous plaster without understanding the substrate. Bleach can damage plaster and does not kill mould roots in porous materials.
- Do not seal or caulk gaps in the wall before the moisture source is identified and fixed.
A safe, step-by-step DIY cleaning method for condensation mould
Surface mould on painted drywall or plaster in a small area can often be handled safely by a competent DIYer with correct PPE… Larger areas, soft substrate, or recurring growth require professional remediation. If your patch is smaller than that and the plaster is solid, follow these steps.
What you need:
- FFP2 or higher-rated mask, disposable gloves, and goggles
- White wine vinegar or a proprietary non-chlorine fungicidal mould cleaner (widely available from DIY retailers)
- Soft-bristled brush or sponge
- Clean cloths or paper towels
- Fungicidal primer (if you plan to repaint afterwards)
Step-by-step procedure:
- Ventilate the room. Open windows and run any extractor fan before you start. Keep ventilation running throughout.
- Protect the area. Lay old towels or plastic sheeting on the floor below the affected wall to catch any drips.
- Apply your cleaning solution. Spray or apply white wine vinegar or your chosen fungicidal cleaner directly onto the mould patch. Allow it to dwell for 10–15 minutes to penetrate the surface growth.
- Clean gently. Using a soft brush or sponge, work from the outer edge of the patch inward to avoid spreading spores. Do not scrub aggressively on plaster, as this can damage the surface.
- Wipe and dispose. Remove the loosened mould with clean cloths or paper towels. Seal used cloths in a plastic bag immediately and dispose of them in an outdoor bin.
- Dry the surface thoroughly. Use a clean dry cloth, then allow the wall to air-dry completely before any further treatment. A fan or dehumidifier speeds this up.
- Apply fungicidal primer if repainting. Once the wall is fully dry, apply a fungicidal primer before any decorative coat. Standard emulsion over untreated plaster will not prevent recurrence.
When to stop and call a professional:
- The affected area is larger than a small patch size suitable for DIY cleaning.
- The plaster is soft, spongy, or sounds hollow when tapped.
- Mould returns within two to three weeks of cleaning.
- You can see visible water marks or staining inside the wall cavity.
- The wall is porous stone, textured render, or any substrate that feels compromised.
Wall material determines the removal method. Porous or soft substrates often need replacement rather than surface cleaning, while non-porous surfaces like concrete or ceramic tile respond well to thorough cleaning and sealing. If you are unsure about your substrate, a brief professional assessment is a better use of time than repeated DIY attempts.
Long-term prevention: ventilation, heating, insulation and external maintenance
Cleaning removes the visible mould. Prevention stops it returning. Reducing indoor humidity from everyday activities and improving ventilation are the first-line measures recommended by local council guidance. The measures below are listed roughly in order of impact and ease.
Ventilation (highest impact, lowest cost):
- Run kitchen and bathroom extractor fans during and for at least 15 minutes after cooking or bathing.
- Open trickle vents on windows and leave them open year-round, including in winter.
- Open windows for at least 10 minutes each morning to flush overnight moisture from the air.
- If the property is very airtight (common in newer builds or after draught-proofing), consider intermittent mechanical ventilation (MVHR or PIV units). These are a professional installation but significantly reduce condensation risk. A practical guide to home air quality improvements covers the options in detail.
Heating and insulation:
- Maintain a steady background temperature of at least 18°C throughout the property, including unused rooms. Cold rooms become condensation traps.
- Address cold bridges at lintels, window reveals, and floor junctions. These are the spots where condensation concentrates first.
- Internal wall insulation on a north-facing solid wall raises the internal surface temperature and dramatically reduces condensation risk. This is a professional job; a survey should precede any insulation work to rule out existing moisture in the wall.
External maintenance (often overlooked):
- Clear gutters and downpipes at least twice a year, particularly in autumn. Blocked gutters are a leading cause of saturated north walls.
- Trim back vegetation growing against the wall. Ivy and dense shrubs keep the wall face permanently damp and shaded.
- Repair cracked pointing, failed render, or damaged flashing promptly. Any gap in the external envelope allows rainwater to penetrate, which then shows as internal moisture. See why walls get damp after rain for a detailed breakdown of external causes.
Behavioural fixes:
- Dry clothes outside or in a tumble dryer vented to the outside rather than on indoor airers.
- Use pan lids when cooking and run the extractor fan.
- Use a hygrometer (available for under £15 from most hardware retailers) to monitor indoor relative humidity. Keep it below 60%; the ideal range is 30–50%. If readings consistently exceed 60%, a dehumidifier or ventilation upgrade is warranted.
Pro vs DIY at a glance:
- Extractor fan replacement: DIY or local electrician, typically £80–£200 fitted.
- Portable dehumidifier: DIY purchase, £100–£300 depending on capacity.
- Gutter clearance: DIY or local tradesperson, typically £50–£150.
- Internal wall insulation: professional installation required; cost varies by wall area and system.
- Mechanical ventilation (PIV/MVHR): professional installation, typically £400–£1,500 depending on system type.
Signs that you should book a damp and mould survey
Some problems are beyond what ventilation and cleaning can fix. Recognising the signs early saves money and prevents structural damage from worsening.
Call a specialist when you see any of the following:
- Mould returns within two to three weeks of a thorough clean.
- Damp tide marks or salt staining (white crystalline deposits) on the wall surface.
- Soft, crumbling, or hollow-sounding plaster.
- Mould or damp patches appearing in more than one room.
- A persistent musty smell that does not clear with ventilation.
- Any growth larger than roughly 10 square feet.
A note on health: the NHS advises that anyone with asthma, a respiratory condition, or a weakened immune system should not wait to see whether mould resolves on its own. Prompt remediation is the recommended course of action. If health symptoms have appeared alongside the mould, treat that as an immediate reason to act.
What a surveyor will check on site:
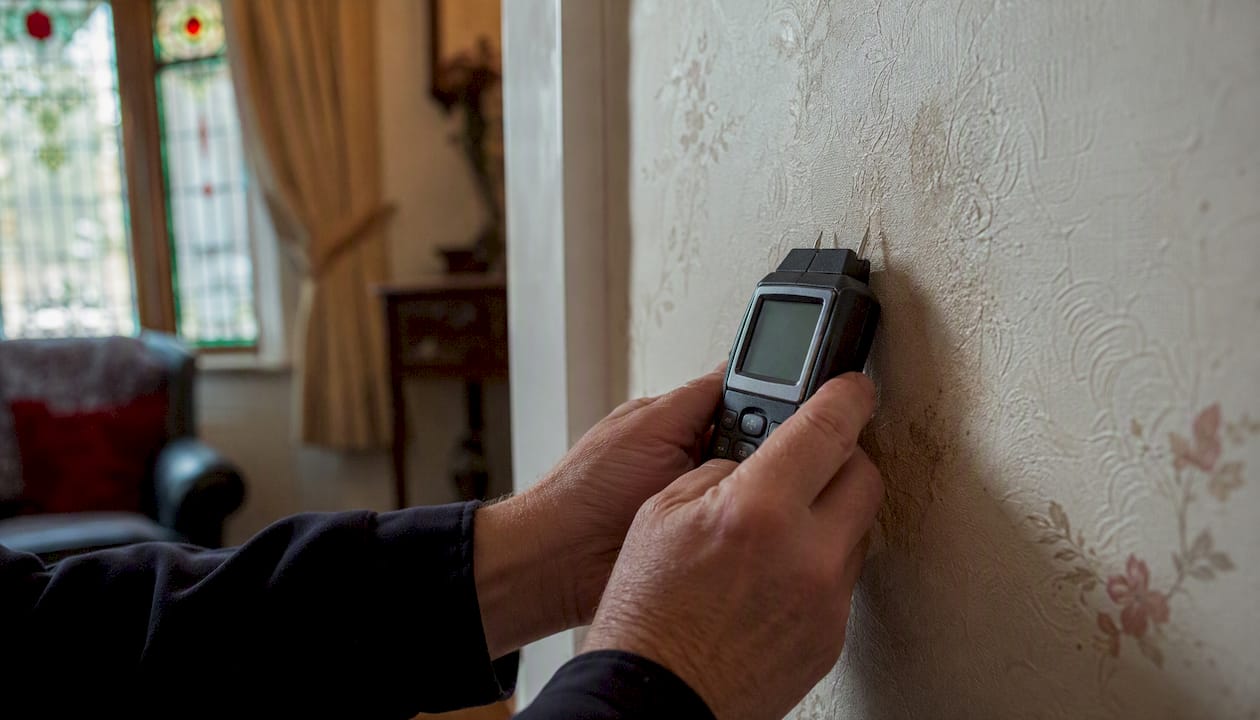
A competent damp surveyor will take moisture readings at multiple points across the affected wall and adjacent surfaces, inspect window reveals and external elevations, check gutters and the roofline, and look for evidence of cold bridging or insulation gaps. Thermal imaging may be used where cold bridging is suspected. You can read about how professionals test for damp in a wall to understand what the visit involves.
What to ask and what to request in writing:
- Ask for written findings that clearly state the identified cause, not just the symptom.
- Request a defined scope of work with timescales before any remedial work begins.
- Ask about guarantee terms: what is covered, for how long, and what conditions apply.
- Confirm whether the surveyor carries professional indemnity insurance.
A survey that produces only a verbal recommendation is not sufficient. Written findings and a documented scope protect you if the problem recurs and you need to hold the contractor to account.
What a professional damp and mould survey involves
Understanding what a paid survey delivers helps you evaluate whether the scope of work you are offered is appropriate.
Survey steps a competent specialist will follow:
A visual inspection comes first, covering the internal wall face, window reveals, skirting boards, and ceiling junctions. The surveyor then takes moisture readings using a calibrated moisture meter at multiple points, comparing readings across the wall to identify whether moisture is concentrated at the surface (condensation) or distributed through the substrate (structural damp). Where cold bridging is suspected, thermal imaging identifies the precise locations of heat loss. Cavity checks and external elevation inspection complete the picture, covering gutters, pointing, render condition, and any vegetation in contact with the wall.
| Remedial option | Typical application | What it addresses |
|---|---|---|
| Targeted ventilation upgrade | Condensation in poorly ventilated rooms | Reduces humidity at source |
| Internal wall insulation | Cold north-facing solid walls | Raises surface temperature, eliminates condensation |
| Gutter and flashing repair | Saturated wall face after rain | Stops external water ingress |
| Penetrating damp repair | Failed pointing, render, or flashing | Seals external envelope |
| Controlled plaster replacement | Compromised substrate | Removes contaminated material, reinstates sound finish |
What evidence a contractor should produce:
Written diagnosis with photographic records, moisture log readings taken before and after any treatment, a defined scope of work, and a written guarantee. A guarantee that covers both materials and workmanship, for a stated period, is the mark of a contractor who stands behind their diagnosis. Without a written scope, there is no basis for holding anyone accountable if the problem returns.
Plausible outcomes depending on findings:
If the survey confirms condensation as the sole cause, the remedial programme typically involves a ventilation upgrade, possibly internal wall insulation, and replastering and repainting with fungicidal products. If structural damp is identified, the scope expands to include external repairs (pointing, render, gutters, flashing) followed by controlled plaster replacement and a guaranteed treatment system. The difference in cost and timescale between these two outcomes is significant, which is precisely why a thorough diagnosis before any work begins matters.
A professional perspective on common homeowner mistakes
The single most common mistake is repainting over active mould without fixing the moisture source. A fresh coat of paint may hide the problem for four to six weeks, but the mould returns through the new surface because the conditions that created it have not changed. The wall looks better briefly and the problem is now harder to assess because the original pattern is obscured.
The second mistake is pushing furniture flush against external walls. This is particularly damaging on north-facing walls, where the wall surface is already the coldest point in the room. Blocking airflow behind a wardrobe or sofa creates a pocket of stagnant, humid air directly against the coldest surface, and mould follows reliably. Moving furniture away from the wall costs nothing and is one of the most effective short-term interventions available.
The third mistake is ignoring external causes. Homeowners focus on the interior because that is where the mould is visible, but blocked gutters, failed pointing, and dense vegetation against the wall face are frequently the root cause. Property maintenance experts consistently note that structural moisture is often mistaken for a ventilation problem; the result is that ventilation measures are applied to a problem that requires external repair, and the mould returns regardless of how well the room is ventilated.
Pro Tip: When you are unsure whether you are dealing with condensation or an active leak, take a 48–72 hour moisture log. Record readings from a hygrometer at the same time each morning and evening, noting whether readings spike during heating cycles or after rain. Condensation problems typically show elevated humidity during cold, still weather and after overnight cooling. Active leaks show elevated moisture in the wall substrate regardless of indoor conditions, and often worsen after rainfall. That distinction guides the correct remedial route before you spend money on the wrong fix.
Quay Point Plastering: survey-led mould diagnosis for north-facing walls
Persistent mould on a north-facing wall deserves a diagnosis, not a guess. Quaypointplastering has over 35 years of experience diagnosing and treating damp, mould, and timber problems across Dorset, Hampshire, and Wiltshire, and every job starts with a thorough on-site inspection before any remedial work is agreed.

The survey-led approach means you receive written findings, a clear scope of work, and a defined guarantee before anything is touched. Services that directly address north-wall mould include damp and timber surveys, black mould removal with guaranteed treatments, condensation solutions, penetrating damp repairs, and professional plastering and reinstatement. If the survey identifies a structural cause, penetrating damp repairs and render work are handled in-house, so there is no need to co-ordinate multiple contractors.
To book a damp and timber survey and get a documented diagnosis for your property, contact Quaypointplastering directly.
Sources
The following UK sources provide authoritative guidance on health, condensation control, and external maintenance:
- Controlling condensation and mould in your home
- Can damp and mould affect my health? — NHS
- How to stop mould on outside walls — Homebuilding
This article is general information, not a substitute for advice from a qualified doctor. Consult a qualified healthcare professional about your own circumstances before acting on anything here.