
Avoid mould: UK homeowners' plaster drying time: 5–7 days for skims
Avoid mould: UK homeowners’ plaster drying time: 5–7 days for skims
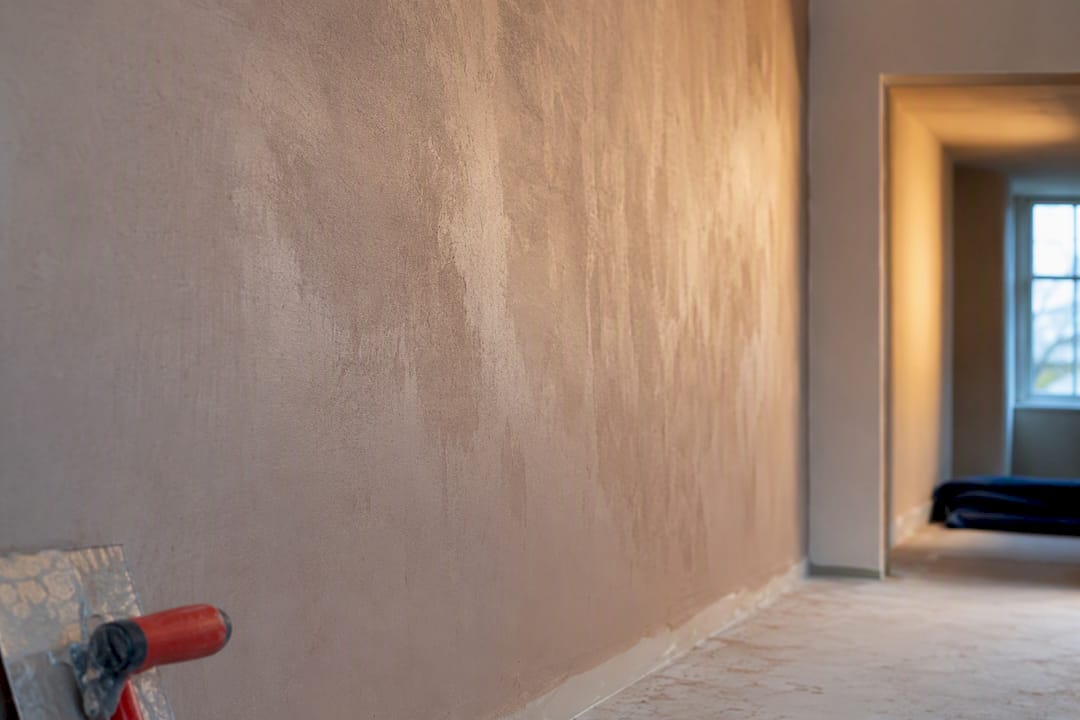
Most thin gypsum skims are paint-ready in about 5 to 7 days; bonding coats and undercoats on masonry usually need 7 to 14 days. Before you pick up a brush, check for a uniform pale or salmon colour across the whole wall and confirm it with a moisture meter. Skip the temptation to blast a heater at it — aggressive heat causes cracking rather than faster drying.
TL;DR:
- Gypsum skim coats typically require 5 to 7 days to be paint-ready, while bonding coats on masonry need 7 to 14 days, depending on thickness and conditions.
- Room temperature should ideally stay between 18°C and 25°C, with proper ventilation to prevent moisture entrapment that delays drying and causes defects.
- Visual checks include a uniform pale or salmon color and moisture meter readings below 12%, but multiple spot checks provide a more accurate assessment.
- Accelerating drying with direct heat or industrial heaters risks surface cracking, so gentle airflow, low-level heating, and dehumidification are recommended.
- Persistent damp patches, soft plasterboard, or recurring mold after drying indicate underlying issues that require professional diagnosis before further decoration.
Table of Contents
- Typical drying and curing times for different plaster types
- What actually slows down or speeds up plaster drying time?
- How can you tell if plaster is dry enough to paint?
- Safe ways to speed up plaster drying without causing cracks
- When is it safe to apply a mist coat or paint?
- Is it mould, staining, or just normal drying marks?
- Quick checklist before you start decorating
- Trade perspective: what usually goes wrong and how to fix it
- How Quay Point Plastering can help if drying isn’t going to plan
- Sources
Typical drying and curing times for different plaster types
There’s a difference between plaster that has “set” and plaster that’s actually dry enough to decorate. Setting is a chemical reaction: the gypsum crystallises and goes hard within hours. Curing is what happens afterwards, as the remaining water works its way out through evaporation. You can tap a wall and find it rock solid a day after skimming, yet the surface underneath is still holding enough moisture to blister your paint or trap mould behind it.
Gypsum skim coats, the thin 2 to 3mm finish applied over plasterboard, are the fastest to cure. Checkatrade’s guidance puts full paint-ready cure at roughly 3 to 7 days, though a lot of tradespeople treat 5 to 7 days as the realistic minimum in an average UK home. Thin skims dry unevenly if you rush them, so don’t assume touch-dry after a day means ready-to-paint.
Bonding and undercoat plasters on masonry are thicker, typically 8 to 13mm, and behave very differently. Because they’re holding far more water and often going onto absorbent brick or block, expect 7 to 14 days in moderate conditions before they’re genuinely ready for a topcoat.
| Plaster type | Typical thickness | Paint-ready guidance |
|---|---|---|
| Gypsum skim (plasterboard) | 2 to 3mm | 5 to 7 days |
| Bonding/undercoat (masonry) | 8 to 13mm | 7 to 14 days |
| One-coat plaster | 5 to 10mm | 5 to 10 days |
| Lime plaster | Variable, often thicker | Several weeks to months |
| Patching plaster (small repairs) | Thin, localised | 2 to 4 days |
A few things worth mapping to your own job:
- One-coat plasters sit between skim and bonding coats in both thickness and drying behaviour, so treat the 5 to 10 day range as a starting point, not a guarantee.
- Lime plaster cures far more slowly because it hardens through carbonation, not simple evaporation, and can genuinely take weeks longer than gypsum products.
- Small patch repairs dry fastest of all, sometimes within days, because there’s so little mass holding water.
The old rule of thumb, “a millimetre a day”, gets repeated endlessly online, but Checkatrade’s own trade advice treats it as unreliable, particularly for thin skims that dry faster than that formula suggests. Use it as a very rough sense check at most, never as your final word on readiness.
What actually slows down or speeds up plaster drying time?
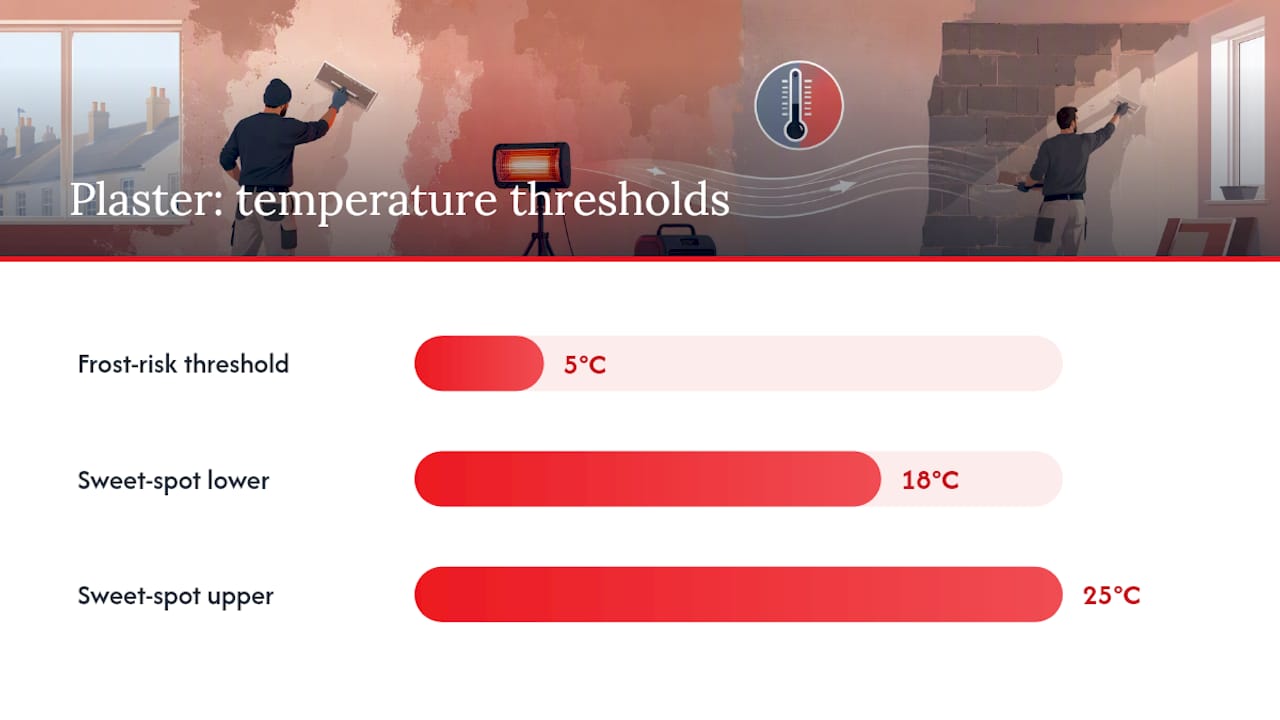
Temperature does more heavy lifting than most people expect. Trade guidance from Angi points to 18 to 25°C as the sweet spot. Below 5°C, you risk frost damage before the plaster has even set properly. Push the temperature too high with a heater aimed directly at the wall, and you’ll flash-dry the surface while the core stays wet, which is exactly how cracks form later.
Humidity and airflow work together, as explained in ways to fix damp walls in your Antwerp home, highlighting the importance of ventilation to manage moisture effectively. A bathroom with the extractor fan off, or a bedroom with the windows shut all winter, holds moisture in the air that the plaster is trying to release into. Cross-ventilation, even a window cracked open on each side of the room, lets damp air out and lets drier air replace it.
Substrate and thickness matter just as much as the room’s climate:
- Plasterboard skims dry faster than solid masonry because the board itself doesn’t hold much water.
- Thicker coats on brick or block take longer simply because there’s more moisture to shift.
- Unsealed, porous masonry pulls water back out of the plaster inconsistently, leaving patches that dry at different rates.
Preparation failures cause more slow-drying jobs than people realise. Bond It Group’s guidance on sealing masonry is clear that unsealed brickwork or bricked-up dabs let moisture migrate into new plaster from behind, which shows up weeks later as staining or mould that has nothing to do with how carefully you mixed the mortar.
North-facing rooms, houses plastered straight after a spell of heavy rain, or older properties with generally poor drying ability all deserve extra patience. Add several days onto any baseline figure if your job fits one of these cases.
Pro Tip: If a room feels colder or damper than the rest of the house, plaster there will lag behind everywhere else. Check that room last, not first, when you’re deciding whether the whole job is ready.
How can you tell if plaster is dry enough to paint?
Colour is the first and most useful visual clue. Wet plaster looks darker, often with a patchy, uneven tone. Dry gypsum plaster turns a consistent pale pink or salmon shade across the entire surface. Dark patches, especially near skirting boards, corners, or where pipework runs through a wall, usually mean moisture is still trapped there.
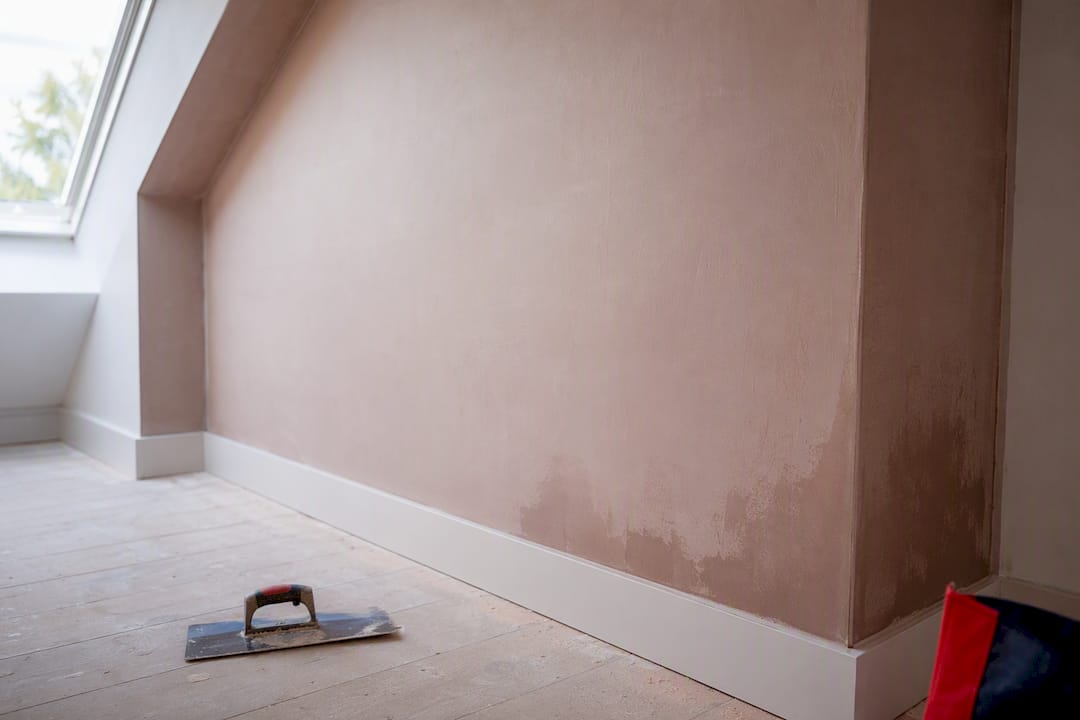
The touch test backs this up. Run a dry hand across the wall; it should feel cool but not damp, and there should be no chalky residue transferring onto your fingers. Pay particular attention to internal corners and areas near external walls, since these dry slower than open, flat sections.
A moisture meter takes the guesswork out entirely. TradeCalculator’s guidance recommends multiple spot checks rather than relying on a single reading, and testing at different heights and near suspected damp areas gives a far more reliable picture than trusting your eyes alone.
As a working guide, many trades aim for a moisture content below roughly 12% in wall materials before final decoration, though this figure is illustrative rather than a fixed legal threshold — there’s no formal British Standard governing plaster drying time.
A few checks worth building into your routine:
- Test at least three or four locations per wall, not just the centre.
- Re-check 24 to 48 hours after your first reading to confirm the trend is downward, not flat.
- Always check the manufacturer’s Product Data Sheet (PDS) for the specific product you used, since some formulations have different paint-ready timings that override general guidance.
If the PDS gives a specific figure, follow that over any generic range in this article. Manufacturers test their own products under controlled conditions, and their guidance beats a rule of thumb every time.
Safe ways to speed up plaster drying without causing cracks
Rushing plaster is the single most common way homeowners create problems for themselves. There’s a sensible sequence to follow if you want to shave days off the wait without wrecking the finish.
- Let the plaster set fully first, usually 24 to 48 hours, before doing anything to accelerate drying.
- Open windows on opposite sides of the room to create cross-ventilation once the surface is firm enough to handle airflow.
- Introduce gentle, low-level background heating, not direct heat aimed at the wall, once initial set has occurred.
- Bring in a dehumidifier after the plaster has set, rather than during application, since running one too early can interfere with the setting process itself.
Dehumidifiers genuinely help. TradeCalculator’s estimates suggest a reduction in drying time of roughly 30 to 50% when used correctly after initial set, which makes a real difference in winter when opening windows isn’t practical. Avoid running one during other wet trades, such as screeding a floor in the same room, since you’ll just be pulling moisture out of one job and adding it back from another.
What you should never do is reach for a fan heater pointed directly at a freshly skimmed wall, or use industrial heaters to force the pace. Angi’s trade advice is blunt about this: aggressive heat flash-dries the surface, leaves the core still wet, and the result is cracking that often shows up days or weeks after you’ve already painted over it.
Pro Tip: In winter, stage your drying. Heat and ventilate one room at a time rather than trying to warm the whole house, and you’ll get more even, predictable results than spreading limited heat too thin.
When is it safe to apply a mist coat or paint?
New plaster is extremely absorbent, and a mist coat seals the surface evenly so your proper paint doesn’t soak in unevenly and leave a patchy, flat-looking finish.
The sequence matters more than the calendar date. Confirm dryness using the colour and moisture checks covered earlier, then apply the mist coat, then allow it to dry fully before any subsequent coats go on. Painting over plaster that only looks dry, without confirming with a meter, is one of the most common causes of peeling and bubbling later.
Before applying anything, a bit of preparation pays off:
- Remove dust from the surface with a soft brush or vacuum; loose particles will show through in the finished paint.
- Lightly key very smooth or overly polished areas if your plasterer used a steel trowel finish, so the mist coat has something to grip.
- Consider a specialist primer instead of a diluted emulsion mist coat if the manufacturer’s PDS recommends one for that particular plaster.
Spot repairs need a slightly different approach. Small patches dry faster than the surrounding wall, so blending them in usually means feathering the mist coat slightly wider than the repair itself to avoid a visible ring where old and new plaster meet.
Is it mould, staining, or just normal drying marks?
Not every dark patch on new plaster is mould, and telling the difference matters because the fix is completely different in each case. Drying marks are usually patchy shading that evens out over days as the wall dries uniformly. Salt staining looks like a white, powdery bloom, often called efflorescence, and points to moisture pulling mineral salts out of the masonry behind the plaster. Genuine mould is darker, often black or green-black, with a fuzzy or slightly raised texture, and it can appear within 24 to 48 hours on a surface that’s staying too damp for too long.
If you’re dealing with a small patch, ventilation and measured dehumidification usually resolve it, alongside a light clean with an appropriate mould-specific product rather than reaching straight for bleach, which can bleach the surface without actually killing the root cause. If the underlying wall was never properly sealed before plastering, expect the same problem to return until that’s addressed, not just the surface symptom.
Some signs mean it’s time to stop treating this as a DIY job:
- Mould keeps coming back in the same spot after cleaning and drying.
- Plasterboard feels soft, spongy, or is visibly disintegrating.
- Affected area covers more than roughly 1 square metre.
- Anyone in the household is experiencing respiratory symptoms that seem tied to being in that room.
Salt-contaminated plaster in particular rarely resolves with cleaning alone, since the salts keep drawing moisture back in from the air. A survey-led inspection identifies whether you’re dealing with drying time, a hidden leak, or rising damp before any more plaster goes on.
Quick checklist before you start decorating
- Confirm a uniform pale or salmon colour across the entire wall, with multiple moisture meter readings inside the guidance threshold, not just one spot check.
- Check that masonry substrates were properly sealed before plastering and that no white salt staining is bleeding through the surface.
- Set up ventilation or gentle heating for the next 48 to 72 hours, and have your mist coat or primer ready to apply as soon as readings confirm dryness.
- If mould keeps returning, plasterboard feels soft, or the affected area is large, book a professional survey before you paint over the problem.
Trade perspective: what usually goes wrong and how to fix it
Most of the “faulty plaster” calls we see aren’t plaster problems at all. They’re damp problems that were already there before the plasterer arrived, and the new finish is simply the first thing to show it. That’s why a proper diagnosis before any remedial work matters more than the plastering itself.
We’d also push back on the instinct to seal or membrane everything in an older property. Slapping a waterproof membrane over a wall that’s still drying out from behind often traps moisture rather than solving anything, and it can make the eventual repair more expensive.
Written guarantees and a documented scope of work exist precisely so you’re not left guessing whether a repair was done properly. Ask any specialist for both before work starts, whatever the job.
— Quay
How Quay Point Plastering can help if drying isn’t going to plan
If you’ve followed the checks above and something still isn’t right, whether that’s a wall that won’t stop looking damp weeks after plastering, mould that keeps returning, or plasterboard that’s gone soft, Quay Point Plastering’s survey-led approach exists for exactly that gap between “I’ve done everything the guides say” and “this still isn’t drying.” We diagnose from visual symptoms first, document what we find, and give you a defined scope of work before any treatment starts, backed by a written guarantee.

Booking a survey makes sense if you’re seeing recurring mould in the same spot, unexplained wet patches that don’t track with recent weather, or softness in plasterboard that shouldn’t be there this soon after a job. Rather than guessing whether it’s damp appearing after rain or a hidden penetrating issue, our damp and timber survey gives you a clear answer and a repair plan you can actually rely on. Across Dorset, Hampshire, and Wiltshire, that starts with a call or a booking, not a guess.
Sources
- Advice on drying plaster | Checkatrade
- How long does plaster take to dry? | Angi
- Plaster drying time estimator | TradeCalculator
- Is it OK to have mould after plastering? | SelfBuildExtendRenovate
- How long does plaster take to dry? | Homebuilding