
9–12 Months to Dry: How New Build Homeowners Prove Damp Is a Defect
9–12 Months to Dry: How New Build Homeowners Prove Damp Is a Defect
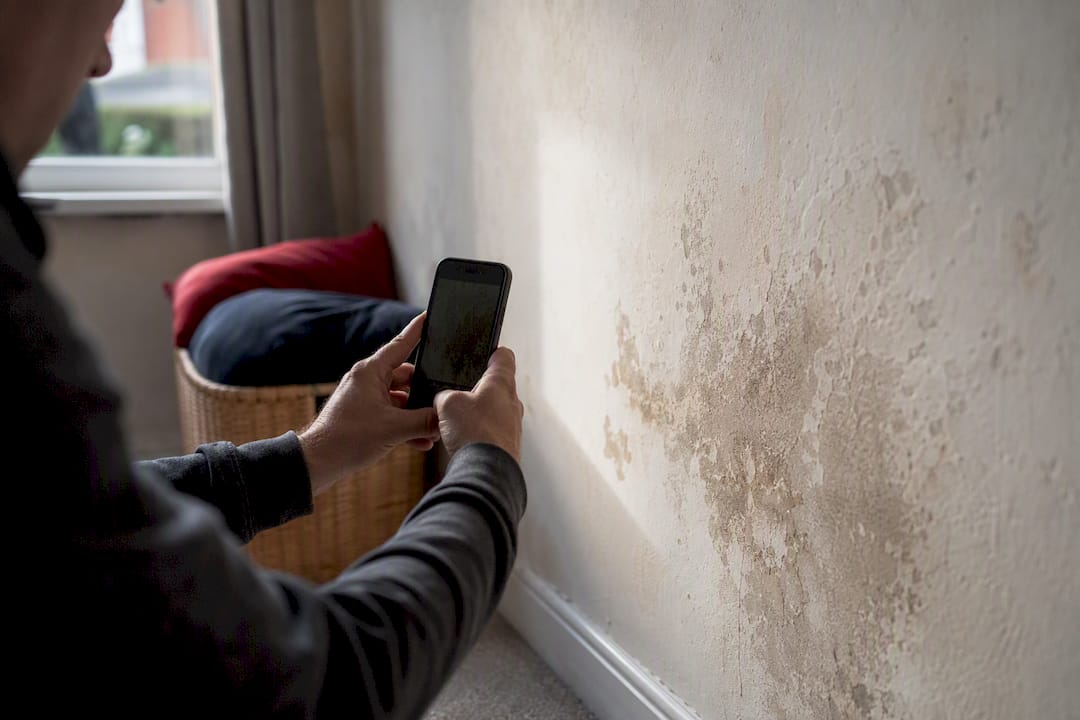
Some condensation and residual construction moisture are normal while a new build dries out, but persistent, worsening or localised damp is not. Ventilate properly, heat the home to a steady moderate temperature, run a dehumidifier and keep a dated photo log. If the damp does not ease within a few weeks of doing all three correctly, stop self-treating and commission an independent survey.
TL;DR:
- Persistent damp in new homes often results from trapped moisture, which can take 9 to 18 months to fully dry out, especially in winter.
- Proper ventilation, steady heating, and the use of a dehumidifier usually improve condensation within a few weeks, but ongoing issues require professional assessment.
- A damp survey involving calibrated moisture measurements, thermal imaging, and thorough documentation provides the necessary proof to address real defects.
- Long-term prevention depends on confirmed commissioning and balancing of ventilation systems, along with checking construction details like damp-proof courses and flashing.
- Homeowners should document their efforts and seek independent surveys if damp persists despite correct management, to avoid costly disputes or missed defects.
Table of Contents
- Why new builds often show damp or mould in the early months
- Condensation or a defect: how to tell the difference
- Ventilation, heating and dehumidifiers: your first two weeks
- When you need an independent damp survey
- Warranty claims: what counts as proof
- Preventing damp from becoming a permanent problem
- How survey-led diagnosis actually works
- What to do this week, and what to expect by next winter
- Lessons from decades of survey work
- Book a damp survey with Quaypointplastering
- Sources
Why new builds often show damp or mould in the early months
New homes are wetter than they look. Screed, plaster, mortar and concrete all go into a build carrying significant water content, and that moisture has to leave the structure somehow before the property settles into a stable equilibrium. According to research from New-builds, new-build properties commonly need 9 to 12 months to dry out fully, and that window can stretch to 18 months depending on the season and construction method used.
Modern building regulations also demand much tighter airtightness than older housing stock. That’s good for energy bills, but it changes how moisture behaves indoors.
- Wet trades (plastering, screeding, rendering) release water vapour for months after they’re finished, not days.
- Airtight envelopes trap that vapour close to the building fabric instead of letting it escape through gaps and draughts, the way older houses did.
- Mechanical ventilation systems are sometimes not fully commissioned or balanced at handover, so extract rates fall short of what the property actually needs.
- Winter completions dry more slowly than summer ones, because cooler air holds less moisture and homeowners heat less consistently.
Trapped moisture in an airtight shell is the real driver here. When a ventilation system hasn’t been properly commissioned, what should be a short drying phase can turn into a long-running condensation problem. That distinction between a builder’s process still catching up and a genuine defect is the one worth understanding before you assume the worst.
Condensation or a defect: how to tell the difference
Condensation follows a pattern. Defects usually don’t. Learning to spot the difference saves you weeks of unnecessary worry, and it’s the single most useful skill a new-build owner can develop in year one.
Condensation typically shows up as:
- Misting on cold glazing first thing in the morning, clearing once the room warms and airs.
- Damp patches in cold corners, particularly north-facing rooms or behind wardrobes pushed against external walls.
- A pattern that softens noticeably once you ventilate and heat the room, then returns after a few cold, unventilated days.
Signs pointing towards a genuine defect look different:
- A localised patch that keeps growing regardless of how well you heat and ventilate the room.
- Mould or staining that appears or worsens specifically after heavy rain, suggesting damp appearing after rain rather than airborne humidity.
- A consistent damp band at skirting board height, which often points to rising damp or a bridged damp-proof course rather than condensation.
- Damp that persists in the same exact spot for weeks despite correct ventilation and heating elsewhere in the house.
Three simple checks help you build evidence either way. Buy a cheap hygrometer and note the reading in the affected room daily. Take a photograph from the same spot, at the same time of day, each week. Then compare the pattern before and after a fortnight of consistent ventilation. If the numbers and the photos improve together, it’s drying-out. If they don’t move, or the patch spreads, you’re likely looking at a defect rather than a phase.
Ventilation, heating and dehumidifiers: your first two weeks
Three tools do most of the work here, and they need to be used together, not one at a time.
Trickle vents built into your window frames should stay open, including through winter, according to advice from VIVID Homes. Pair them with a short daily airing, ten to fifteen minutes with windows fully open, and run extractor fans in the kitchen and bathroom during and after every shower or cooking session.
- Keep trickle vents open year-round rather than sealing them shut against draughts.
- Air each room briefly once a day rather than leaving one window cracked constantly.
- Run extractor fans for at least fifteen minutes after any activity that produces steam.
- Maintain a steady, moderate background temperature rather than blasting the heating on and off.
On heating, consistency beats intensity. A steady moderate temperature throughout the day dries the fabric of the building far more effectively than switching the heating off during the day and cranking it up in the evening, which just lets the walls cool and condense again overnight.
Dehumidifiers help too, and the type matters. Specialists point out that desiccant dehumidifiers suit UK homes better than compressor models, because compressor units lose efficiency at the lower indoor temperatures typical of a British winter. Site the unit centrally in the affected room, away from walls, and empty or drain the tank daily.
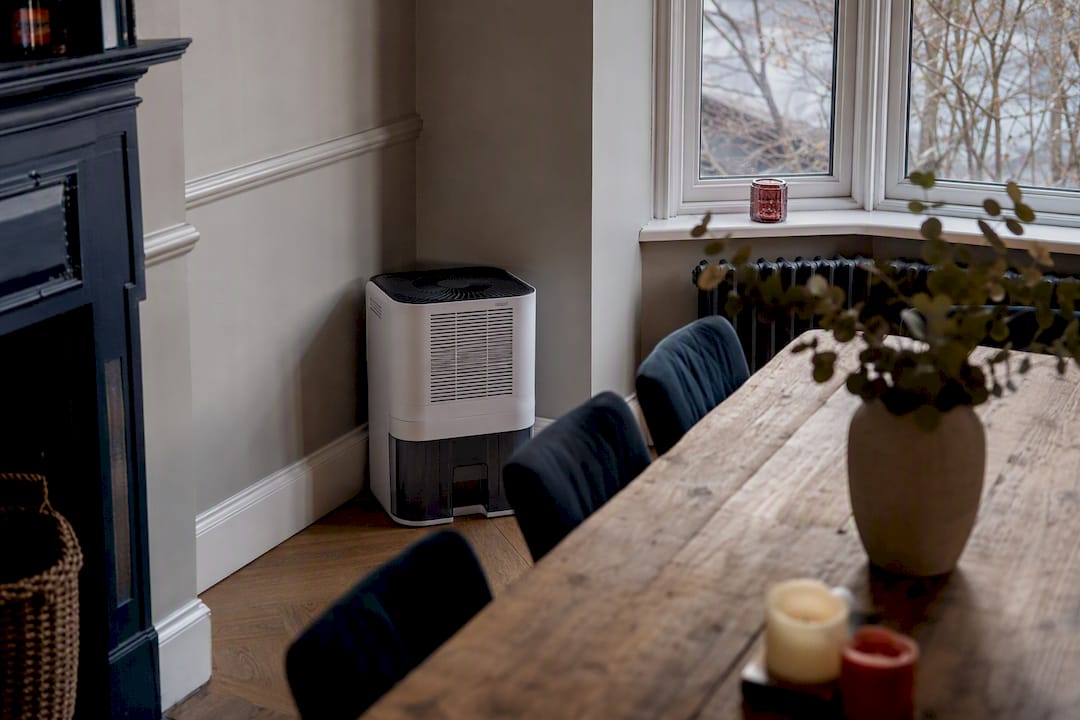
Pro Tip: Photograph your heating thermostat and dehumidifier settings alongside the damp patch itself, not just the patch on its own. A dated log showing you kept the room at 19°C for three weeks is far stronger evidence than a photo of mould alone if you ever need to make a warranty claim.
When you need an independent damp survey
Sensible home management has limits, and knowing where they sit protects you from months of wasted effort. If damp persists despite genuinely correct ventilation and heating, if mould keeps recurring in the same spot, if anyone in the household is experiencing respiratory symptoms, or if the damp only appears after rain or near plumbing, it’s time to call in an independent surveyor rather than keep adjusting the thermostat.
A proper specialist damp survey should include:
- Calibrated moisture meter readings taken at multiple points, not a single spot check.
- Thermal imaging to reveal cold bridging or hidden moisture behind plaster and dry lining.
- Intrusive checks, such as lifting a floorboard or removing a small section of plaster, where the visual evidence justifies it.
- A formal written report setting out findings, likely causes and a defined scope of remedial work.
Independent, calibrated measurements carry weight that a homeowner’s own observations simply don’t. A moisture meter reading logged against a specific wall, backed by a thermal image showing the same cold spot, gives a developer or warranty provider something objective to respond to rather than a dispute about who’s right. Guidance from Oscar Onsite on court-grade reporting makes the same point: vague descriptions rarely hold up, but calibrated data and a clear chronology usually do.
Warranty claims: what counts as proof
New-build warranties, whether from the developer directly or a structural warranty provider, tend to draw a firm line between two categories of problem. Ordinary condensation and construction drying-out are usually treated as the homeowner’s responsibility to manage. Genuine defects, poor detailing, faulty membranes, incomplete waterproofing, are usually the developer’s responsibility to fix within the warranty period.
The trouble is that this line only holds up if you can prove which side of it your damp sits on. That’s why documentation matters more than almost anything else in this process. Dated photographs, an independent inspection report, and a simple log of heating and ventilation habits over several weeks turn a subjective complaint into a case a warranty provider can actually assess.
A workable sequence looks like this:
- Send formal written notice to the developer describing the issue, with dates and photographs attached, rather than raising it only by phone.
- Allow reasonable access for the developer’s own inspection, but keep your own parallel photo and heating log running throughout.
- If the developer disputes the cause or refuses to act, commission an independent report and use its findings to escalate formally to the warranty provider, whether that’s the NHBC or another underwriter.
- Keep every piece of correspondence, since a paper trail of formal complaints strengthens your position if the dispute runs on for months.
Cases reported by the BBC show how badly this can go when evidence is thin and disputes drag on for years rather than weeks. Documentation from day one is what shortens that timeline.
Preventing damp from becoming a permanent problem
Fixing the symptom without fixing the cause just buys you a repeat performance next winter. Long-term prevention means checking that the building itself is doing its job, not just that you’re heating and airing it correctly.
Ask your developer to confirm the mechanical ventilation system has been properly commissioned and balanced, not just installed. Guidance from Akita AC on ventilation commissioning notes that a system fitted but never correctly balanced can leave rooms under ventilated despite appearing to run fine. Keep trickle vents clear of paint and debris so they continue to function years after handover, not just at completion.
Certain detailing failures show up again and again in new-build defect reports, including bridged damp-proof courses, missing cavity trays above windows and doors, and poorly fitted flashings around roof junctions and extensions. If damp recurs at a specific junction every time it rains, one of these is a likely culprit, and it’s worth asking a surveyor to check that detail specifically rather than treating the wall generally.
- Confirm ventilation systems are commissioned and balanced, not just switched on.
- Check for bridged damp-proof courses, especially where patios or decking have been added after completion.
- Inspect flashings and cavity trays above openings if damp appears after rain.
- Use breathable paints and finishes while the building is still drying, and hold off on wallpapering or vinyl paint for at least the first year.
How survey-led diagnosis actually works
Guesswork is the enemy of a fair outcome, for the homeowner and the developer alike. Quaypointplastering built its process around evidence rather than assumption, which matters because a damp claim lives or dies on what you can prove, not what you suspect.
The sequence runs in a fixed order:
- A visual inspection first, looking at patterns, staining and building context before anything is touched.
- Moisture mapping using calibrated meters across multiple points, not a single reading taken and generalised.
- Thermal imaging where the visual evidence suggests hidden moisture or cold bridging behind the surface.
- A written scope of remedial works, agreed before any treatment begins, with a documented guarantee attached to the finished job.
The most useful survey reports don’t just say “mould present.” They combine moisture meter logs, thermal images and a clear chronology tying what was seen to the weather and occupancy at the time. That combination is what actually persuades a warranty provider or a court that a claim is genuine.
That documentation does two jobs at once. It gives homeowners the paper trail a warranty claim needs, and it stops unnecessary work being carried out on rooms that are simply still drying out. A damp and timber survey that finds nothing beyond normal construction moisture is just as valuable as one that finds a defect, because it tells you to stop worrying and keep managing the drying-out period instead.
What to do this week, and what to expect by next winter
Start with three things this week: ventilate properly, keep a dated photo and heating log, and run a dehumidifier in the affected room. Most condensation-related damp visibly improves within a few weeks of doing all three consistently.
If it doesn’t, that’s your red flag. Persistent patches, recurring mould in the same spot, or damp that tracks with rainfall rather than room temperature all justify calling in a surveyor rather than waiting out another season.
When you brief a surveyor, ask specifically for calibrated moisture readings, thermal imaging, and a written report with a defined scope of works, not just a verbal opinion. That’s the evidence standard a warranty provider will actually respect, and it’s the difference between a dispute that drags on for months and one that gets resolved in weeks.
Lessons from decades of survey work
Homeowners almost always wait too long before getting an independent check, usually because they assume damp in a new house must be their fault for not ventilating enough. Sometimes that’s true. Often it isn’t.
What actually protects you is a written guarantee on any remedial work and a transparent scope agreed before treatment starts, not a vague promise that “it’ll dry out eventually.” Manage the short-term drying sensibly, but don’t let sensible management become an excuse to avoid a survey once the pattern stops matching normal condensation.
— Quay
Book a damp survey with Quaypointplastering
Quaypointplastering is the alternative to guessing your way through a drying-out period. Rather than another dehumidifier and a hopeful winter, you get a documented, evidence-first diagnosis, calibrated moisture readings, thermal imaging and a written report that either confirms you’re simply waiting out construction moisture or identifies a genuine defect worth pursuing with the developer.

Homeowners across Dorset, Hampshire and Wiltshire use this process to settle exactly that question, whether the concern is a persistent patch near a window reveal, mould returning at skirting height, or black mould that keeps coming back no matter how often it’s cleaned. Every survey ends with a written scope of any remedial work required and a documented guarantee on workmanship, so you’re never paying for treatment before the cause has actually been confirmed. If your damp hasn’t budged after a few weeks of proper ventilation and heating, book a specialist damp survey and get a clear answer instead of another guess.
Sources
- Managing the drying out period in your new build home | New‑Builds
- Damp and mould in new build homes | VIVID
- BBC News: new-build home damp and long disputes