
Leak tracing dye test for UK homeowners: narrow first, confirm with dye
Leak tracing dye test for UK homeowners: narrow first, confirm with dye
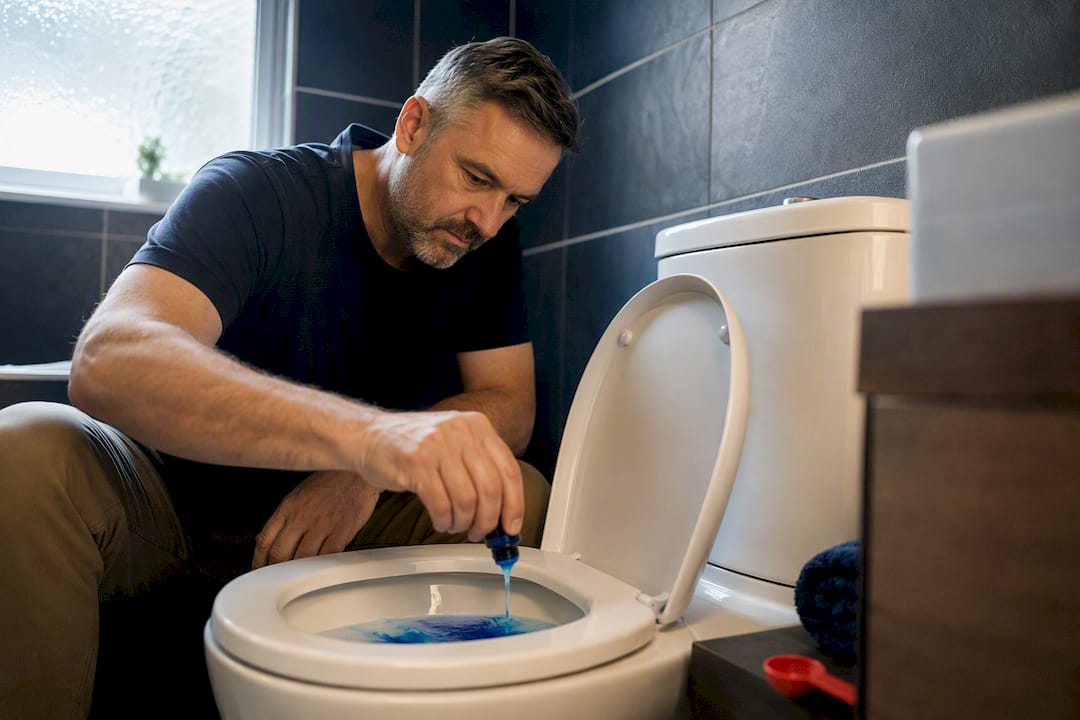
A leak tracing dye test confirms where water is actually flowing once you already suspect a fault, using visible or fluorescent colour to show a path through toilets, drains, or pools. It works best on gravity-fed or open systems and cannot reliably pinpoint a pressurised supply pipe hidden inside a wall. Use it to prove a leak, not to search for one.
TL;DR:
- Dye testing is effective for confirming flow pathways in open, gravity-fed systems but cannot reliably locate leaks in pressurised supply pipes or concealed areas.
- Proper dye tests require specific dyes like fluorescein or rhodamine, suitable equipment, and follow manufacturer instructions, with careful attention to dye concentration and application point.
- Water movement and external factors often cause false negatives, so dye tests should follow other diagnostic tools like moisture meters or acoustic surveys, especially with pressurised or hidden leaks.
- A positive dye result must be accurately documented and re-tested after repairs to confirm the leak has been fixed, while negative results in concealed systems should be treated as inconclusive requiring further investigation.
- Full leak diagnosis should combine dye testing with visual inspection and specialist surveys for complex or recurring issues, rather than relying solely on dye flow confirmation.
Table of Contents
- What does a leak tracing dye test actually show?
- Which dye and equipment do you actually need?
- How do you run a dye test on a toilet, drain, or pool?
- Why dye tests give false results, and what professionals add
- What should you do with a positive or negative dye result?
- How Quaypointplastering builds dye testing into a proper survey
- Why treating dye as proof, not detection, changes the outcome
- Book a survey-led leak inspection with Quaypointplastering
- Sources
- FAQ
What does a leak tracing dye test actually show?
Dye testing introduces a coloured tracer into a system and watches for it appearing somewhere else, proving a physical connection between two points. It is a visible, non-destructive method for confirming flow pathways in plumbing and drainage systems, and it has been used by plumbers and pool technicians for decades because it needs no cutting or digging.
The method suits open or gravity-fed systems where you can watch the water move. Common domestic uses include:
- Toilet tank leaks — dye reveals a worn flapper valve letting water seep into the bowl.
- Drain tracing — confirming which outlet or gulley a pipe actually connects to.
- Pool and spa checks — spotting leaks at skimmers, fittings, and light niches.
- Illicit connections — proving whether a drain wrongly discharges surface water into the foul system, or vice versa.
Dye testing has real limits. It is not designed for pressurised supply lines, where water under mains pressure escapes fast and disperses before any tracer becomes visible. It is also not a wide-area search tool for a leak somewhere under a slab or a garden. Dye confirms a suspicion; it rarely finds one from scratch.
Which dye and equipment do you actually need?
The right tracer depends on where you are testing and how much dilution the water will cause. Fluorescein and rhodamine WT are the two tracers most often used professionally, chosen partly because concentration and volume must match the size of the system being tested.
For domestic use, the options break down like this:
- Liquid concentrate — quick to use with a syringe or squeeze bottle, ideal for toilets and pools.
- Fluorescent dye — shows up under a UV lamp, useful in dim or turbid conditions where a coloured dye alone is hard to see.
- Tablets or powders — dissolve slowly, so they suit slower-moving systems like cisterns.
- Dye cones — placed at pipe outlets to catch and confirm a trace arriving from upstream.
Supporting kit is simple: a syringe or bottle for close-range application, a bucket for dilution, a testing cone for drain work, a UV lamp if you are using fluorescent dye, and basic gloves. Always dilute powders and cakes before use, and follow the manufacturer’s dilution instructions rather than guessing a strength.
Pro Tip: Choose a dye colour that contrasts with the water and surrounding surfaces. A pale blue dye in a white toilet bowl is far easier to read than the same dye against dark tiling.
How do you run a dye test on a toilet, drain, or pool?
Every test follows the same principle: still the water, introduce the dye close to the suspected point, then watch and record. The specifics change depending on the system.
Before you start, note the baseline. Photograph the area, let standing water settle, and isolate any other taps or flows nearby so you are not chasing a false trail.
- Toilet tank test. Drop a dye tablet into the cistern, or add a few drops of liquid dye directly into the tank rather than the bowl.
- Do not flush. Leave it for 10 to 15 minutes.
- Check the bowl. Colour appearing without flushing confirms a leaking flapper valve or a faulty seal.
- Drain tracing. Dilute the dye according to the product instructions before introducing it at the suspect inlet, whether that is a sink, gulley, or downpipe.
- Open downstream inspection chambers and watch for the dye’s arrival.
- Place a testing cone over a pipe outlet if you need to confirm the trace at a specific point rather than an open chamber.
- Pool and spa test. Switch off pumps and let the water go completely still. Movement is the single biggest cause of a failed pool dye test.
- Load a syringe with dye and squeeze it slowly within an inch of a suspected fitting, skimmer edge, or light niche. Professionals use exactly this close-range, still-water technique because dye disperses fast once water is moving.
- Watch for dye being pulled toward or through the fitting, which indicates suction from a leak.
- Switch to a UV lamp in a darkened area if you are using fluorescent dye, since it reveals traces invisible under normal light.
- After every test, flush the system to clear residual dye and write up what you saw, where, and when. Photographs or short video clips of the dye appearing are standard evidence for a plumber, insurer, or contractor handover.
Why dye tests give false results, and what professionals add
Dye tests fail more often than people expect, usually for reasons that have nothing to do with whether a leak exists. Moving water is the biggest culprit. Wind on a pool surface, a running tap nearby, or water still settling after a flush will scatter dye before it can show anything useful.
Other common pitfalls include:
- Using the wrong dye strength for the volume of water being tested.
- Testing too far from the suspected point, letting dye dilute below visible concentration.
- Assuming a negative result rules out a leak in an open or fast-flowing system.
- Skipping the still-water step in pools, where even gentle circulation defeats the test.
A negative dye test in a pressurised or turbulent system does not mean there is no leak. It often means the test was in the wrong place. That is why professionals rarely start with dye. Dye testing is not a standalone diagnostic for concealed or pressurised leaks; it works best once other tools have already narrowed the search. Moisture meters flag damp concentrations behind plaster or flooring, acoustic listening equipment picks up the sound of water escaping under pressure, and pressure decay testing checks whether a sealed pipe run is losing pressure over time. Dye then confirms the exact point, rather than searching a whole property.
If you are on a water meter, a quick check with all taps off can tell you whether there is an internal leak at all before you reach for dye. Severn Trent notes that a changing meter reading with everything switched off points to a leak somewhere in the system, which is a useful first filter before you start tracing.
What should you do with a positive or negative dye result?
A positive result is only useful if you record it properly. Photograph or film the dye appearing, note the exact time and location, and make a temporary fix safe if water is actively escaping, such as isolating a stopcock or lifting standing water away from timber.
Once repairs are done, repeat the same test. This is the step people skip most often, and it is the only way to confirm the fix actually worked rather than assuming it did.
If your result is inconclusive:
- Escalate to a moisture survey or acoustic listening equipment rather than repeating the same dye test in the same spot.
- Consider whether the leak might be pressurised or hidden behind a wall, floor, or roof covering, where dye alone cannot reach it.
- Bring in a specialist where damp keeps returning after rain, where you suspect timber decay, or where the leak path is complex enough to need a documented plumbing leak versus damp assessment before any plastering or repair work begins.
How Quaypointplastering builds dye testing into a proper survey
A dye test on its own tells you that water is moving somewhere. It does not tell you why plaster is blown, why timber is soft, or how far damp has travelled through a wall. That gap is exactly where a survey-led process earns its keep.
A professional damp and timber treatment provider typically starts every job with diagnosis from visual symptoms first, before any treatment is discussed. That means:
- Documenting what is actually visible, not assuming a cause before inspection.
- Using dye tests alongside moisture meters to separate active leaks from historic damp staining.
- Producing a defined scope of work so a homeowner or landlord knows exactly what is being fixed and why.
- Backing the work with a written guarantee once the leak detection and repair has been carried out.
For anyone dealing with recurring damp patches or suspected timber decay, that documented approach turns a one-off dye test into evidence a contractor or insurer can actually act on.
Why treating dye as proof, not detection, changes the outcome
The mistake most homeowners make is expecting a dye test to do the job of a survey. It cannot. Dye shows you a flow path once you already have a reasonable idea where to look, and its biggest value is confirming or ruling out a specific suspicion, not scanning a whole property for one.
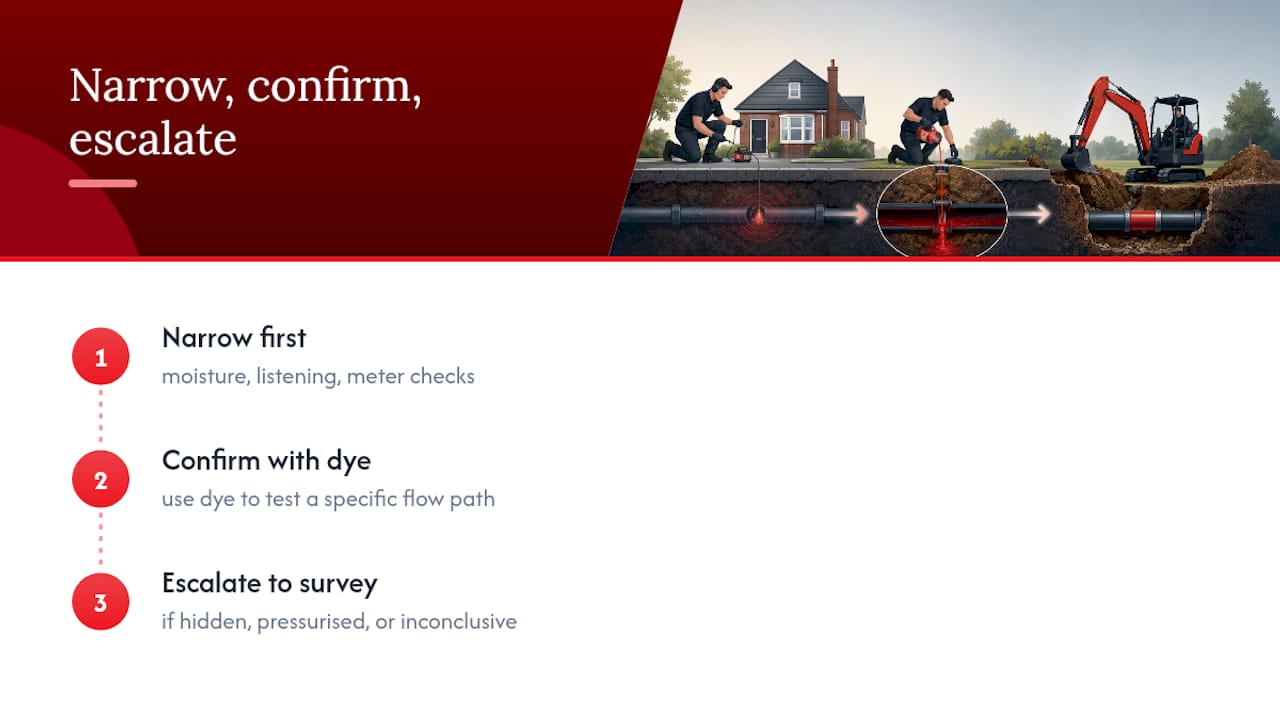
Conventional DIY advice tends to skip that ordering. It presents dye testing as step one, when in most successful investigations it is closer to step three or four, after moisture readings, listening, or a simple meter check have already narrowed the search. Skipping straight to dye on a pressurised line, or on a leak that might be behind plaster rather than in an open drain, wastes time and often produces a false sense of security when nothing shows up.
What should change is the order of operations: narrow first, confirm second. If a dye test comes back negative on an open system, trust it. If it comes back negative on anything hidden, pressurised, or concealed behind a finish, treat that as inconclusive rather than reassuring, and escalate to a proper survey before assuming the problem has gone away.
— Quay
Book a survey-led leak inspection with Quaypointplastering
Quaypointplastering is the practical next step when a dye test raises more questions than it answers, particularly where damp keeps returning after rain or timber shows signs of decay. Rather than guessing at a treatment, every inspection starts with a visual diagnosis, moves through documented findings, and ends with a defined scope of work backed by a written guarantee.

An on-site survey covers exactly the ground a dye test cannot: pressurised pipework, concealed penetrating damp, and timber that has already started to soften. If a dye test has confirmed a leak but you are unsure of the full extent, a penetrating damp investigation gives you a written scope before any work begins, covering Dorset, Hampshire, and Wiltshire. Booking one starts with a call or an online enquiry, and the inspection itself produces a clear report you can act on, whether that means repair, re-plastering, or simply peace of mind.
Sources
- Dye testing for leak detection — Leak Detection Authority
- How to use a tracing dye? — Wonkee Donkee Tools
- Pool leak detection dye: how to dye test like a pro — LeakTronics
- Checking for leaks with your water meter — Severn Trent Water
FAQ
Can a dye test find a leak inside a wall?
Not reliably. Dye testing works on open or gravity-fed systems you can observe directly, and it is not designed to trace pressurised supply pipes hidden behind plaster.
How long should you wait during a toilet dye test?
Leave the dye in the cistern for a sufficient period without flushing to observe if colour appears in the bowl, confirming a leaking flapper valve or seal. Colour appearing in the bowl during that time confirms a leaking flapper valve or seal.
Why did my pool dye test show nothing?
Moving water is the most common cause of a failed pool test. Pumps need to be off and the water still, with the syringe held within an inch of the suspected fitting.
Should you repeat a dye test after a repair?
Yes. Repeating the same test at the same point after repair work is the only reliable way to confirm the fix actually stopped the leak.
When should you call a specialist instead of testing yourself?
Call a specialist when damp keeps returning after rain, when timber shows signs of decay, or when the leak path is too complex for a simple test, since a damp and timber survey can document the cause before repair work starts.