
Damp under a bay window: causes, checks and fixes
Damp under a bay window: causes, checks and fixes
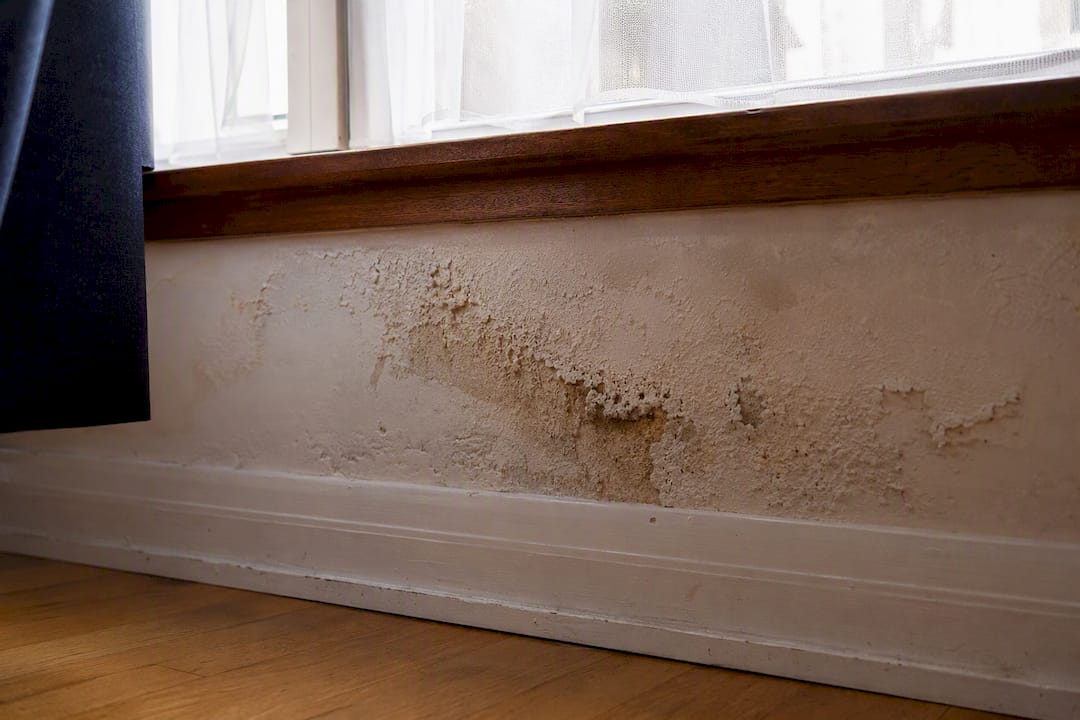
Damp under a bay window almost always comes from one of three sources: condensation forming on cold surfaces, penetrating damp from a failing roof or flashing above, or rising damp moving up through the base of the wall. Start with the simple checks first. Ventilate the room, move furniture away from the affected wall, photograph any staining with the date, and clear the gutters and downpipes above the bay. A basic handheld moisture meter will tell you whether the wall is genuinely wet or just cold and prone to condensation.
Some signs mean you should stop DIY and book a survey straight away.
- Salt crusts or a powdery white “tide mark” at skirting height
- Timber that feels soft, spongy, or crumbles under light pressure
- Staining that reappears within days of heavy rain, even after you’ve cleared the gutters
Pro Tip: Keep a simple log with your phone. A photo taken the morning after a storm, next to one taken during a dry spell, tells a surveyor more in ten seconds than a paragraph of description.
Key Takeaways
Damp under a bay window is rarely one simple problem; it’s usually condensation, penetrating damp, or rising damp, and treating the wrong one guarantees recurrence.
| Point | Details |
|---|---|
| Three likely causes | Condensation, penetrating damp, and rising damp each leave different clues, so check patterns before assuming a fix. |
| Inspect before treating | Use a moisture meter, water-spray test, and photos taken after rain to localise the actual source. |
| Salts cause recurrence | Old plaster contaminated with hygroscopic salts keeps drawing moisture even after the original leak is fixed. |
| Know your DIY limits | Reseal gaps and clear gutters yourself, but leave flashing, roofing, and rotten timber to professionals. |
| Book Quay Point Plastering | Their survey-led damp and timber inspection documents the cause first, then quotes a guaranteed scope of repair. |
Table of Contents
- One-hour inspection checklist for damp under a bay window
- What actually causes damp under bay windows?
- Safe DIY fixes you can try before booking a survey
- When should you book a professional damp survey?
- Permanent repairs: fixing the cause and replastering properly
- How to stop damp coming back under your bay window
- Why diagnosis matters more than the fix itself
- Book a survey-led fix with Quay Point Plastering
- Sources
One-hour inspection checklist for damp under a bay window
Before calling anyone, spend an hour working through the bay systematically. This won’t fix anything, but it narrows the cause and saves time (and money) once a professional gets involved.
- Check the window itself. Look for condensation on the glass first thing in the morning, particularly in winter. Heavy condensation with mould in a even band around the frame usually points to a ventilation or thermal bridging problem, not a leak.
- Examine the wall below the window. Look for soft plaster, paint blistering, or a tide mark with white salt deposits at skirting level. This is often a marker for rising or penetrating damp rather than condensation.
- Go outside after rain. Check the flashing where the bay roof meets the main wall, inspect the gutters for blockages, and look at downpipes for splits or disconnected joints.
- Look at ground level. Paving, decking, or flower beds piled up against the wall stop moisture escaping and can push damp straight into the brickwork.
- Run a water-spray test on suspect seams and joints, working from low to high, while someone watches inside for signs of moisture. Clear any weep holes you find at the base of the frame.
- Photograph and log everything, noting whether the damp appears only after rain, only in cold weather, or seems constant.
Hidden mould often develops behind fitted units or cabinets near the bay, where moisture tracks into the cavity unseen. A visual inspection rather than relying on air testing alone is the only reliable way to catch it.
What actually causes damp under bay windows?
Condensation is the most common culprit, and bays make it worse because they project outward and have more external wall surface than a flat wall, which makes them colder and prone to thermal bridging. It tends to show as fine speckled mould around the window reveal, worsens in winter, and eases once you improve ventilation or heating.
Penetrating damp is a different animal entirely. It’s caused by water getting in from outside, usually through:
- Degraded or missing lead flashing where the bay roof joins the house
- Blocked gutters or downpipes that overflow onto the wall below
- Perished sealant around the window frame or damaged roof tiles
Bay window roofs are particularly prone to this because the small, sloped roof structure has more joints and flashing than a standard wall. Staining from penetrating damp usually follows a pattern: it appears or worsens after heavy rain, and you can often spot the external defect if you look closely enough.
Rising damp shows differently again: a tide mark rarely higher than a metre from the floor, often with salt crusting on the surface. Older plaster that was never removed after a previous treatment can rehydrate and show fresh patches years later, which is why homeowners sometimes see damp return in the same spot despite having “fixed” it once already. Mixed causes are common. A leak gets patched, but the salts left behind in the old plaster keep drawing moisture from the air indefinitely.
Safe DIY fixes you can try before booking a survey
A few sensible steps will reduce symptoms and, in condensation cases, may solve the problem outright.
- Open trickle vents on the window frame and increase general airflow through the room.
- Run a dehumidifier in the affected room, particularly overnight and during cold spells.
- Pull furniture and curtains away from the wall so air can circulate behind them.
- Clear gutters, downpipes, and weep holes of leaves and debris.
- Reseal small, visible gaps around the window frame with a good exterior-grade silicone.
A handheld moisture meter gives a rough guide. Readings that stay high even in dry weather suggest an active leak rather than seasonal condensation. The water-spray test described in the inspection checklist works well here too. Spray a suspect seam for a few minutes and watch for damp appearing inside.
Some jobs are not DIY territory. Anything involving flashing repair, working on the bay roof itself, or timber that feels soft or spongy needs a professional. Rot and structural timber issues get worse, not better, if left while you experiment with sealant.
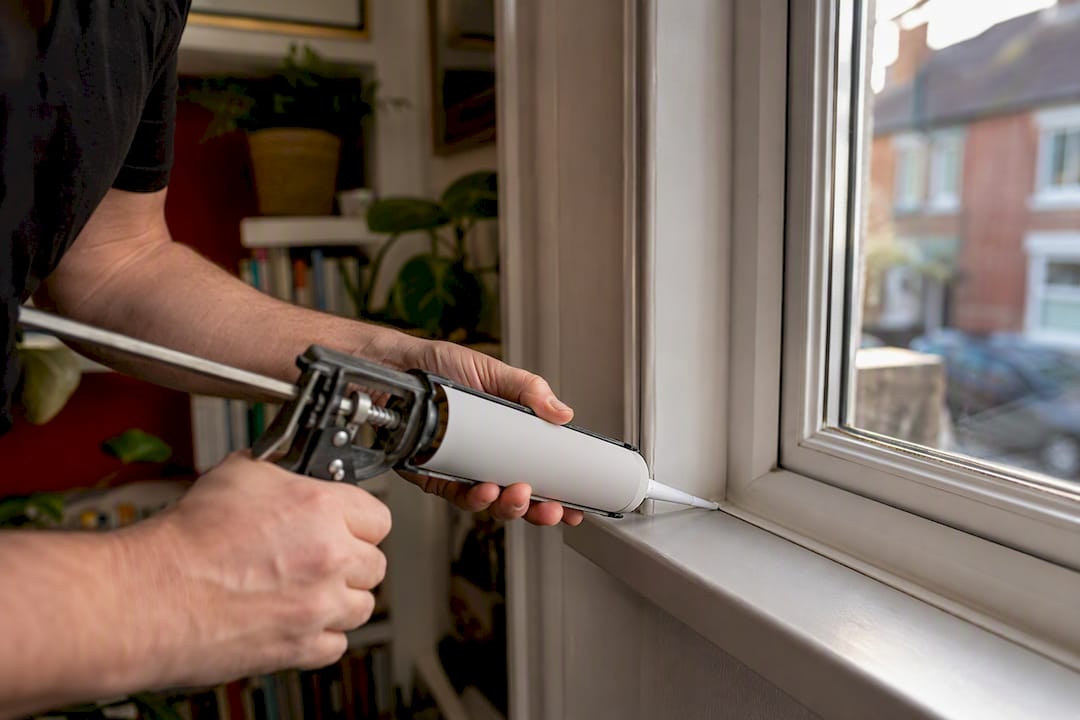
Pro Tip: If a wall stays wet despite three dry, mild days in a row, treat that as an active leak rather than condensation. Condensation dries out quickly once heating and ventilation improve; a leak does not.
When should you book a professional damp survey?
Certain signs mean the DIY checklist has done its job. It’s told you this needs an expert.
- Damp that returns after previous treatment or redecoration
- Salt crystals or crusting on the plaster surface
- Soft, crumbling, or visibly rotting timber around the frame or sill
- Mould covering a wide area, or staining that reappears after every heavy downpour
A proper survey goes well beyond a glance at the wall. It should include a full visual inspection inside and out, a check of the roof and gutters above the bay, moisture meter mapping across the affected wall, and, where the source isn’t obvious, a controlled tracer water test to pinpoint the exact entry point. Everything gets documented with photographs and written recommendations, not a verbal guess.
A trustworthy quotation sets out phased remedial works clearly, whether that’s flashing replacement, roof membrane repair, or replastering, along with realistic timescales and a written guarantee on the workmanship.
Quay Point Plastering builds every job around this survey-first model: diagnose thoroughly, document the findings, then quote against a defined damp and timber survey rather than guessing at treatment. That distinction matters when you’re trying to work out whether a quote is solving the actual problem or just papering over it.
Permanent repairs: fixing the cause and replastering properly
Long-term fixes depend entirely on what the survey finds, but they generally fall into a few categories: flashing replacement, roof membrane repair, gutter and downpipe rectification, resealing with proper exterior-grade sealants, and timber repair where rot has taken hold. Coordinating flashing and membrane work together avoids the trap of patching one fault while another keeps feeding moisture into the wall.
Replastering is often the step people skip, and it’s usually the reason damp comes back. Old plaster contaminated by hygroscopic salts pulls moisture straight from the air, even once the original leak or rising damp source has been fixed. Removing and replacing that plaster, rather than just redecorating over it, is what actually stops the cycle.
- Simple exterior repairs (resealing, gutter clearance) can often be done in a day
- Flashing or roof membrane replacement typically adds one to three days
- Replastering after salt contamination usually needs several weeks for the new plaster to dry properly before decorating
Costs vary widely depending on the extent of the damage and whether timber repair is involved, so an accurate figure only comes after a proper survey rather than a phone estimate.
How to stop damp coming back under your bay window
Prevention is far cheaper than repair, and most of it takes minutes rather than hours.
- Check gutters, downpipes, and flashing every autumn, before leaves and debris cause a winter blockage.
- Inspect exterior sealant annually and top up anywhere it’s cracked or pulled away from the frame.
- Keep trickle vents open year-round, even in winter, and run extractor fans in adjacent kitchens or bathrooms.
- Avoid blocking airflow by pushing furniture too close to the bay wall, and use a dehumidifier if the room struggles with condensation.
- Book a professional inspection every three to five years, or sooner after a severe storm, since scheduled checks catch flashing and gutter failures before they turn into plaster damage.
Why diagnosis matters more than the fix itself
Most damp problems under bay windows don’t fail because the wrong treatment was applied. They fail because the wrong problem was treated. A silicone bead over a cracked seal does nothing for salt-contaminated plaster underneath, and a dehumidifier won’t touch a leaking flashing joint three feet above it.
The pattern we see repeatedly is treatment without diagnosis: someone patches the visible symptom, the damp reappears within a season or two, and the homeowner assumes the problem is “just damp houses” rather than a specific, findable fault. It rarely is. A wall that’s wet in January and dry in July is telling you something different from a wall that’s wet regardless of season. Reading that correctly, before spending money on a fix, is what separates a permanent repair from an expensive guess.

Book a survey-led fix with Quay Point Plastering
Quay Point Plastering gives you a documented answer before a single repair is booked, rather than a quote based on a five-minute look at a damp patch. Homeowners across Dorset, Hampshire, and Wiltshire get a proper inspection using moisture meters and visual checks, a written scope of work, and a guarantee on the finished job, so you know exactly what’s being fixed and why.

Booking starts with a damp and timber survey, where a surveyor checks the bay itself, the roof and flashing above it, and the wall base for rising damp before recommending anything. If the report points to a leak, the penetrating damp investigation page explains what that repair route typically involves. Once the cause is confirmed, you’ll receive a clear, phased scope of work and a written guarantee, so the job addresses what’s actually happening in your wall rather than what’s easiest to sell.
Sources
- New England Metal Roof — Bay window roof repair and maintenance
- Inspectapedia — Cabinet mold contamination