
Damp in solid walls: causes, diagnosis and fixes
Damp in solid walls: causes, diagnosis and fixes
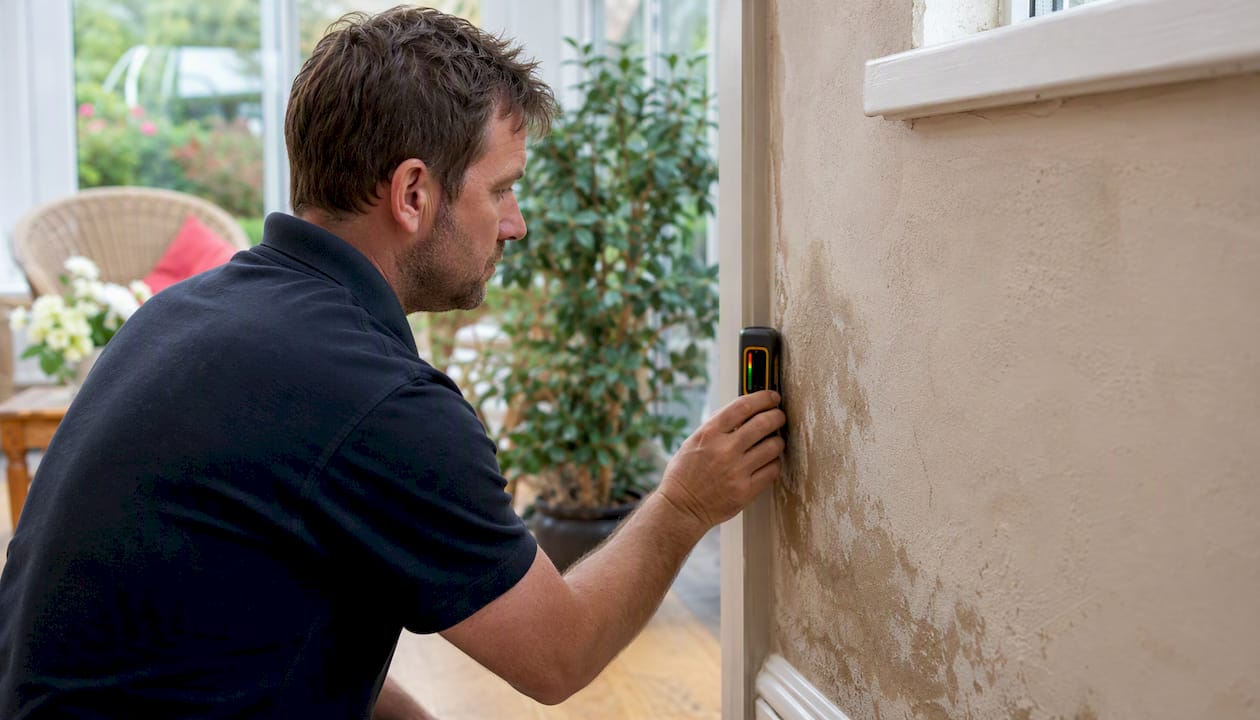
If you can see damp on a solid wall, check the gutters and roofline before you touch the plaster. Most damp in solid walls starts outside, with water getting in through a fault you can spot from ground level with a pair of binoculars. Treating the symptom indoors, whether that’s a fresh coat of paint or a bag of DPC cream, rarely fixes anything if the cause is still active behind the wall.
Take a few photos of the affected area now, noting the height of any tide-marks and whether the patch grows after rain. Check whether the gutter above the damp patch is overflowing or blocked, since a leaking joint is one of the most common triggers we see on site. Feel the wall: is it genuinely wet, or just cold and slightly clammy, which points more towards condensation than penetrating damp?
- Photograph the affected wall, inside and out, including the roofline directly above it
- Check gutters, downpipes and any nearby render or pointing for obvious cracks
- Note whether the damp worsens after rain or stays constant regardless of weather
- Avoid painting over the patch or stripping plaster until someone has diagnosed the cause
Pro Tip: Don’t rush to buy a moisture meter and start testing yourself. Meters give useful readings only when interpreted alongside salt tests, wall construction, and the pattern of the damp. Used alone, they mislead more homeowners than they help.
A proper diagnosis matters because internal wall insulation, replastering or redecoration applied over an unresolved damp problem tends to trap moisture rather than solve it. That’s the point where many well-intentioned repairs go wrong.
Key Takeaways
Fixing damp in solid walls permanently requires diagnosing the actual cause first, repairing the external fabric, allowing full drying, and only then finishing with breathable materials.
| Point | Details |
|---|---|
| Diagnose before treating | Book a survey-led inspection to identify penetrating damp, condensation or rising damp before any repair begins. |
| External defects come first | Fix gutters, render and pointing at roof level down, since most solid-wall damp starts outside. |
| Use DPC sparingly | Chemical damp-proof courses only address genuine rising damp, not penetrating damp or condensation. |
| Let walls dry fully | Drying can take one to twelve months depending on wall thickness before permanent finishes go on. |
| Choose breathable IWI materials | Favour vapour-open, capillary-active insulation and finishes to avoid trapping moisture in solid walls. |
| Quay Point Plastering | Offers survey-led damp diagnosis with documented findings, a defined scope of work and written guarantees across Dorset, Hampshire and Wiltshire. |
Table of Contents
- How to identify damp in solid walls: visible signs and simple checks
- Why solid walls go damp: penetrating, rising, condensation and salts
- What does a proper damp survey involve?
- How to fix damp in solid walls: the correct repair sequence
- Internal wall insulation and solid walls: avoiding moisture traps
- Drying, redecoration and realistic timescales
- Preventing damp in masonry: a maintenance checklist
- When to call a specialist for damp in solid walls
- What does fixing damp in solid walls typically cost?
- Authoritative guidance and resources
- The conventional damp advice gets the order wrong
- Get a survey-led diagnosis instead of a guess
- Frequently asked questions
- Sources
How to identify damp in solid walls: visible signs and simple checks
Damp in solid walls announces itself differently depending on what’s causing it, and reading those signs correctly saves you from paying for the wrong repair. A tide-mark low on the wall, rising to a fairly consistent height across a room, often gets blamed on rising damp. In practice, that same pattern is frequently penetrating damp tracking down from a defect higher up, or condensation pooling where air circulation is poorest.
Here’s what to look for and what it typically points towards:
- Localised, high-level staining near a chimney, window head or parapet usually indicates penetrating damp from a specific external fault rather than rising groundwater.
- White, fluffy or crystalline deposits on the plaster surface are salt efflorescence, a strong sign that dissolved salts have travelled through the wall and crystallised as it dries.
- Black spotting on cold external walls, especially behind furniture or in corners with poor airflow, is the classic signature of condensation rather than a fabric moisture problem.
- Soft, crumbling plaster that stays damp for weeks regardless of weather suggests hygroscopic salts holding moisture in the wall long after the original leak.
- Bulging or peeling paintwork flags a wall that isn’t breathing properly, often because a previous repair used cement render or vinyl paint over solid brick or stone.
A cold, faintly damp feel to the wall confirms moisture is present, but it doesn’t tell you where it came from, and homeowner signs including cold walls, mould growth and salt efflorescence need proper investigation before any insulation or redecoration goes ahead. Touch tests and simple hygrometer readings are useful starting points, not a diagnosis in themselves.
Record what you find rather than acting on it. Take dated photographs, mark the extent of visible staining, and note recent weather, especially heavy rain in the days before symptoms appeared. Resist the urge to hack off plaster to “see how far it goes.” Removing plaster before a surveyor has assessed the wall can spread contaminated material, disturb salt deposits, and destroy evidence a specialist would otherwise use to pinpoint the source.
If you own or manage rented property, don’t treat visible mould as cosmetic. Government guidance on rented housing sets out that damp and mould pose genuine health risks to occupants and should be treated as a hazard requiring action, not just decoration.
Why solid walls go damp: penetrating, rising, condensation and salts
Solid walls, whether brick, stone or a mix of both, behave very differently from a modern cavity wall, and that difference explains why so many damp diagnoses in older properties get it wrong. A cavity wall has a built-in gap to stop water crossing from outside to inside. A solid wall has no such barrier, so its performance depends entirely on the condition of its external skin and its ability to absorb and release moisture through breathable materials.
Penetrating damp happens when water gets through the external fabric via a specific defect rather than rising from the ground. Typical culprits include:
- Cracked or missing render allowing rain to soak into the masonry behind it
- Perished mortar joints that no longer shed water
- Blocked or leaking gutters and downpipes overflowing directly onto the wall
- Failed flashings around chimneys, parapets or window heads
- Damaged or poorly sealed window cills letting water track inward
This is why an external inspection from roof level down is the starting point for any credible damp diagnosis, rather than an afterthought, since the fix usually lies outside, not inside.
Rising damp is real but far rarer than most homeowners believe. Groundwater rises through capillary action in the wall base, typically no higher than a metre, and produces a fairly even tide-mark with salt staining at the leading edge. Specialists who carry out proper moisture mapping frequently find that what looks like rising damp is actually penetrating damp or condensation once they trace the pattern back to its source, which is exactly why unnecessary chemical damp-proof course injections remain such a common wasted expense.

Condensation forms when warm, moist internal air meets a cold surface, most often on solid external walls with poor insulation, in bathrooms, kitchens or bedrooms with limited ventilation. It’s distinguishable by black mould spotting rather than tide-marks, seasonal worsening in colder months, and a strong link to lifestyle factors like drying laundry indoors or under-heating a property.
Salt or hygroscopic damp complicates all of the above. Even after the original moisture source is fixed, salts left behind in the plaster continue to draw in atmospheric moisture, especially in humid weather, keeping a wall feeling damp long after the leak has stopped. Distinguishing genuine ongoing moisture ingress from residual salt contamination is one of the main reasons DIY diagnosis so often gets the wrong answer, and why a specialist will usually take a plaster sample for salt analysis rather than rely on a meter reading alone.
What does a proper damp survey involve?
A credible damp survey follows a defined sequence, and if a surveyor skips straight to quoting for a damp-proof course without doing the groundwork below, that’s a warning sign worth taking seriously.
- External walk-around from roof level down. This covers roof coverings, flashings, gutters, downpipes, render condition, pointing, window and door seals, and ground levels against the wall. Most penetrating damp traces back to a defect found at this stage.
- Internal moisture mapping. A calibrated moisture meter is used across the affected wall and surrounding areas to establish the pattern and extent of elevated readings, not just a single spot check.
- Salt testing. Plaster or masonry samples are analysed for nitrates and chlorides, which helps confirm whether rising groundwater, contamination from previous treatments, or hygroscopic salts are driving the readings.
- Timber inspection. Any skirting, joists or embedded timbers near the damp area get checked for decay, since prolonged dampness against timber invites wet rot or, in the worst cases, fungal decay that spreads well beyond the original wet patch.
- Thermal imaging or further lab analysis, used selectively where the pattern is unclear, cold bridging is suspected, or a hidden leak needs pinpointing before opening up the wall.
A robust diagnostic workflow starts with that external walk-around, moves to moisture mapping, and only uses invasive probes where genuinely necessary, since indiscriminate drilling or tanking without clear evidence of capillary rise tends to cause more disruption than it resolves.
It’s worth understanding what a moisture meter can and can’t tell you. A surface reading on a solid wall is affected by plaster type, embedded metal, salt contamination and even recent decorating. Read in isolation, a high number means very little. Read alongside salt testing, wall construction and the visual pattern of the damp, it becomes genuinely useful.
Pro Tip: Ask to see the moisture map, not just the final number. A one-line reading tells you almost nothing; a plotted pattern across the wall tells you where the water is actually entering.
Insist on a written report that names the root cause, not just the symptom, and sets out a defined scope of work with realistic timescales for drying and repair. If a report jumps straight from “damp detected” to “recommend damp-proof course, £X,” push back and ask what evidence rules out penetrating damp or condensation first.
How to fix damp in solid walls: the correct repair sequence
Fixing damp in a solid wall works best in a fixed order, and skipping steps is where most repairs fail. Source control comes first, external repairs second, drying time third, and only then compatible internal finishing.
Step one: stop the water getting in. Nothing indoors will hold until this happens. That usually means:
- Clearing and repairing gutters, downpipes and flashings
- Repointing perished mortar joints with a lime mortar that matches the wall’s breathability, never a hard cement mix
- Repairing or replacing cracked render, again favouring breathable, lime-based systems over cement render on older solid walls
- Fixing failed cill seals or replacing damaged window details that let water track inward
Step two: consider whether a damp-proof course is genuinely needed. A chemical or physical DPC has a specific, narrow job: stopping capillary rise from the ground. It does nothing for penetrating damp, and injecting one into a wall where the real problem is a leaking gutter is money wasted twice over, since the original damp keeps coming and the wall now also has unnecessary drilling damage. DPC injection is appropriate only where genuine rising damp has been confirmed through the diagnostic process above.
Step three: allow the wall to dry before finishing it. This is the step most commonly skipped, usually out of impatience, and it’s the single biggest cause of repeat call-outs for damp problems that “never really went away.”
Step four: choose internal finishes that let the wall breathe. Lime plaster, breathable renovation plasters and mineral or clay-based paints all allow residual moisture to migrate out through evaporation rather than trapping it behind an impermeable layer. Gypsum plaster skimmed directly onto a damp wall, or vinyl silk paint applied too soon, both create a barrier that pushes moisture sideways or upwards to reappear somewhere else in the wall.
Common mistakes worth naming directly, because they crop up constantly:
- Painting over a fresh repair immediately. Trapped moisture behind fresh paint often reappears within weeks as bubbling or a new damp patch nearby.
- Rendering in cement over an old lime-built wall. This is one of the most frequent causes of long-term recurring damp in period properties, because the hard, impermeable render stops the wall evaporating moisture the way it was designed to.
- Treating salt-contaminated plaster with a standard skim coat. Salts will migrate through most conventional plasters and reappear on the surface within months unless a salt-resistant render or a membrane system designed for the purpose is used.
- Assuming a DPC fixes everything. As covered above, it addresses one specific mechanism and nothing else.
Conservation guidance from Historic England is blunt on this point: removing breathable lime render or introducing impermeable materials is a common root cause of long-term damp problems in older solid-wall buildings, not a one-off risk. Once dry, walls can take a genuinely long time to reach equilibrium: depending on thickness and permeability, drying can take from a few weeks to over a year or longer, which is why patience at the finishing stage matters as much as getting the earlier repairs right.
Internal wall insulation and solid walls: avoiding moisture traps
Internal wall insulation changes how a solid wall manages temperature and moisture, and getting the design wrong is one of the most expensive mistakes a homeowner can make in the name of energy efficiency. Insulating the inside face of a solid wall pushes the dew point further into the wall’s structure, meaning the masonry behind the insulation runs colder and wetter than it did before. If moisture already existed in that wall, or the insulation traps it there, the result is often worse than doing nothing.
The guiding principles specialists follow are consistent across UK retrofit guidance:
- Resolve any existing damp problem before insulation goes anywhere near the wall
- Favour vapour-open, capillary-active materials such as wood fibre or calcium silicate boards over foil-backed or closed-cell foam systems
- Avoid internal vapour barriers on solid walls in most scenarios, since adding a vapour barrier inside the insulation build-up frequently causes more harm than good by trapping moisture against the masonry
- Consider external insulation instead where the wall’s appearance and planning constraints allow it, since it keeps the masonry warm and dry rather than cold and wet
Hygrothermal research backs this up with modelling rather than opinion. Simulations of internally insulated masonry assemblies show that thinner, moisture-open insulation systems generally carry lower moisture risk than thicker, closed systems, particularly under the wetter, warmer conditions UK climate projections anticipate. Thinner isn’t a compromise; in solid-wall retrofit, it’s often the safer engineering choice.
Retrofit guidance is unambiguous that moisture-open, capillary-active materials should be the default choice for internal wall insulation on solid walls, and that adding internal vapour barriers can increase, not reduce, moisture risk.
For anyone insulating a period property specifically, the Historic England and SPAB position goes further: preserving the wall’s ability to breathe matters as much as hitting a thermal performance target, because sealing an old solid wall with modern impermeable materials tends to store up decay problems for years down the line. Ventilation upgrades and targeted draught-proofing sometimes deliver a better balance of comfort and risk than full-wall insulation, especially where the wall’s damp history is uncertain.
Drying, redecoration and realistic timescales
Patience is the hardest part of fixing damp in solid walls, and it’s the stage where most homeowners lose confidence in an otherwise correct repair. Wall thickness, the permeability of the plaster and masonry, and how consistently the property is heated all affect how quickly a repaired wall actually dries out.
- Thin, well-heated internal walls can dry within a matter of weeks once the external cause is fixed
- Thick solid stone or brick walls, especially in unheated rooms, can take several months
- Impervious paints, cement renders or vinyl wallcoverings applied too early will trap residual moisture and can extend drying indefinitely, sometimes reintroducing the original symptoms
- Use moisture-tolerant primers or breathable, water-based temporary paints while the wall finishes drying, rather than committing to a final decorative finish too soon
Monitor progress with repeat moisture meter readings over several weeks rather than a single check. A consistent downward trend, alongside visual signs like the wall feeling warmer to the touch and staining fading rather than spreading, is a far more reliable sign-off than one reading on one day.
Preventing damp in masonry: a maintenance checklist
Most repeat damp problems trace back to the same handful of maintenance gaps, and a modest annual routine prevents the vast majority of them.
- Check gutters and downpipes twice a year, clearing leaves and debris before autumn and again after winter storms, since a blocked gutter is still the single most common cause of new penetrating damp.
- Inspect pointing and render every few years, looking for hairline cracks or crumbling mortar before they become a route for water ingress.
- Check roof flashings and chimney pointing, ideally from the ground with binoculars, after any significant storm.
- Keep ground levels and paving below the level of any damp-proof course, since raised flower beds or resurfaced patios frequently bridge a perfectly functional DPC and let groundwater track straight into the wall.
- Improve drainage away from external walls, ensuring gullies aren’t blocked and that surface water isn’t pooling against the base of the building.
- Ventilate consistently, using extractor fans in kitchens and bathrooms and opening windows briefly after cooking, showering or drying laundry indoors.
- Maintain reasonably consistent background heating through colder months rather than letting rooms swing between cold and briefly heated, which encourages condensation on solid walls.
- Walk the property each spring and autumn, noting anything new: fresh staining, peeling paint, or a damp smell that wasn’t there before.
None of this requires specialist tools, just a regular look at the parts of the building that quietly fail over years rather than weeks.
When to call a specialist for damp in solid walls
Some damp problems are genuinely manageable with better ventilation and a bit of maintenance. Others need a professional survey before you spend another penny on redecorating. Call a specialist when damp keeps returning after rain despite obvious repairs, when you find soft or crumbling timber near a damp wall, when mould covers a significant area rather than a small patch, or when you’re buying a period property and need clarity before committing.
A survey-led approach, the kind Quay Point Plastering has built its reputation on over more than 35 years working across Dorset, Hampshire and Wiltshire, starts with diagnosis, not a quote for treatment. That means:
- Documented findings from the external and internal inspection, not a verbal guess
- A clearly defined scope of work tied to the actual cause, not a generic damp-proofing package
- Written guarantees on the workmanship carried out
- Aftercare and follow-up, since drying and settling can take months after the initial repair
When comparing quotes, ask each surveyor what evidence supports their diagnosis, whether salt testing was carried out, and exactly what the guarantee covers if the damp reappears.
Pro Tip: Ask any surveyor to explain their diagnosis in one sentence before you agree to any work. If they can’t point to a specific defect and a specific piece of evidence, ask more questions before you sign anything.
What does fixing damp in solid walls typically cost?
Costs vary widely depending on the cause, the extent of the damage, and access to the affected areas, but rough bands help with planning. A full damp and timber survey typically runs from a few hundred pounds upward, scaling with property size and complexity. Guttering and minor roof repairs often sit in the low hundreds, while repointing and render repair costs climb with the area affected and whether scaffolding is required.
DPC injection, where genuinely justified, is usually priced per linear metre, and internal wall insulation preparatory works, including plaster removal, salt neutralisation and breathable replastering, add further cost depending on room size.
Several factors push costs up beyond the basic estimate:
- Scaffolding or difficult access, particularly on taller or terraced properties
- Timber decay discovered once plaster is removed, which widens the scope of repair
- Listed building or conservation area constraints requiring specific materials or approvals
- The extent of salt contamination found during testing
A thorough professional diagnosis upfront, even though it adds a small cost before any repair work begins, consistently saves money by avoiding treatments aimed at the wrong cause. When comparing quotes, check that any written guarantee explicitly covers workmanship, not just materials, and ask what happens if damp reappears within the guarantee period.
Authoritative guidance and resources
For further reading, the Property Care Association’s Code of Practice sets the UK diagnostic standard, while Historic England, the Centre for Sustainable Energy and Energy Saving Trust cover insulation and retrofit risk in detail.
The conventional damp advice gets the order wrong
Most damp guidance online still leads with treatment: which cream to inject, which membrane to use, which paint blocks moisture. That’s backwards. The evidence consistently points the other way. Specialists using proper moisture mapping and salt testing routinely find that what homeowners assumed was rising damp turns out to be a blocked gutter or a cold bathroom wall with poor ventilation.
The retrofit research is arguably even more important than the diagnosis question, and it gets far less attention. Insulating a solid wall without resolving existing moisture first, or without choosing vapour-open materials, doesn’t just fail to help. It can actively push a manageable damp problem into structural timber decay. That risk rarely makes it into general home improvement advice, which tends to treat insulation as a simple upgrade rather than a change to how a wall’s entire moisture balance works.
If you take one thing from this, prioritise the survey over the fix. Every homeowner wants the quick answer, but the wall doesn’t care how urgently you want it dry. It cares about evidence.
Get a survey-led diagnosis instead of a guess
Quay Point Plastering exists precisely because so many damp problems get treated before they’re properly understood, and that approach costs homeowners money without solving anything. Unlike a quote based on a quick look and a guess, every job starts with a documented inspection covering the external fabric, internal moisture mapping and salt testing where needed, giving you a written report with a defined scope of work before any repair begins.

That matters most if you’re dealing with damp that keeps returning after rain, mould that won’t shift with cleaning, or you’re weighing up internal wall insulation and want to know the wall is genuinely dry first. With over 35 years working across Dorset, Hampshire and Wiltshire, and written guarantees on workmanship, you get a clear answer rather than a repeat call-out six months later. If you’re ready to find out what’s actually causing your damp, book a specialist damp survey and get a documented diagnosis before you spend on repairs.
Frequently asked questions
Is damp in solid walls always caused by rising damp? No. Genuine rising damp is far less common than most people assume. Penetrating damp from external defects and condensation from poor ventilation account for the majority of cases specialists diagnose, which is why a proper survey matters more than an assumption.
Can I fix damp in solid walls myself? External maintenance like clearing gutters and repointing small cracks is manageable for a confident DIYer. Diagnosing the cause, interpreting moisture readings and choosing the right internal finish generally needs professional input, particularly where salt contamination or timber decay is involved.
How long does it take for a solid wall to dry out after a damp repair? It depends heavily on wall thickness and material permeability, but drying can realistically take anywhere from a few weeks to over a year for thick, poorly heated walls. Redecorating too early is one of the most common causes of damp seemingly “coming back.”
Should I add internal wall insulation if my solid wall has had damp before? Only once the underlying moisture problem has been fully resolved and confirmed dry. Insulating over unresolved damp, or using the wrong materials, can trap moisture against the masonry and make the problem significantly worse.
What’s the difference between penetrating damp and rising damp? Penetrating damp enters through a specific external defect, such as a cracked render or leaking gutter, and can appear at any height on the wall. Rising damp comes from groundwater and is limited to roughly a metre from the base, with a fairly even tide-mark and salt staining at its edge.
Sources
- Code of Practice: Control of Dampness in Buildings — Property Care Association
- Insulating walls in historic buildings — Historic England
- Retrofit: Internal Wall Insulation — best practice guidance (IWI guidance)
- Solid wall insulation - internal - Centre for Sustainable Energy
- Solid wall insulation — Energy Saving Trust