
Damp rising through a concrete slab: diagnosis and repair
Damp rising through a concrete slab: diagnosis and repair
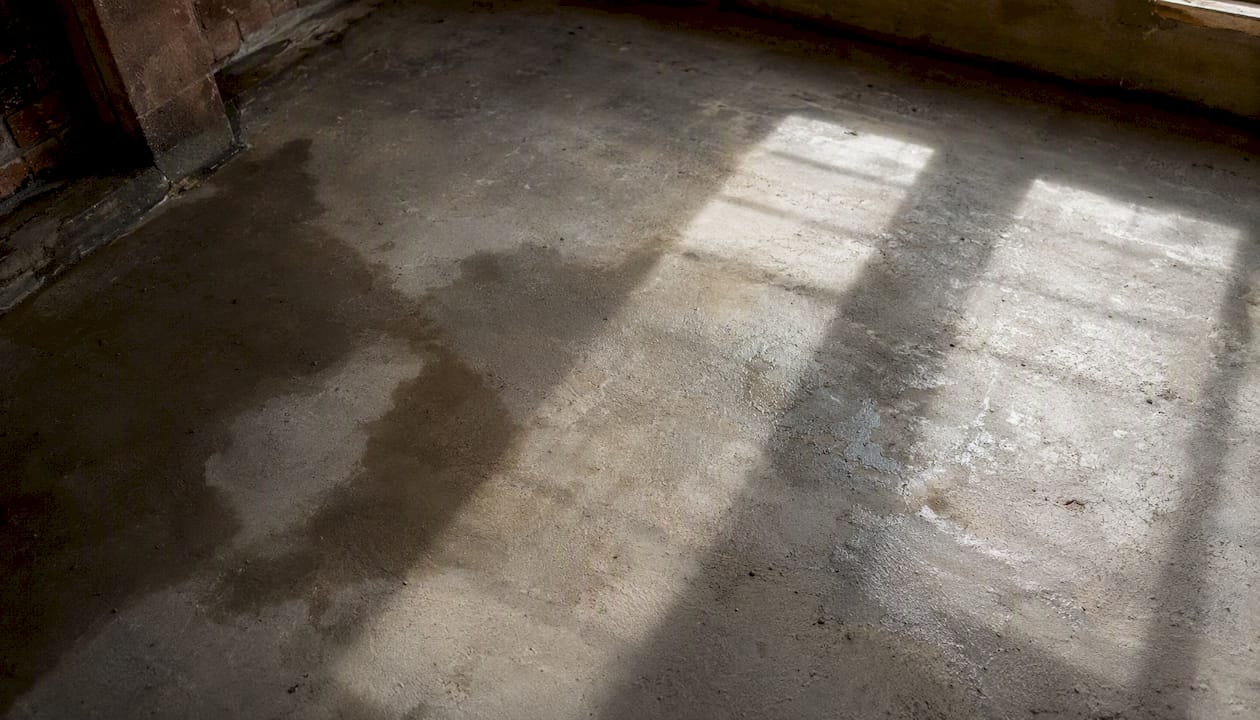
If moisture is appearing through your concrete slab, the single most important first step is to get a survey-led diagnosis and proper moisture testing before spending anything on repairs. Applying a coating or laying new flooring over an undiagnosed problem is one of the most common and costly mistakes in property maintenance. Concrete slab damp is not one problem with one solution. It is a symptom that can stem from vapour emission, hydrostatic pressure, or an active plumbing leak, and each of those requires a completely different remedy.
The three core mechanisms are:
- Moisture vapour emission (MVE): Water vapour diffuses upward through the slab from residual pour moisture or a high ambient water table, without liquid water being present.
- Hydrostatic pressure: Liquid groundwater is forced through cracks, joints, or pores by pressure from below or the sides. This is a fundamentally different problem to MVE.
- Plumbing leaks: A pipe running beneath or through the slab is leaking, producing localised or spreading wet patches that are often mistaken for rising damp.
Immediate actions to take now:
- Stop any floor covering installation immediately.
- Photograph all visible damp patches, edge staining, adhesive failure, and any external ground levels or drainage gullies near the affected area.
- Check visible plumbing fixtures and ask whether any recent work was done under or near the slab.
- Do not apply decorative paints or topical coatings as a long-term fix — they will not hold against hydrostatic pressure and will fail within months.
Pro Tip: Request ASTM F2170 in-situ relative humidity testing rather than a surface moisture meter reading if you are planning to lay moisture-sensitive flooring. Surface readings can be dry while the slab interior remains saturated.
Key takeaways
Survey-led diagnosis with ASTM F2170 in-situ RH testing is the essential first step for any concrete slab damp problem, because the correct remedy depends entirely on identifying the cause.
| Point | Details |
|---|---|
| Stop installation immediately | Do not lay flooring over a damp slab — photograph evidence and halt works until testing is complete. |
| Identify the mechanism first | MVE, hydrostatic pressure, and plumbing leaks each require a different remedy; a surface meter cannot distinguish between them. |
| Request F2170 testing | In-situ RH probes at slab depth are the reliable, predictive method for flooring decisions; surface readings mislead. |
| Fix leaks and drainage before treating | Resolve active leaks and external drainage issues before applying any moisture suppression or waterproofing system. |
| Quaypointplastering survey-first service | Quaypointplastering provides documented diagnosis, F2170 testing, and written guarantees across Dorset, Hampshire, and Wiltshire. |
Table of Contents
- Why does moisture rise through concrete slabs?
- What are the signs that damp is coming up through the floor?
- Which tests do professionals use to measure slab moisture?
- Which remediation methods actually fix slab moisture?
- Why does a survey-first approach prevent wasted work?
- How long does a slab take to dry, and when should you re-test?
- What do the main remediation options cost in the UK?
- How do you prevent repeat problems and prepare for new flooring?
- A surveyor’s perspective on what actually goes wrong
- Quay Point Plastering: survey-led diagnosis and guaranteed repairs
- Sources
Why does moisture rise through concrete slabs?
Moisture entering a slab commonly stems from capillary rise, sub-slab drainage failure, plumbing leaks, residual pour moisture, or vapour transmission — and each mechanism requires a different remediation approach. Understanding which one you are dealing with is not a detail; it determines whether the repair works at all.
The five common causes
Capillary rise and a high water table. Concrete is porous. Where the water table sits close to the underside of the slab, moisture wicks upward through the capillary network within the concrete matrix. This tends to produce widespread, diffuse dampness rather than a single wet patch.
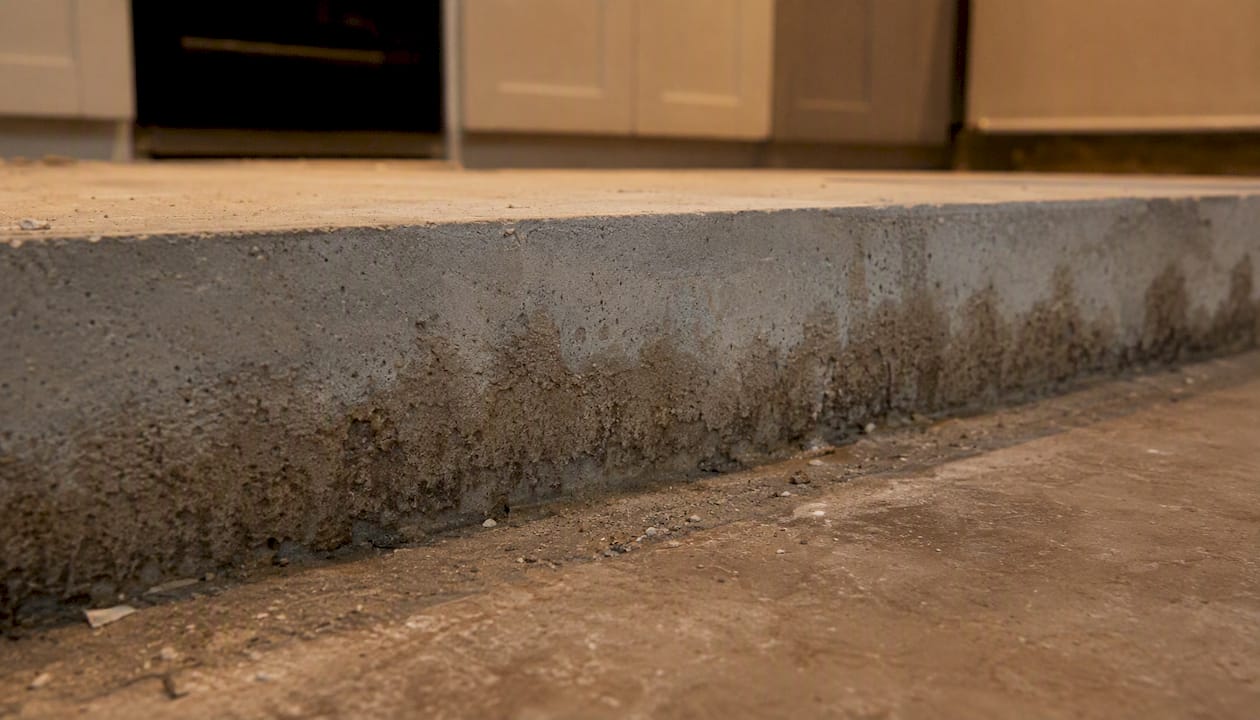
Absent or damaged sub-slab DPM. A correctly installed damp proof membrane (DPM) is the primary barrier between ground moisture and the slab. UK guidance specifies a minimum 300 micron polythene membrane meeting BS EN 13967 for most residential ground-bearing slabs, with sealed laps and upstands at the perimeter. Where the membrane was omitted, punctured during construction, or has degraded, moisture moves freely into the slab. A slab on its own is not an adequate moisture barrier.
Poor sub-slab drainage or external grading. Where ground levels around the building have been raised by landscaping or paving, or where gullies and soakaways are blocked, water accumulates against and beneath the slab. This can convert a previously dry floor into a persistently damp one without any change to the slab itself. You can read more about damp appearing after external water ingress and how grading affects internal conditions.
Plumbing leaks under or through the slab. A slow leak from a buried supply or waste pipe can saturate the sub-base over weeks before it becomes visible at the surface. The damp patch is typically localised and may worsen after water use rather than after rainfall.
Residual moisture from the original pour. Concrete drying behaviour depends on mix design, water–cement ratio, slab thickness, curing conditions, and ambient environment. A slab poured with too high a water–cement ratio, or one that was covered before adequate drying, can emit moisture vapour for months or years.
MVE versus hydrostatic pressure versus condensation
Moisture vapour emission (MVE) involves vapour moving through the slab without liquid water being present. Hydrostatic pressure involves actual liquid water being forced through the structure. The distinction matters because topical epoxy moisture suppression systems are designed for MVE — they are not rated for hydrostatic conditions. Applying a vapour-suppression coating over a hydrostatic pressure problem is a common and expensive mistake. Condensation, by contrast, forms on the surface of the slab or floor finish when warm humid air meets a cold surface — it is not coming from below at all.
Pro Tip: If a topical paint or damp-proof paint has been applied previously and has blistered or delaminated, that is a strong indicator of hydrostatic pressure rather than MVE. Coatings fail in tension when liquid water pushes from behind.
What are the signs that damp is coming up through the floor?
Observable signs give you and a surveyor a starting point before any testing begins. The following are the most reliable indicators of slab-borne moisture:
- Fresh or recurring damp patches at floor edges and wall-floor junctions, particularly in ground-floor rooms with no above-ground water source.
- Adhesive failure under vinyl or ceramic tiles — the tile lifts cleanly, and the adhesive on the back of the tile or the slab surface appears wet or discoloured.
- Bubbling, blistering, or staining under sheet vinyl or LVT, especially where the pattern is patchy rather than uniform.
- White salt encrustations (efflorescence) on the slab surface or at the base of walls — salts are carried upward by moisture and deposited as the water evaporates.
- Damp patches that dry out temporarily and then return, particularly after wet weather or periods of high groundwater.
- Pooling or wet areas that reappear within days of being dried and cannot be traced to a surface spill or condensation.
What to photograph before the surveyor arrives
Good photographs save time and help the surveyor target their testing. Capture:
- Floor-edge junctions and skirting board bases, particularly where staining or lifting is visible.
- The underside of any tile or vinyl section you can safely lift, showing the adhesive condition.
- Any standing water or wet patches, with a ruler or coin for scale.
- External ground levels, paving, and drainage gullies adjacent to the affected room.
- Any plumbing fixtures, stop valves, or pipe runs in or near the affected area.
Is it condensation or slab moisture?
Homeowners commonly misread surface condensation as rising damp. A quick tape test helps: tape a piece of polythene film (roughly 300mm square) to the dry slab surface, seal all four edges with tape, and leave it for 24–48 hours. If moisture appears on the underside of the film (between film and slab), the moisture source is the slab. If moisture appears on the top of the film, it is condensation from the air above. You can also check whether condensation is mimicking rising damp in your property — the symptoms overlap more than most people expect.
Which tests do professionals use to measure slab moisture?
Surface moisture meters give a quick indication but are not reliable for flooring decisions. ASTM F2170 in-situ relative humidity (RH) testing is the preferred, predictive method for assessing concrete slab moisture before flooring installation; ASTM F1869 calcium chloride measures surface emission and can underestimate deeper slab moisture.
| Test | What it measures | Typical pass threshold | Pros | Cons | Best used when |
|---|---|---|---|---|---|
| ASTM F2170 in-situ RH probes | RH at slab depth | ≤75% RH (product-specific) | Predicts in-service conditions; reproducible | Requires 24h equilibration after drilling | Moisture-sensitive flooring; definitive assessment |
| ASTM F1869 calcium chloride (MVER) | Surface vapour emission over 60 hours | ≤3–5 lbs/1,000 sf/24 h | Simple; widely understood | Measures surface only; underestimates deep moisture | Quick site screening; where F2170 is not specified |
| Tramex hood / surface equilibrium | Surface RH approximation | Varies by meter | Non-destructive; fast | Affected by surface temperature; not predictive | Initial survey screening |
| Handheld moisture meter (resistance) | Electrical resistance in surface layer | Varies by material | Very fast; portable | Misleading on dense or contaminated surfaces | Comparative mapping only |
Thresholds are product-specific and must always be confirmed against the flooring manufacturer’s technical data sheet (TDS). Hardwood flooring generally requires relatively low RH, while some epoxy adhesive systems can tolerate higher humidity with appropriate primers.
Probe placement and why surface readings mislead
The number of probes required depends on the floor area — industry practice is typically one probe per 1,000 square feet as a minimum, with additional probes near edges, joints, and any suspected problem areas. Surface dryness can be misleading: moisture deep in a slab can take weeks or months to equilibrate to the surface, which is why a surface meter reading of “dry” does not confirm the slab is ready for flooring.
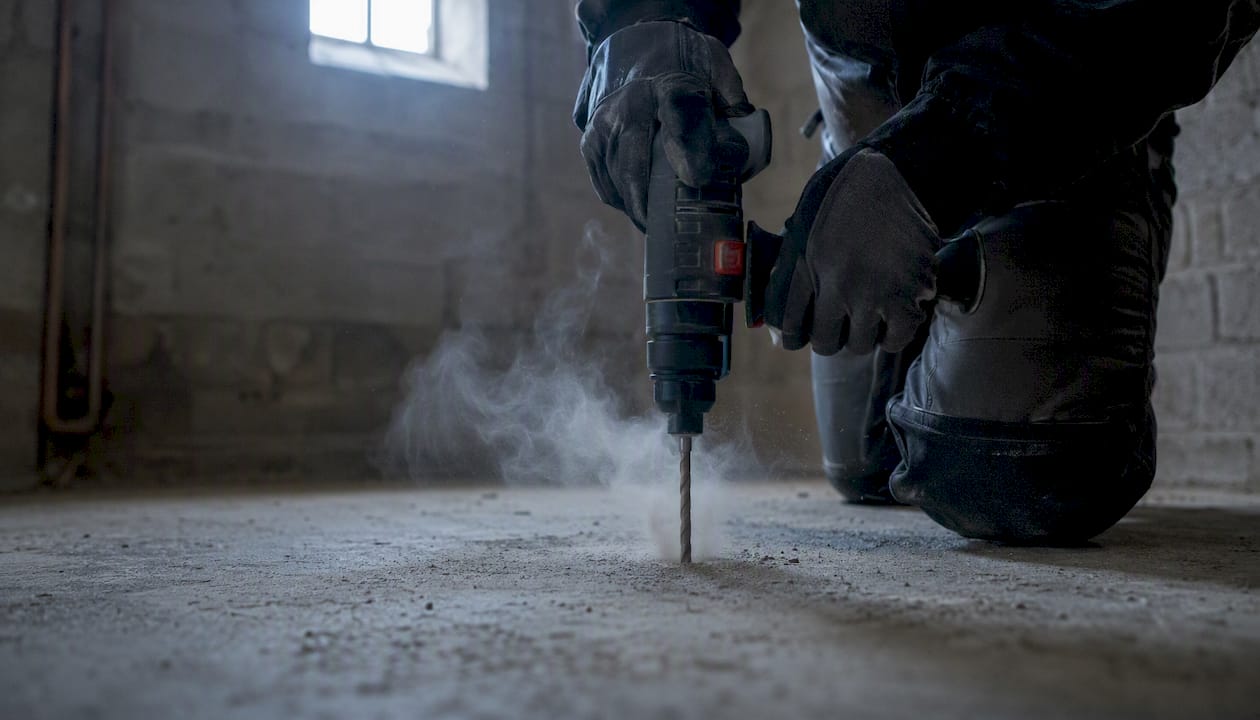
Pro Tip: HVAC must be operating at normal service conditions for at least 48 hours before F2170 testing begins. Testing a slab in an unheated, unventilated building produces readings that do not reflect what will happen once the building is occupied and heated.
Which remediation methods actually fix slab moisture?
The correct solution depends on the cause. Five common field causes for moisture reaching a floor surface are: too high a water–cement ratio, insufficient drying time before installation, vapour retarder problems, poor drainage, and plumbing leaks. Each maps to a different remediation pathway.
| Solution | Problem it fixes | Suitable situations | Disruption level | Typical time to complete | Follow-up testing / guarantee |
|---|---|---|---|---|---|
| Epoxy/liquid moisture suppression coating | MVE (vapour only) | Above-grade slab; under resilient or tile finishes | Low — overlay, no floor removal | 1–3 days including cure | Re-test RH after cure; manufacturer TDS warranty |
| Slimline overlay DPM membrane | MVE; moderate vapour | Above-grade slab; under timber or resilient finishes | Low — overlay | 1–2 days | Re-test before flooring lay; written guarantee |
| Sub-slab drainage and sump system | Hydrostatic pressure; high water table | Basement or below-grade slab | High — drainage channels, excavation | 3 days depending on area | Post-install RH testing; written guarantee |
| Positive/negative-side tanking | Hydrostatic pressure; basement waterproofing | Below-grade walls and floor | High — surface preparation, possible excavation | 3 days | Inspection and re-test; manufacturer guarantee |
| Plumbing repair | Active leak | Any slab with buried pipework | Moderate — localised break-out | 1–5 days | Pressure test; re-test slab RH after drying |
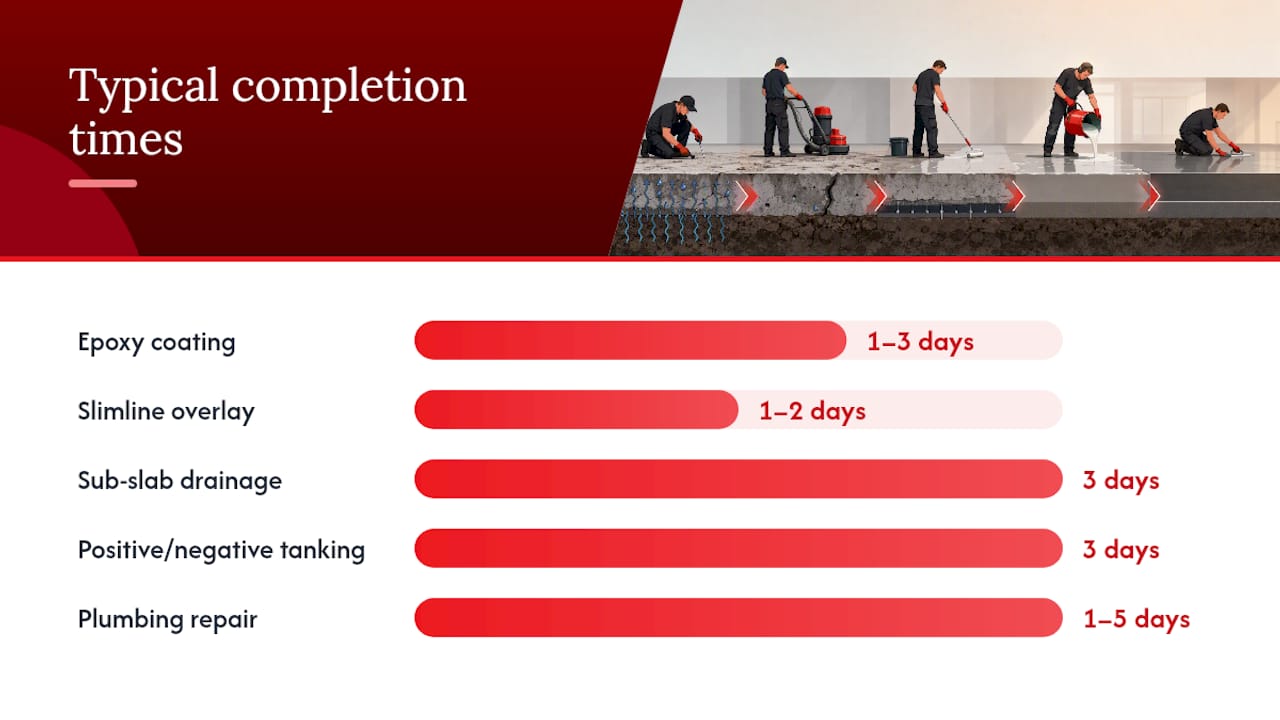
Typical remediation workflow
The order of operations matters as much as the choice of system:
- Identify and repair any active plumbing leaks first.
- Improve external drainage and correct ground levels where grading is directing water toward the building.
- Allow the slab to dry and re-test RH at 3–4 week intervals.
- Apply the appropriate moisture suppression or waterproofing system once the root cause is resolved.
- Re-test before laying any moisture-sensitive floor finish.
Topical decorative paints and non-engineered coatings do not provide reliable protection against slab moisture emission or hydrostatic pressure. Engineered epoxy moisture suppression systems are the appropriate surface mitigation for MVE, and they require correct surface preparation to accept flooring adhesives. Where hydrostatic pressure is confirmed, a drainage or tanking solution is required — no coating will hold.
For slabs where concrete control joints or cracking is present, those joints and cracks must be addressed before any surface system is applied, as moisture will bypass the coating at any unsealed discontinuity.
Why does a survey-first approach prevent wasted work?
Fixing slab dampness without diagnosing the root cause commonly leads to recurring failures and wasted expense. A professional damp survey follows a defined process that produces documented findings rather than assumptions.
What a proper damp survey includes
The process runs in a clear sequence:
- Visual inspection — the surveyor maps all visible symptoms, photographs evidence, and records external conditions including ground levels, drainage, and any recent building works.
- Targeted testing — F2170 in-situ RH probes are placed at appropriate locations and depths, or F1869 calcium chloride tests are set up where agreed. Surface meters are used for comparative mapping only.
- Diagnosis report — the written report includes a site plan showing probe locations, photographs, RH or MVER readings, interpretation of results, and a clear statement of the likely cause or causes.
- Recommended scope of works — the report sets out remediation options with estimated cost, disruption, and timescales, so you can make an informed decision.
- Post-remediation re-test — after works are complete, the same ASTM method is used to confirm the slab has reached an acceptable RH before flooring is installed.
Trust signals to request from any contractor
Before signing a contract for remedial works, ask for:
- Third-party test reports (probe logs, RH readings with timestamps and probe depths).
- Manufacturer technical data sheets (TDS) for any DPM, epoxy, or waterproofing system being specified.
- A written guarantee on workmanship, stating what is covered and for how long.
- Confirmation that post-remediation re-testing using the same ASTM method is included in the price.
A contractor who cannot provide these documents is not in a position to guarantee the outcome.
How long does a slab take to dry, and when should you re-test?
Drying time is one of the most underestimated variables in slab moisture management. Several factors determine how quickly a slab reaches an acceptable RH:
- Water–cement ratio: A wetter mix takes significantly longer to dry. High water–cement ratios are one of the most common field causes of persistent slab moisture.
- Slab thickness: Thicker slabs dry more slowly because moisture must travel further to the surface.
- Admixtures and curing compounds: Some admixtures slow drying; curing compounds applied to the surface can trap moisture.
- Ambient humidity and temperature: Warm, dry, well-ventilated conditions accelerate drying. A cold, unheated building dries very slowly.
- Presence of a sub-slab DPM: A correctly installed DPM prevents groundwater from re-wetting the slab from below. Without one, the slab may never dry to an acceptable level regardless of time.
Recommended re-testing rhythm
- Wait an appropriate curing period after a new pour before the first RH test — often several weeks or more — with many slabs requiring longer drying times.
- Run HVAC at normal service conditions for at least 48 hours before testing.
- If the first test shows RH near but above the threshold, re-test at 3–4 week intervals rather than assuming the slab will continue to dry at the same rate.
- Do not install moisture-sensitive flooring until two consecutive tests, taken at least three weeks apart, show RH within the manufacturer’s specified limit.
Drying timeline to expect: Where excess RH is modest and the sub-slab source has been resolved, 4–8 weeks of active drying with HVAC running can bring many slabs within threshold. Where active groundwater or hydrostatic pressure is present, passive drying will not work — waterproofing or drainage is required before drying can begin.
What do the main remediation options cost in the UK?
Cost and disruption vary considerably depending on the cause and the chosen solution. The following ranges are indicative for UK residential work and should be confirmed with itemised quotations.
- Surface-applied epoxy moisture suppression: Lower cost and minimal disruption. No floor removal required. Suitable only for MVE where the sub-slab source has been resolved. Typically completed in one to three days.
- Slimline overlay DPM membranes: Modest cost, low disruption, and compatible with most floor finishes. Adds a small amount of floor height. One to two days to install.
- Sub-slab drainage channels and sump pump: Moderate to high cost depending on floor area and access. Requires breaking out the perimeter of the slab to install drainage channels. Three to ten days, plus reinstatement of floor finishes.
- Basement tanking (positive or negative side): Higher cost. Requires thorough surface preparation and may involve excavation. Suitable for below-grade spaces with persistent hydrostatic pressure.
- Plumbing repair and slab break-out: Cost depends on pipe location and access. Localised break-out, repair, and reinstatement. Allow additional drying time before re-testing.
What to ask for in any quotation
Request the following in writing before committing to any contractor:
- Scope of works: exactly what is being done and what is excluded.
- Product specification: the system being used, with the manufacturer’s TDS attached.
- Cure times and any restrictions on access during curing.
- Guarantee details: duration, what is covered, and whether it is backed by the manufacturer or the contractor alone.
- Whether post-remediation re-testing is included or charged separately.
- Whether plastering, skirting reinstatement, or floor reinstatement is within the quoted price.
Insurance and claims
Where the cause is a plumbing leak or a construction defect in a relatively new building, the remediation cost may be recoverable through buildings insurance or from the original contractor. Document the condition thoroughly with photographs and test reports before any works begin. Quaypointplastering can assist with insurance claim support and documentation where a leak or defect is suspected.
How do you prevent repeat problems and prepare for new flooring?
Prevention is straightforward when the correct steps are followed at the right stage. Where a slab has been repaired or a new floor is being planned, the following checklist reduces the risk of repeat moisture problems.
- DPM placement: In new builds or full refurbishments, specify a minimum 300 micron polythene DPM to BS EN 13967, laid beneath the slab with sealed laps and upstands at all perimeter walls. Proper DPM installation — sealed laps, protective upstands, and adequate protection during reinforcement placement — costs little at the time of construction but prevents expensive future remediation.
- External drainage: Confirm that ground levels fall away from the building and that all gullies, soakaways, and drainage channels are clear and functional before laying any floor finish.
- DPM protection during construction: Protect the membrane from puncture during reinforcement placement and concrete pour. A damaged DPM is as ineffective as no DPM.
- Adhesive and underlay selection: Use adhesive systems and underlayments that are rated for the confirmed slab RH. Check the flooring manufacturer’s TDS and confirm the adhesive’s RH tolerance before purchase.
- Flooring choice for marginal slabs: Where a slab is borderline and full remediation is not immediately possible, select moisture-tolerant floor coverings rather than hardwood or moisture-sensitive LVT. Confirm the product’s RH limit against your test results.
- Post-repair re-testing: After any remediation, re-test using the same ASTM method before laying new flooring. A single passing result is not sufficient — two consecutive passing tests at three-week intervals give a more reliable picture.
Pro Tip: After remediation, protect the repaired slab surface with a temporary polythene sheet during any reinstatement works (plastering, skirting fixing, decoration). Wet trades introduce significant moisture into the building, which can temporarily raise slab RH and produce a misleading re-test result if testing is done too soon after plastering.
A surveyor’s perspective on what actually goes wrong
The cases we see most frequently in Dorset, Hampshire, and Wiltshire follow a recognisable pattern. A homeowner notices a damp patch, a contractor applies a coating, the coating fails within a year, and the homeowner calls us. By that point, the original evidence has been obscured, the cause is harder to confirm, and the cost of remediation is higher than it would have been at the outset.
The most common root causes in local properties are DPM punctures from subsequent building works (a conservatory base, a new partition wall, or a soil pipe penetration), poor external grading after landscaping or paving, and slow plumbing leaks that went unnoticed for months. None of these are visible without a proper inspection. A surface moisture meter reading tells you that moisture is present — it does not tell you where it is coming from or why.
For property managers balancing cost against tenant disruption, the priority order is clear: fix any confirmed plumbing leak first, then address external drainage, then test the slab before committing to any surface treatment. Choosing an overlay system when hydrostatic pressure is the cause will fail. Choosing full excavation when MVE from a residual pour is the cause is unnecessary and expensive. The test results determine the correct path.
The survey-first approach is not a commercial preference — it is the only way to avoid spending money on the wrong solution.
Quay Point Plastering: survey-led diagnosis and guaranteed repairs
Persistent slab moisture is one of the most misdiagnosed problems in UK property maintenance, and the cost of a wrong first repair is almost always higher than the cost of getting the diagnosis right from the start.

Quaypointplastering provides survey-led damp diagnosis and guaranteed remedial works across Dorset, Hampshire, and Wiltshire. A booked survey includes a full visual inspection, targeted moisture testing (including F2170 in-situ RH probes where appropriate), a written report with probe locations and readings, a recommended scope of works with itemised costs, and a written guarantee on all remedial work. Post-repair re-testing and full reinstatement services — plastering, skirtings, and floor preparation — are available as part of the same contract.
Before your survey, photograph all visible damp patches and gather any records of previous works or plumbing repairs. Stop any planned flooring installation. Then book a damp and timber survey with Quaypointplastering to get a documented diagnosis and a clear path to a permanent fix.
Sources
The following references are worth knowing about — and worth requesting from any contractor who specifies a system for your slab.
ASTM F2170 (Standard Test Method for Determining Relative Humidity in Concrete Floor Slabs Using in situ Probes) — the definitive standard for in-situ RH testing. If a contractor specifies flooring over a slab without referencing this standard, ask why. The IFTI practical guide to concrete moisture testing explains how F2170 and F1869 differ in plain terms.
ASTM F1869 (Standard Test Method for Measuring Moisture Vapour Emission Rate of Concrete Subfloor Using Anhydrous Calcium Chloride) — the older surface emission test. Still widely used and accepted by many flooring manufacturers, but it measures only the surface and can underestimate deeper slab humidity.
ACI/NRMCA CIP 28 (Concrete Slab Moisture) — the ACI/NRMCA guidance document covers slab drying mechanics, vapour retarder location, and design considerations for slabs receiving moisture-sensitive finishes. Ask your contractor whether their specified system is consistent with this guidance.
BS EN 13967 — the British and European standard for plastic sheeting used as a vapour control layer or DPM. A correctly specified DPM for a UK residential ground-bearing slab should reference this standard and confirm the minimum 300 micron thickness.
UK Building Regulations Approved Document C — covers site preparation and resistance to contaminants and moisture for new buildings in England and Wales. Relevant when assessing whether a DPM was correctly specified and installed in the original construction.
Keep copies of all test reports, manufacturer TDS documents, and written guarantees. If a problem recurs, these documents are your evidence for a warranty claim or an insurance submission.
- How to Stop Moisture Coming Through Concrete Floors | IFTI
- CIP 28 - Concrete slab moisture (NRMCA / ACI preview)