
Cold spots on walls: causes, risks and lasting fixes
Cold spots on walls: causes, risks and lasting fixes
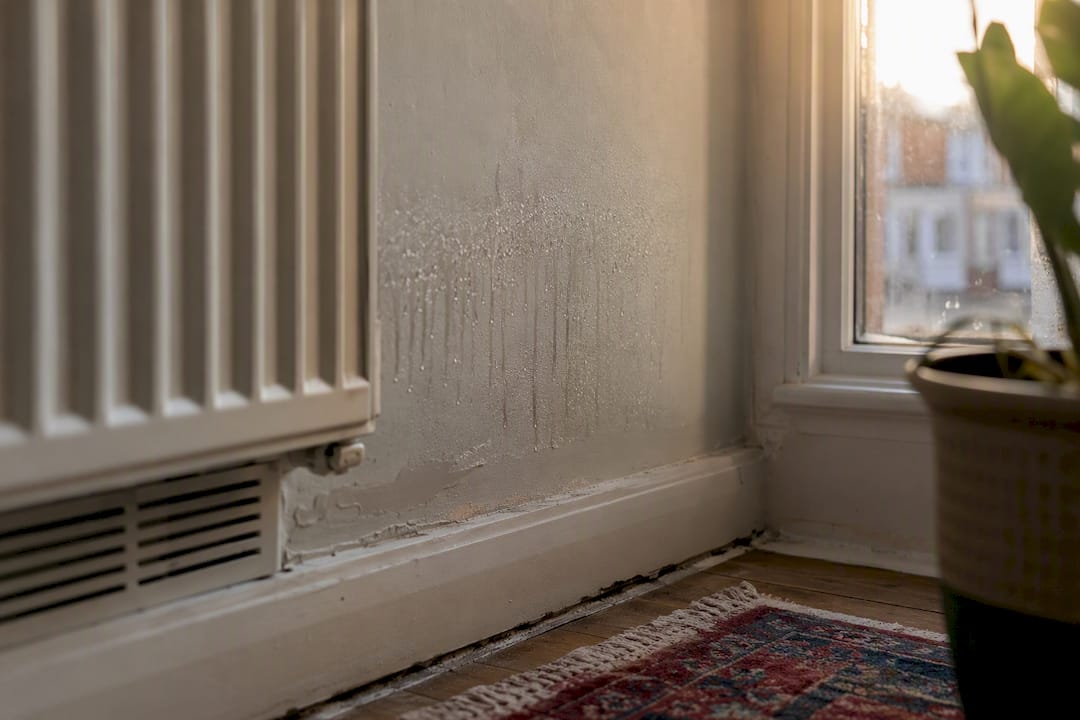
A cold spot is a patch of wall that loses heat faster than the surface around it, usually because of a gap in insulation, a thermal bridge or a draught behind the plaster. That colder surface drops below the dew point more easily than the rest of the wall, so moisture condenses there and mould often follows.
Do this now:
- Touch-test the wall or use a thermometer to confirm it really is colder than nearby areas.
- Pull furniture away from external walls to let air circulate.
- Check for dark specks, bubbling paint or a musty smell.
- Ventilate the room or run a dehumidifier to bring humidity down.
If you can already see mould or the damp keeps coming back, don’t just clean it. That’s a sign to plan a proper diagnostic survey.
Pro Tip: Check the same spot at different times of day. Cold spots that only show up in the early morning are usually condensation related; ones that stay cold all day point to a fabric or insulation problem.
Key Takeaways
Cold spots on walls form when a section of the wall loses heat faster than its surroundings, dropping below dew point and triggering condensation that feeds recurring mould unless the underlying cause is fixed.
| Point | Details |
|---|---|
| Confirm before you treat | Use a thermometer and moisture meter to check whether a patch is genuinely colder, not just damp-looking. |
| Fix the cause, not the symptom | Draught-proofing, insulation and ventilation address why a wall stays cold; cleaning mould alone does not. |
| Watch your humidity | Keep indoor relative humidity at moderate levels to reduce condensation risk on cold surfaces. |
| Know your red flags | Recurring mould, rising damp patterns and blown plaster all warrant a professional survey. |
| Get evidence before repairs | Quay Point Plastering’s thermal-imaging and moisture-mapping surveys produce a written scope of work and guarantee before any remedial treatment begins. |
Table of Contents
- What causes cold spots on walls?
- Why cold spots matter beyond comfort
- How do you diagnose a cold spot on a wall?
- Practical fixes for cold spots and drafty walls
- How to treat mould and damp properly
- When should you call in a professional?
- Book a survey before you book a repair
- Sources
What causes cold spots on walls?
Most cold spots trace back to a handful of building faults, and they often overlap. Working out which one applies to your wall saves you money on the wrong fix.
- Poor or missing insulation — gaps in cavity wall fill, thinning loft insulation at the eaves, or solid walls with no internal or external layer at all.
- Thermal bridging — lintels, wall ties, steel beams or stone details that conduct heat straight through the wall, bypassing whatever insulation is there. This is a leading cause according to Homebuilding, and it tends to create a linear or patchy cold pattern rather than one big cold zone.
- Air leakage and draughts — gaps around skirting boards, floor joists and service penetrations let cold, often moist, air move directly against the inner wall surface. Building-science research suggests air leakage frequently matters more than raw thermal transmission when it comes to condensation risk.
- Wet or contaminated insulation — a roof leak or penetrating damp can soak insulation, and wet insulation loses much of its thermal value.
- Furniture jammed against external walls — wardrobes and beds pushed tight to the wall block airflow and create a stagnant microclimate that cools faster than open wall, according to Ideal Home.
- Uneven heating — poorly balanced radiators, or a cold garage or stairwell on the other side of the wall, can leave one section permanently cooler than the rest of the room.
Why cold spots matter beyond comfort
A cold patch is more than an annoyance on a winter evening. When warm, moist indoor air meets a wall surface at or below dew point, water condenses on it, and repeated cycles of that condensation are what feed black mould growth and musty odours.
Left alone, the damage compounds:
- Paint bubbles, blisters or peels away from the plaster.
- Salts drawn out of masonry appear as white, powdery efflorescence.
- Plaster eventually “blows”, separating from the wall in patches.
- Mould spores in the air are linked to a higher risk of respiratory irritation, particularly for children, older residents and anyone with asthma.
Keeping indoor relative humidity below 60%, and ideally between 30 and 50%, is one of the simplest ways to cut that risk according to US EPA guidance.
How do you diagnose a cold spot on a wall?
Start simple. Feel the wall by hand across a wide area, including behind wardrobes and sofas, and note where the temperature genuinely changes rather than where it just feels draughty. Watch whether the same patch reappears after a shower, a cold snap, or a run of wet weather. That pattern tells you a lot before you spend a penny.
A few low-cost tools make the diagnosis more reliable than guesswork:
| Tool | What it tells you | Typical use |
|---|---|---|
| Surface or infra-red thermometer | Exact surface temperature at a point | Compare cold patch against the rest of the wall |
| Hygrometer | Indoor relative humidity | Track whether humidity is pushing surfaces past dew point |
| Moisture meter | Moisture content within the wall | Distinguish surface condensation from a wet wall |
Pro Tip: *Log your hygrometer reading each morning for a week.
Thermal imaging goes further than any handheld tool because it maps heat loss across the whole wall in one pass, revealing thermal bridges, missing insulation and hidden leaks that touch tests miss entirely, as DIY Doctor notes. If a cold spot has no obvious cause, or mould keeps returning after cleaning, a thermal-imaging survey is the next sensible step rather than another round of guesswork.
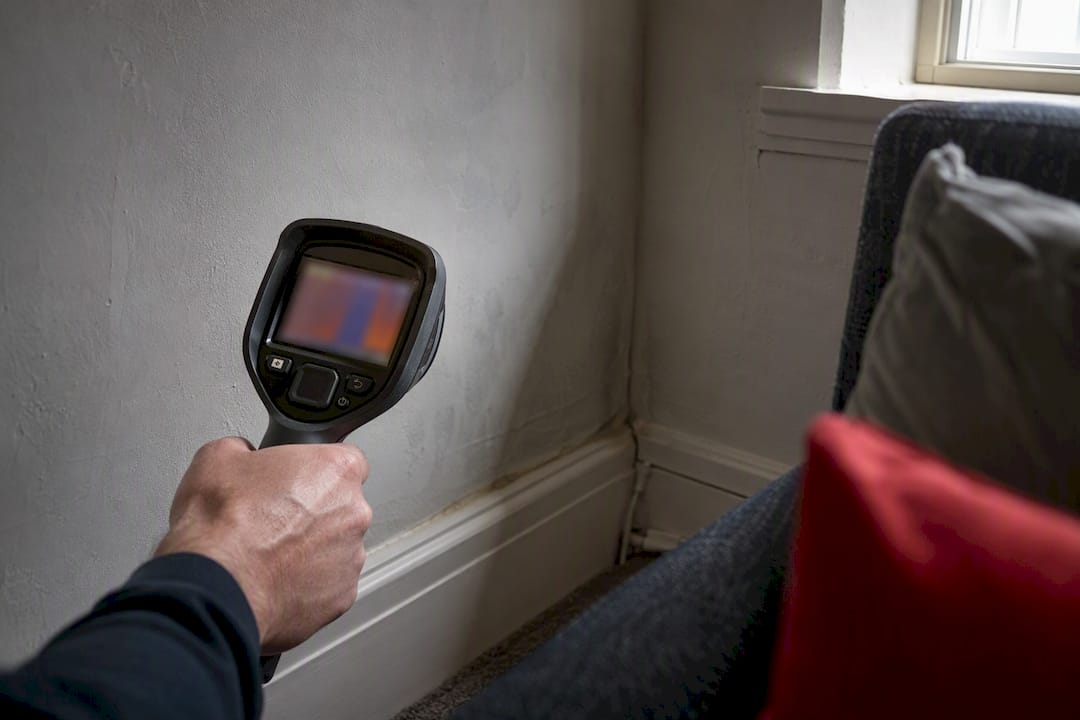
Treat these as red flags for professional investigation: damp that persists despite good ventilation, a rising damp pattern along the base of a wall, large areas of blown plaster, or any suspicion of a penetrating leak from outside.
Practical fixes for cold spots and drafty walls
Some fixes cost nothing and work today. Others need proper planning. Both matter.
Short-term steps you can take this week:
- Move furniture at least a few inches off external walls to restore airflow.
- Run an extractor fan or open a window briefly after cooking, showering or drying laundry indoors.
- Use a dehumidifier in rooms that struggle, particularly bedrooms with poor ventilation.
- Keep heating on at a low, steady level rather than letting rooms cool sharply overnight, since large temperature swings let surfaces drop closer to dew point.
Seal the draughts. Gaps around window frames, skirting boards, pipework and suspended timber floors let cold air move directly against internal wall surfaces. Sealing these, alongside draught-proofing internal doors, closes off routes that carry cold, damp air into rooms in the first place.
Consider your insulation options. Cavity wall fill suits older properties with an unfilled cavity and is usually the cheapest per square metre. Internal wall insulation, often fitted as insulated plasterboard, works well for solid walls where you can’t alter the external appearance, though it does eat into room space. External wall insulation avoids that space loss and tackles thermal bridging at source, but it changes the building’s exterior and carries the highest upfront cost. A retrofit advice service can help you weigh these against your budget and property type.
If you’re renovating, ask for insulated lintels and a continuous insulation layer at wall junctions. This is where thermal bridges are usually built in by accident, and it’s far cheaper to detail correctly the first time than to retrofit later.
Balance your heating. An unbalanced radiator system leaves some rooms warm and others cold, which widens the temperature gap between air and wall surface exactly where you don’t want it.
As a rule of thumb: draught-proofing, moving furniture and running a dehumidifier are all reasonable DIY jobs. Cavity fill, internal or external insulation, and anything involving suspected damp penetration are jobs for a surveyor and installer, because getting the diagnosis wrong here means paying for insulation that never fixes the actual cause.
How to treat mould and damp properly
Wipe down small, isolated patches of mould yourself, but do it safely: wear gloves and a mask, use a proper fungicidal wash rather than just bleach, and dry the surface thoroughly afterwards so moisture doesn’t feed the next outbreak.
- Ventilate the room well during and after cleaning.
- Avoid disturbing large areas of mould without protection, since this can release spores into the air you breathe.
- Check whether plaster has salt damage or has started to blow. This needs stripping back and replastering, not just a fresh coat of paint.
Cleaning mould off a cold spot without fixing the cause is a temporary win at best. If the wall still reaches dew point overnight, the same patch of mould will be back within weeks. Quay Point Plastering’s guide covers exactly why cosmetic treatment alone so often fails.
Where mould covers a large wall area, or vulnerable people live in the property, this stops being a DIY job and becomes a case for professional mould removal alongside a proper diagnostic survey.
When should you call in a professional?
Some situations are genuinely beyond a hygrometer and a tube of sealant. Call in a specialist when mould keeps returning after you’ve cleaned and ventilated properly, when damp patterns don’t match anything obvious, or when you suspect penetrating or rising damp rather than simple condensation.
A thorough survey should include a visual inspection, thermal imaging, moisture mapping across the affected walls, and where relevant an air-tightness check to find hidden draught paths. RICS guidance on home surveys sets out the standard homeowners should expect from an accredited surveyor, and Gov explains what different survey types actually cover.
A survey worth paying for ends with a written report: documented findings, photographic evidence, a clear scope of remedial work, and ideally a guarantee on any workmanship carried out. Anything less is just an opinion with an invoice attached.
Before your appointment, jot down when and where the cold spots or damp appear, note humidity readings if you’ve been tracking them, and take a few photos. It makes the surveyor’s job faster and your report more accurate.
Why survey-led fixes beat cosmetic quick fixes
Guessing at a fix wastes money twice: once on the wrong treatment, and again when the same cold spot reappears six months later. Thermal imaging and moisture readings turn a hunch into evidence, and that evidence is what should drive the repair.
A scope of work built on real diagnostic findings, rather than a quick look and a tub of anti-mould paint, is what actually stops a wall coming back to haunt you.

Book a survey before you book a repair
Quay Point Plastering approaches cold spots the way a surveyor should: diagnose first, treat second. Every job starts with a damp and timber survey that uses thermal imaging and moisture mapping to pinpoint exactly why a wall is cold and where the moisture is coming from, rather than treating symptoms and hoping the cause was covered too.

Typical work that follows a survey includes black mould removal, cavity inspections, insulated plasterboard installation and damp replastering once the underlying cause is confirmed. Every scope of work is written down, with a guarantee on the workmanship, so you know exactly what’s being fixed and why.
With over 35 years’ experience across Dorset, Hampshire and Wiltshire, Quay Point Plastering has seen most of the ways a wall can go cold and damp, and most of the DIY fixes that didn’t stick. If a cold spot on your wall keeps coming back, visit the damp problems page to see how the survey process works and book an inspection.