
Tide marks on walls: diagnose, act, and fix them
Tide marks on walls: diagnose, act, and fix them
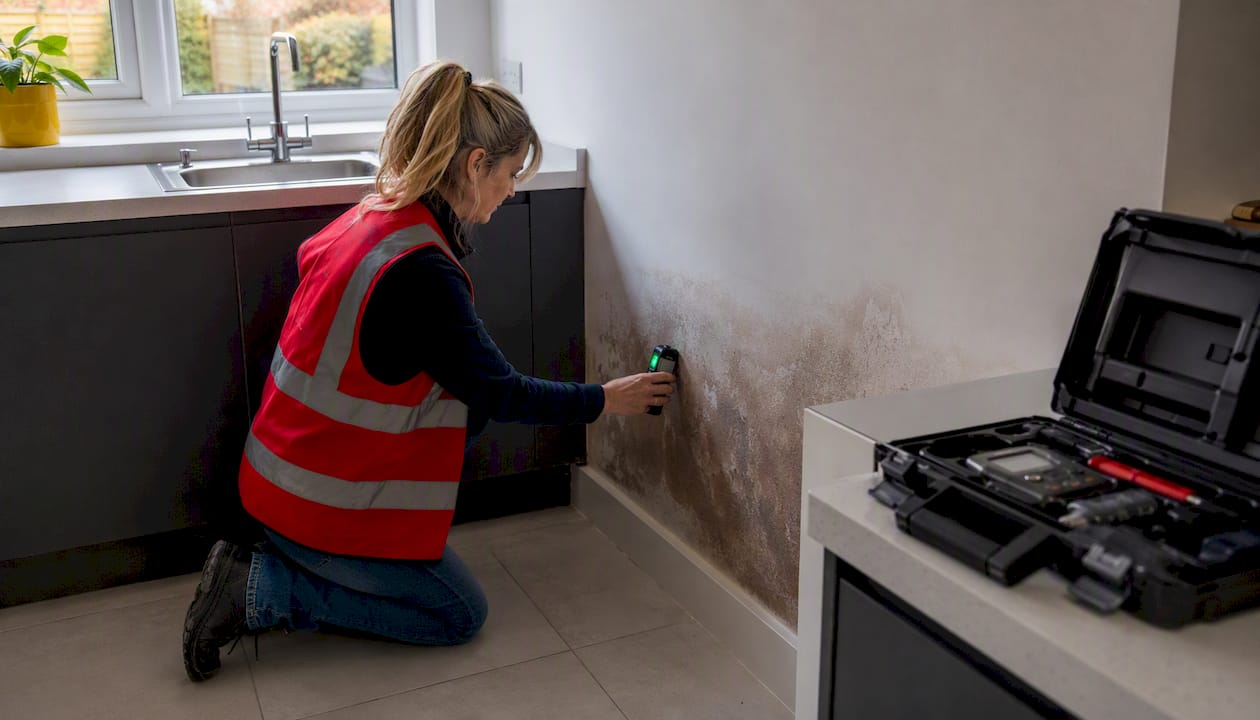
A horizontal tide mark on your wall is not just a cosmetic blemish. It is a physical record of moisture movement through the fabric of your property, and the height and pattern of that mark are your first and most reliable diagnostic clues. Photograph it now, measure the height from floor level, check for white powdery deposits around the edge, and look at your external ground levels and gutters before doing anything else.
Three immediate actions to take today:
- Photograph the mark from a distance and close up, with something for scale (a ruler or tape measure). Note the height in millimetres from the floor.
- Check for white or grey salt deposits (efflorescence) along the upper edge of the stain. Their presence confirms moisture has been moving through the masonry.
- Inspect external ground levels, gutters, and downpipes for obvious defects before calling anyone.
Rising damp typically leaves tide marks between 300 mm and 1.2 metres up the wall. A mark sitting within that band with salt deposits strongly suggests rising damp and a failed or absent damp proof course (DPC). A mark higher up, or one that appeared after heavy rain, points to penetrating damp or a plumbing leak instead. Do not paint over it, replaster, or redecorate until the moisture source is confirmed and resolved. Quaypointplastering offers a specialist damp survey covering Dorset, Hampshire, and Wiltshire if you need a documented diagnosis and written scope of works.
Table of Contents
- What causes tide marks on walls?
- How does the height and pattern of a tide mark guide diagnosis?
- How to inspect a damp wall yourself: a safe step-by-step guide
- What to do and what to avoid when you spot a tide mark
- When should you call a damp surveyor?
- What are the common repair options for damp walls in the UK?
- How long does a damp wall take to dry, and what does it cost?
- How Quaypointplastering approaches tide-mark diagnosis
- Key takeaways
- The mistake that costs homeowners the most
- Quaypointplastering: survey-led damp diagnosis and guaranteed repairs
- Useful sources
What causes tide marks on walls?
A tide mark is the evaporation line left behind when moisture moves through masonry and then dries. As water travels through brick, stone, or mortar, it carries dissolved mineral salts with it. When the moisture evaporates at the surface, those salts are deposited, leaving a visible horizontal stain and, over time, causing plaster to soften, blister, and break down. The salt migration process is the reason a tide mark keeps returning even after you wipe it clean: the salts are still in the wall.
Four causes account for the vast majority of cases.
Rising damp occurs when groundwater travels upward through masonry by capillary action. It is most common in older properties where the DPC is missing, damaged, or has been bridged by raised external ground levels or render. The staining appears at the base of walls and tends to be consistent in height across a run of wall.
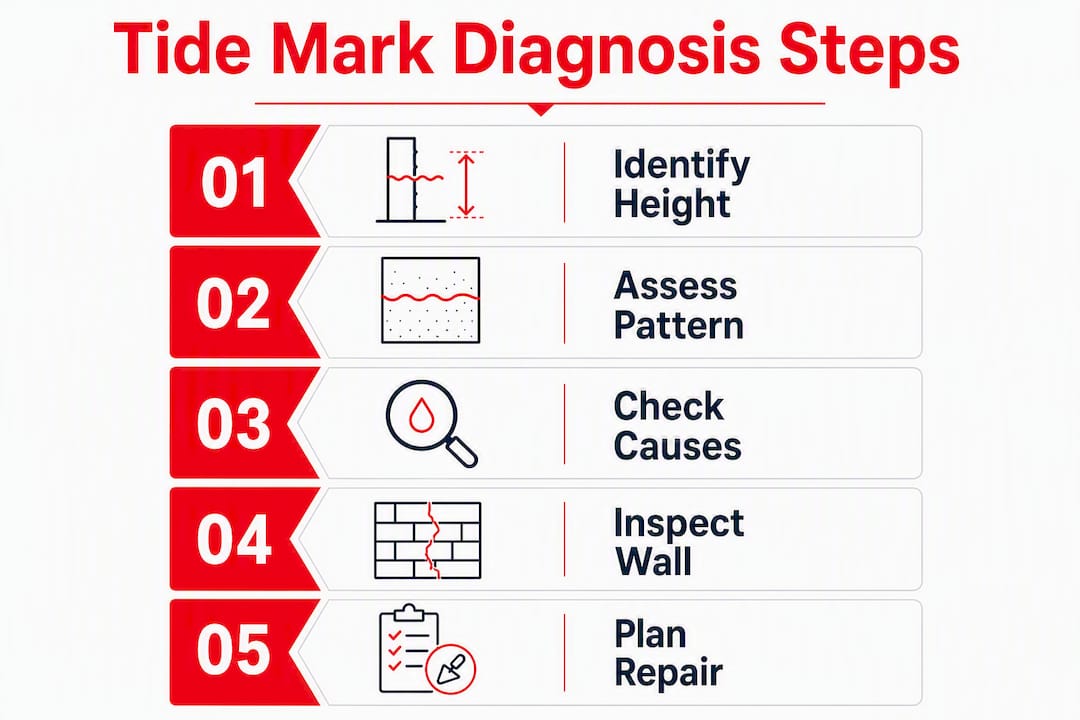
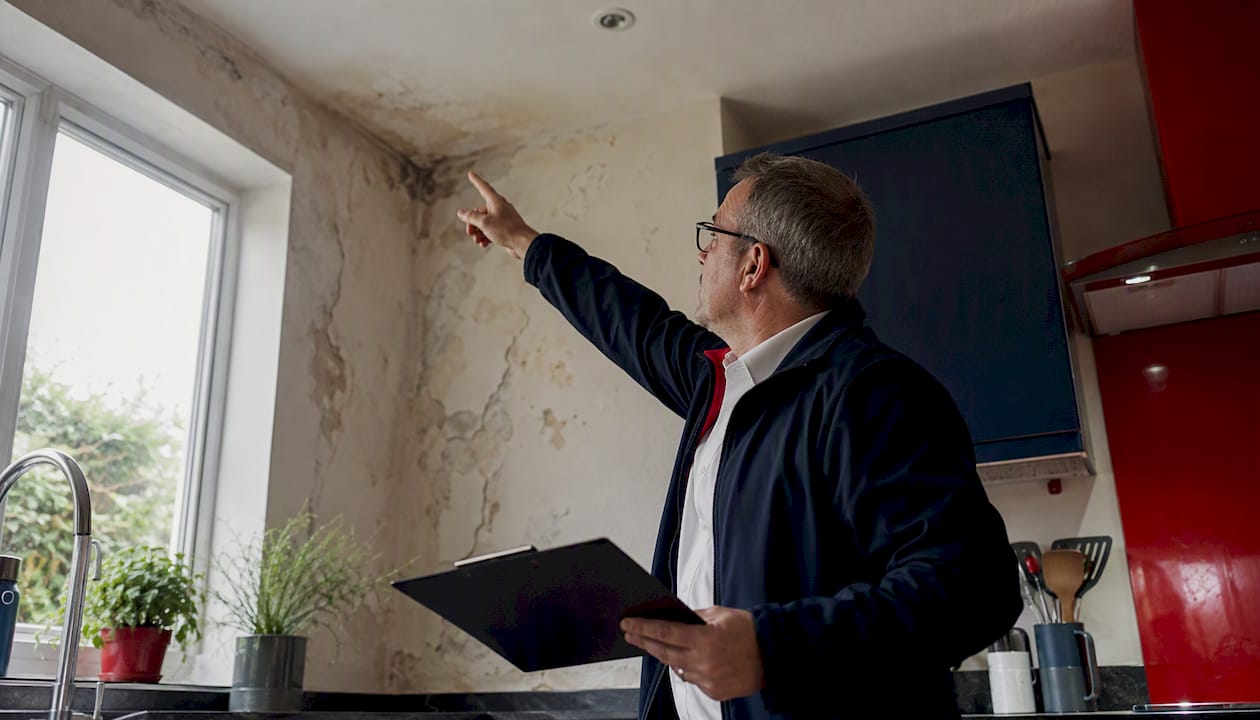
Penetrating damp enters from outside, typically through defective pointing, cracked render, failed window seals, or blocked gutters. The damp patches tend to appear after rain and may be irregular in shape rather than forming a clean horizontal band. You can read more about why walls get damp after rain and what to check externally.
Condensation forms when warm, moist air meets a cold surface. It does not usually produce a classic tide mark at low level; instead, it causes mould growth higher up the wall or in corners, often near windows or in poorly ventilated rooms. Salt tracking from condensation can mimic a tide mark, but the pattern is typically less defined.
Plumbing leaks from concealed pipes, overflows, or waste runs can produce staining at any height. These marks often appear suddenly, may be accompanied by a damp smell, and do not follow the consistent horizontal pattern of rising damp.
Pro Tip: Before assuming the worst, check whether the mark appeared after a specific event, such as a heavy rainstorm, a blocked gutter, or a recent plumbing job. Timing is a useful diagnostic clue that a surveyor will ask about.
How does the height and pattern of a tide mark guide diagnosis?
Height is the single most practical first indicator for distinguishing rising damp from other causes. Rising damp commonly sits between 300 mm and 1.2 metres of a wall. Marks consistently above that height are unlikely to be rising damp and should prompt you to look at penetrating sources, roof or gutter defects, or plumbing.
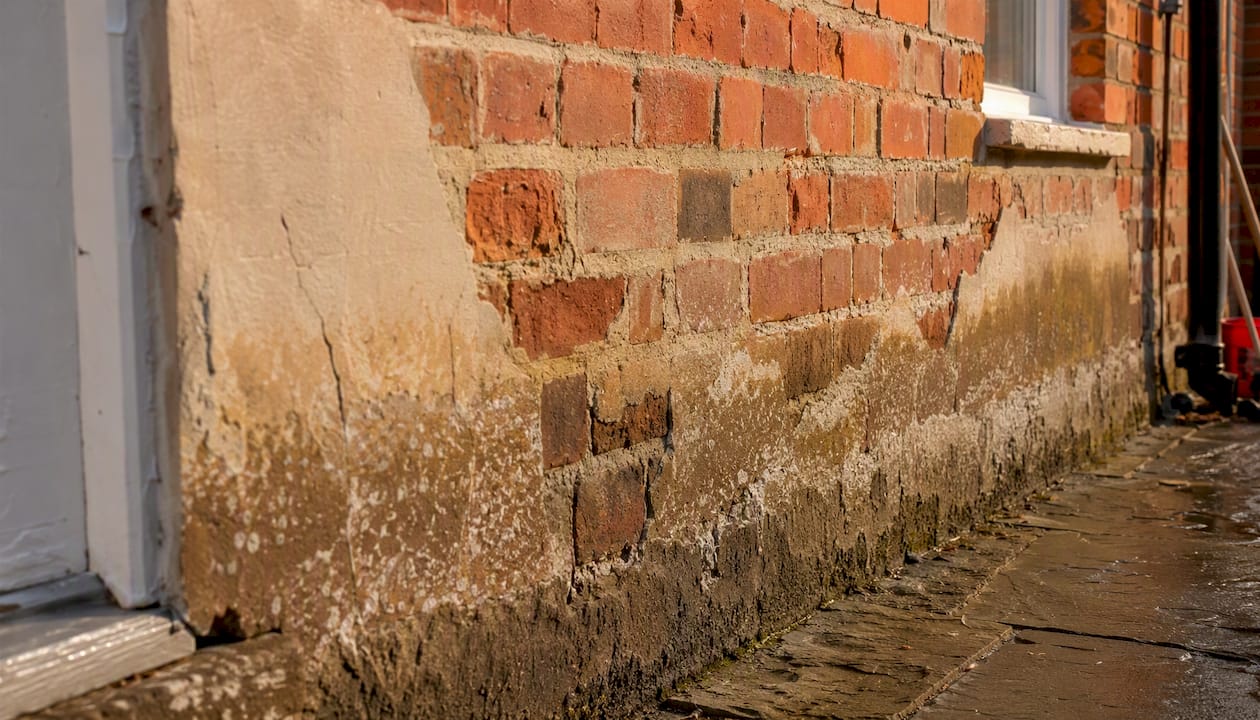
Pattern matters just as much as height. Rising damp produces tide marks with an irregular, uneven upper edge because capillary action does not travel uniformly through masonry. A perfectly straight, level line is more likely to indicate a leak from a specific source, such as a leaking pipe or an overflowing appliance, where water has pooled at a fixed level. An irregular, wavy line across the lower wall is more consistent with capillary moisture movement.
| Height band | Typical causes | What to check next |
|---|---|---|
| Below 300 mm | Rising damp (early stage), bridged DPC | External ground level, render bridging DPC, air bricks |
| 300 mm–1.2 m | Rising damp (established), penetrating damp at low level | DPC condition, external pointing, ground drainage |
| Above 1.2 m | Penetrating damp, plumbing leak, roof or gutter defect | Gutters, downpipes, roof, window seals, concealed pipes |
| Any height, post-rain | Penetrating damp | External wall condition, pointing, render, flashings |
| Any height, near wet rooms | Plumbing leak or condensation | Pipe runs, overflow outlets, ventilation |
To record the feature accurately before a survey, do the following:
- Measure the height of the mark at its highest point from finished floor level and note it in millimetres.
- Photograph the full wall, then a close-up of the upper edge of the stain.
- Note whether the upper edge is even or irregular.
- Record when you first noticed the mark and whether it has grown.
- Check whether the mark is on an external or internal wall, and whether it is on a ground floor or upper floor.
How to inspect a damp wall yourself: a safe step-by-step guide
A careful DIY inspection will not resolve the problem, but it will give you and any surveyor a much clearer picture of what you are dealing with. Work through these steps in order, and stop before any action that could damage the structure or obscure evidence.
-
Photograph the affected area. Take wide shots showing the full wall and close-ups of the stain edge. Include a tape measure for scale. Photograph any associated damage: peeling wallpaper, crumbling plaster, salt deposits, or mould.
-
Measure and record the height. Use a tape measure to record the highest point of the stain from the finished floor level. Note the measurement in millimetres.
-
Check for salt efflorescence. Run your finger along the upper edge of the mark. White or grey powdery deposits confirm that moisture has been moving through the masonry and evaporating at the surface. This is a strong indicator of active moisture movement rather than a one-off stain.
-
Use a handheld moisture meter if you have one. Press the probes against the plaster surface at the centre of the stain, at the upper edge, and at a dry area of the same wall for comparison. Record all three readings. Surface readings above 20% on a standard pin-type meter on plaster are generally considered elevated; readings above 30% suggest significant moisture. Report these figures to your surveyor alongside the location of each reading. Note that surface readings on salt-contaminated plaster can be artificially high, so treat them as indicative rather than definitive.
-
Check for soft or crumbling plaster. Press gently on the plaster surface. Soft, hollow, or powdery areas indicate that salts have broken down the plaster matrix. Do not probe or remove plaster at this stage.
-
Inspect external ground levels. Go outside and check whether the ground, render, or any raised paving sits above the DPC line (usually visible as a thin horizontal band in the mortar joints, typically two or three courses above ground level). A bridged DPC is one of the most common causes of rising damp.
-
Check gutters, downpipes, and drains. Look for blockages, overflows, or leaking joints. Run a hose into the gutter if safe to do so and watch for water escaping at joints or overflowing near the affected wall.
-
Trace probable sources. If the mark is on an upper floor or near a bathroom, check for leaking pipes, overflow outlets, or failed shower trays above.
Pro Tip: Do not remove skirting boards, hack off plaster, or drill into walls before a survey. Invasive action can destroy the salt and moisture evidence a specialist needs to make an accurate diagnosis, and it may also expose you to hidden electrical cables.
Checking for crumbling plaster and visible mould before any treatment is a standard preparatory step, and the findings from your inspection will directly inform the scope of any remedial works.
What to do and what to avoid when you spot a tide mark
Some actions help. Others make the problem significantly worse and more expensive to fix.
Do:
- Ventilate the room by opening windows where safe and practical. Increased airflow helps reduce surface moisture and slows mould growth while you arrange a survey.
- Place a dehumidifier in the room as a temporary measure. This will not resolve the underlying cause, but it reduces ambient humidity and limits secondary condensation damage.
- Clear gutters and downpipes if you can do so safely. Removing a blockage that is contributing to penetrating damp costs nothing and may slow the ingress.
- Record the mark with photographs and measurements, and keep a log of any changes over the following days or weeks.
- Remove wallpaper from the affected area if it is already peeling. Trapped moisture behind wallpaper accelerates plaster damage and mould growth.
Do not:
- Paint over an active tide mark. Applying paint or decorative materials over active damp will not seal the problem; moisture will bleed through and the new finish will fail, often within weeks.
- Replaster or redecorate before the moisture source is identified and resolved. New plaster applied over contaminated substrate will absorb the same salts and fail in the same way.
- Use non-breathable masonry paints or sealants on the affected wall. These trap moisture in the structure and can accelerate damage to the masonry itself.
- Ignore a mark near electrical sockets, consumer units, or light fittings. If you suspect moisture is present near any electrical installation, do not touch the fitting and contact a qualified electrician before proceeding with any other inspection.
When should you call a damp surveyor?
Some tide marks are minor and resolve once an obvious external defect is fixed. Others indicate a structural moisture problem that requires professional diagnosis and guaranteed remedial work. Call a specialist when:
- The mark returns after you have wiped or painted it.
- The stain sits above 300 mm and has been present for more than a few weeks.
- Plaster is crumbling, hollow, or separating from the wall.
- You can smell damp in the room, particularly a musty or earthy odour.
- Salt efflorescence is visible and persistent.
- The mark is spreading or increasing in height.
- You are about to sell, let, or purchase the property.
A qualified damp surveyor will carry out a structured on-site inspection that goes well beyond what a homeowner can observe. The process typically includes:
- Visual inspection of the affected areas, noting pattern, height, and associated damage.
- Moisture meter mapping across the wall at multiple heights and locations, producing a grid of readings that shows the extent and distribution of moisture.
- Salt analysis of plaster samples to identify the type and concentration of hygroscopic salts, which helps distinguish active rising damp from historic staining.
- Thermal imaging where appropriate, to identify cold spots, hidden moisture, or concealed pipe runs that are not visible to the naked eye.
- A written report setting out the findings, the probable cause, and a defined scope of recommended remedial works.
- A written guarantee on any works carried out, covering both materials and workmanship.
When booking a survey, ask the following:
- What does the survey fee cover, and is it offset against any subsequent works?
- Will you receive a written report with moisture readings and a defined scope of works?
- Does the guarantee cover both the treatment and the replastering?
- What is the typical turnaround from survey to written report?
- Is redecoration included in the scope, or is it a separate stage?
What are the common repair options for damp walls in the UK?
The right remedial route depends on the confirmed cause. A survey report should specify which treatment is appropriate; the following summaries will help you understand what you are being quoted for.
| Treatment | When it is used | What it involves | Redecoration notes |
|---|---|---|---|
| DPC injection | Rising damp with failed or absent DPC | Chemical cream or fluid injected into mortar courses to form a water-repellent barrier | Salt-contaminated plaster must be removed and replaced before redecorating |
| Salt-retardant replastering | After DPC injection or where salts have damaged plaster | Existing plaster stripped; new system applied using salt-retardant or renovation plaster | Breathable finish coat and paint required; allow full drying before decorating |
| Tanking | Basement or cellar waterproofing | Cementitious or cavity drain membrane system applied to walls and floor | Internal finish applied over membrane; specialist materials needed |
| External drainage repair | Rising damp caused by high ground levels or poor drainage | Ground levels lowered, French drains installed, or gullies cleared | External works only; internal replastering may still be required |
| Roof, gutter, or pipe repair | Penetrating damp from above | Defective element repaired or replaced; wall allowed to dry | Replastering and redecorating after confirmed drying |
| Breathable render or pointing | Penetrating damp through external wall | Failed pointing or render replaced with breathable materials | Internal replastering if damage is significant |
Chemical DPC injection is the most widely used treatment for rising damp in UK properties. The injection creates a water-repellent zone in the masonry, but the treatment alone is not sufficient: salt-contaminated plaster must be removed and replaced with a salt-retardant system, otherwise the hygroscopic salts already in the plaster will continue to draw moisture from the air and the staining will return.
When combined solutions are needed, the sequence matters. External drainage or ground-level corrections should be completed before DPC injection, and DPC injection should be completed and allowed to cure before replastering. Replastering before the wall has dried sufficiently is one of the most common causes of repeated failure.
For the finishing stage, breathable renovation plaster systems are preferable to standard gypsum plasters on walls that have been affected by damp. After the plaster has cured and dried, a stain-blocking primer is typically applied before the final decorative coat. Shellac-based or oil-based primers are commonly used for persistent staining where a standard emulsion would bleed through.
How long does a damp wall take to dry, and what does it cost?
Drying times vary considerably depending on the cause, the thickness of the wall, the materials involved, and the time of year.
- After a plumbing leak or one-off penetrating event: a solid brick wall may take 1–6 months to dry passively, depending on ventilation and ambient temperature. Mechanical drying with dehumidifiers and low-level heating can reduce this significantly.
- After DPC injection: the masonry itself may take 6–12 months to dry to a stable level. Replastering is typically carried out 4–6 weeks after injection, once the immediate surface moisture has reduced, using salt-retardant plaster that manages the residual moisture during the drying period.
- After tanking or membrane installation: the structure behind the membrane continues to hold moisture, but the internal surface is protected immediately. Redecoration can proceed once the internal finish has cured.
Factors that slow drying include thick solid walls, north-facing aspects, poor ventilation, and works carried out in winter. A dehumidifier running continuously in a closed room will accelerate drying, but it needs emptying regularly and is not a substitute for resolving the moisture source.
Ballpark UK cost guidance (indicative figures only, based on typical market rates; actual costs depend on property size, extent of damage, and location):
- Specialist damp survey: typically £150–£400 depending on the scope and property size.
- DPC injection (per linear metre of wall): costs vary by contractor and wall construction; a full ground-floor treatment in a standard semi-detached property typically runs into several hundred to low thousands of pounds.
- Salt-retardant replastering: priced per square metre; a single affected room commonly costs £500–£1,500 or more depending on the extent of plaster removal required.
- Drainage or gutter repairs: highly variable; minor gutter repairs may cost under £200, while French drain installation or ground-level corrections can run to several thousand pounds.
- Roof or pointing repairs: minor pointing repairs start from a few hundred pounds; roof repairs vary widely by extent and access.
These figures are indicative only and should not be used as a substitute for a written quotation based on a site survey.
A practical decision timeline:
- Week 1: Photograph, measure, and carry out the DIY inspection checklist. Identify and fix any obvious external defects (gutters, ground levels).
- Week 2–3: Book a specialist damp survey if the mark persists, is above 300 mm, or shows salt deposits.
- Week 3–4: Receive written survey report and scope of works. Review and agree the remedial programme.
- Weeks 4–12: Remedial works carried out (DPC injection, drainage, pipe repairs as specified).
- Months 1–6: Drying period. Ventilate and monitor.
- After drying confirmed: Replastering and redecoration.
How Quaypointplastering approaches tide-mark diagnosis
Quaypointplastering’s process starts with evidence, not assumptions. Every survey begins with a structured visual inspection of the affected areas, followed by moisture meter mapping across the wall at multiple heights to produce a documented picture of where moisture is present and how far it extends. Where the pattern is unclear, salt analysis of plaster samples is used to distinguish active rising damp from historic staining, and thermal imaging is available where concealed moisture or cold bridging is suspected.
The findings are set out in a written report with a defined scope of remedial works, so you know exactly what is being treated and why, before any work begins. Quaypointplastering backs its remedial work with written guarantees covering both treatment and reinstatement, and provides aftercare guidance to help you maintain the repair.
With over 35 years of experience in damp, mould, and timber diagnosis across Dorset, Hampshire, and Wiltshire, the team has seen the full range of causes that produce tide marks on interior walls, from straightforward DPC failures to complex combined problems involving drainage, penetrating damp, and salt-contaminated plaster. That depth of local experience informs both the diagnosis and the recommended solution.
Key takeaways
Tide marks on walls are a reliable indicator of moisture movement through masonry, and the height and pattern of the mark are the most practical first clues for diagnosis.
| Point | Details |
|---|---|
| Height is the primary clue | Rising damp typically leaves marks between 300 mm and 1.2 metres; marks above that height suggest penetrating damp or a leak. |
| Salts confirm active moisture | White powdery efflorescence at the stain edge confirms moisture is still moving through the wall, not just a historic mark. |
| Never paint over active damp | Decorating over an active tide mark will fail; resolve the moisture source and allow full drying before any redecoration. |
| Survey before any remedial work | A written survey report with moisture readings and a defined scope of works prevents repeated treatment failure. |
| Quaypointplastering | Offers survey-led diagnosis with written guarantees across Dorset, Hampshire, and Wiltshire. |
The mistake that costs homeowners the most
The pattern we see repeatedly is a homeowner who spots a tide mark, paints over it, watches it return, and then calls a plasterer to skim over it. By the third or fourth attempt, the wall has accumulated layers of failed finish, the salt damage has progressed deeper into the substrate, and the original cause, often a bridged DPC or a blocked gully, has been active for two or three years longer than it needed to be.
The instinct to fix the visible symptom first is understandable. But a tide mark is not the problem; it is the evidence of the problem. Treating the evidence without addressing the cause is not a repair. Painting over active damp has been described accurately as applying tape over rust: the surface looks better briefly, and the damage underneath continues.
What actually protects a property is a documented diagnosis followed by sequenced remedial work: source resolved, wall dried, salt-contaminated plaster removed, salt-retardant system applied, breathable finish coat. That sequence, carried out properly and backed by a written guarantee, is what produces a permanent result. Skipping any step in that sequence is what produces a repeat call-out.
If you have already had a wall treated and the mark has returned, do not redecorate again. Document what you can see, note the height, and book a survey. The evidence in the wall at that point is more useful to a specialist than a freshly painted surface.
Quaypointplastering: survey-led damp diagnosis and guaranteed repairs
Persistent tide marks on your walls deserve a permanent answer, not another coat of paint. Quaypointplastering provides survey-led damp diagnosis across Dorset, Hampshire, and Wiltshire, starting with a thorough on-site inspection that produces a written report, a defined scope of works, and a guarantee on every remedial job.

The survey covers moisture meter mapping, salt analysis, and visual inspection of both internal and external factors. You receive a clear written report setting out the cause, the extent of the problem, and the recommended treatment, before any work begins. Where remedial works are agreed, Quaypointplastering handles the full sequence: treatment, salt-retardant replastering, and reinstatement, so you are not left coordinating multiple trades.
To book a specialist damp survey or request a free estimate, contact Quaypointplastering directly. Tell us what you can see, the height of the mark, and when it appeared, and we will advise on the right next step.
Useful sources
The following sources were used in preparing this guide and are recommended for further reading.
- Tide marks on walls caused by rising damp — Property Defect Guide: detailed explanation of how salt migration produces tide marks and the link to DPC failure.
- How to treat stains on plaster and drywall — This Old House: guidance on assessing plaster damage, checking for mould, and preparing surfaces before treatment.
- How to paint over water stains without bleed-through — Rawlins Paints: explains why painting over active damp fails and what preparation is required after the source is resolved.
- Specialist damp survey — Quaypointplastering: details of the on-site survey service, including moisture mapping, written report, and guaranteed scope of works.
- Damp re-plastering — Quaypointplastering: guidance on salt-retardant plaster systems and the reinstatement process after damp treatment.
- PCA Surveyor Training: CSSW Examinations — Property Care Association: the professional qualification standard for damp and waterproofing surveyors in the UK; useful when assessing the credentials of any specialist you appoint.