
Efflorescence vs damp: how to tell them apart
Efflorescence vs damp: how to tell them apart
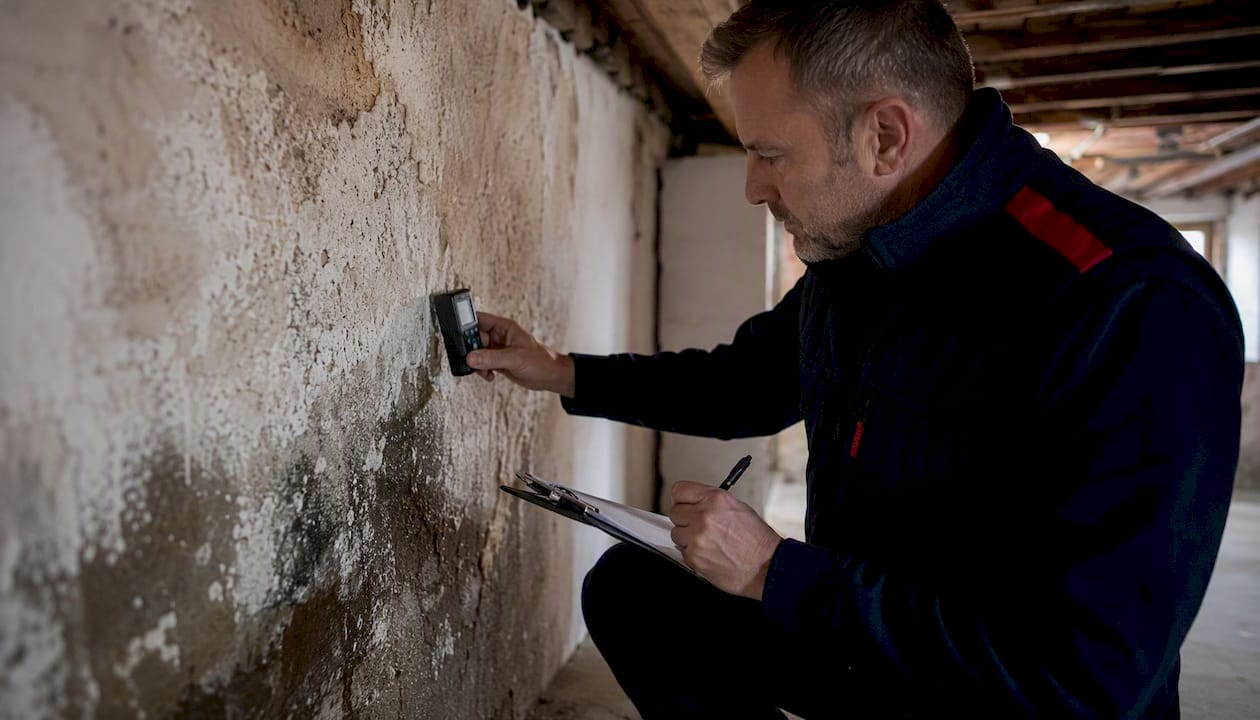
A white, powdery crust on your wall is usually efflorescence — salt deposits left behind as moisture evaporates — but it can signal active damp when other symptoms are present. The difference between the two determines whether you need a cloth and a brush or a specialist survey.
Quick triage:
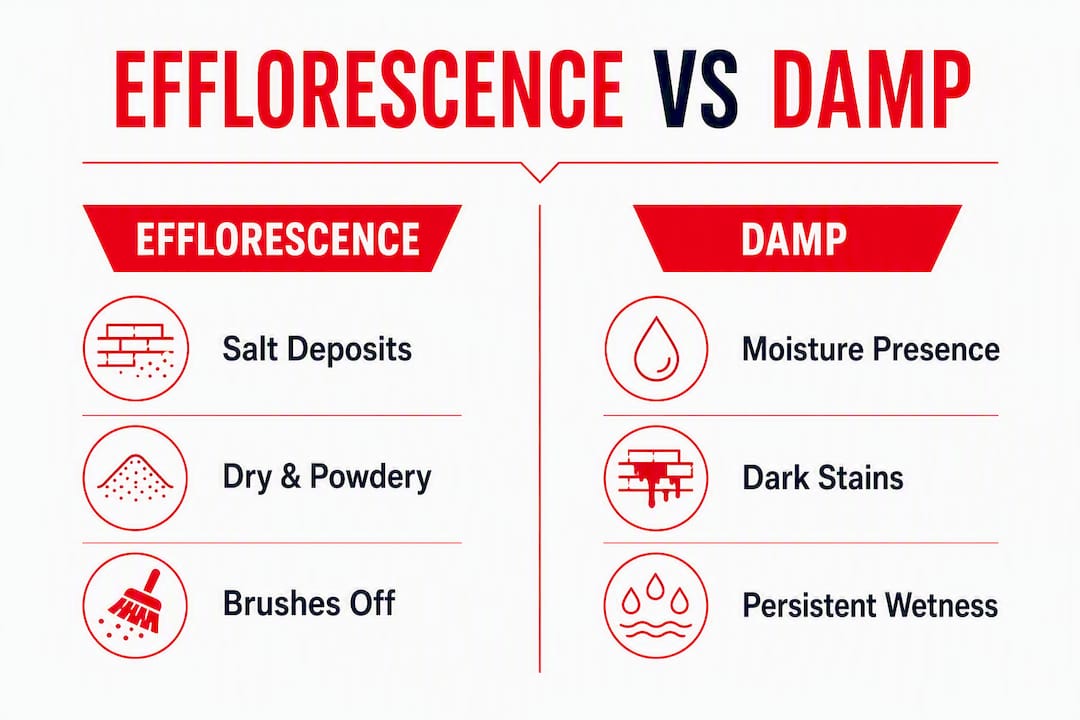
- Run your finger across the deposit. If it brushes off as dry powder, you are likely looking at efflorescence.
- Press the wall. If it feels cold, wet, or soft, active damp is probable.
- If deposits keep returning after cleaning, book a damp survey before redecorating.
Quaypointplastering works with homeowners and property managers across Dorset, Hampshire, and Wiltshire, diagnosing exactly this kind of problem every week. Guidance from the Property Care Association (PCA), the Building Research Establishment (BRE), and Historic England all confirm that survey-led diagnosis prevents unnecessary and costly remedial work. The sections below give you the tools to triage the problem yourself and know when to call in a specialist.
Table of Contents
- How to tell efflorescence from damp at a glance
- Why efflorescence appears: the simple science
- Simple tests to distinguish efflorescence from active damp
- Fix the moisture source before you clean or replaster
- How to clean efflorescence safely (only after the moisture source is fixed)
- How to prevent efflorescence returning
- Will efflorescence go away on its own?
- What Quaypointplastering does during a specialist damp survey
- Key takeaways
- The mistakes we see most often — and how to avoid them
- Book a specialist damp survey with Quaypointplastering
- Useful sources and further reading
How to tell efflorescence from damp at a glance
Efflorescence is the technical term for salt crystals that form on the surface of masonry when moisture carrying dissolved minerals evaporates. The deposit itself is dry, white or off-white, and powdery or slightly crusty in texture. Run a finger across it and it crumbles or smears without leaving the wall wet.
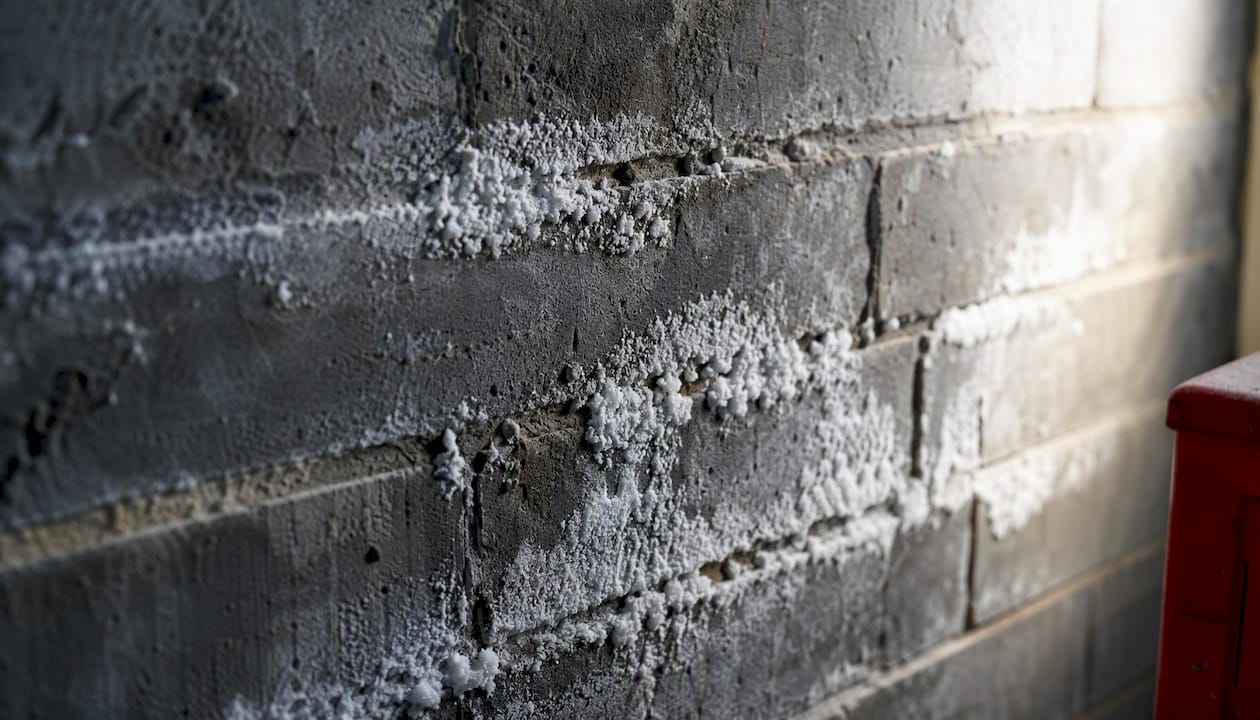
Active damp looks and feels different. The wall surface is cold to the touch, sometimes visibly wet, and often carries a musty smell caused by microbial activity in the substrate. Plaster may feel soft or spongy, and you may see tide-mark staining, peeling paint, or dark mould patches alongside the discolouration.
Checklist for visual triage:
- Texture: Powdery or crystalline and dry = efflorescence. Wet, slimy, or stained = active damp.
- Colour: Bright white or pale grey deposits = salts. Yellow-brown tide marks or dark patches = moisture or mould.
- Location: Efflorescence commonly appears on brick exteriors, basement walls, chimney breasts, and external sills. These are also the locations where damp after rain and rising damp first show up, so location alone does not rule either out.
- Smell: No odour = more likely salts. Musty or earthy smell = active moisture.
- Plaster condition: Firm and intact = more likely efflorescence. Soft, blown, or crumbling = active damp or salt damage to the substrate.
- Spread pattern: A horizontal band at low level, typically up to around 1.5 metres, points toward rising damp. Patches following rain or tracking from a window or roof junction suggest penetrating damp.
Pro Tip: Photograph the deposit before you touch it, and take a second photo after brushing it off. If the same patch reappears within days or weeks, that recurrence is one of the clearest indicators of an active moisture route — log the date and share both photos with your surveyor.
In heritage buildings, salts can reflect historic wetting events rather than current moisture. Historic England advises caution with older properties: repeated deposits at the same location in a listed building often indicate ongoing moisture pathways, and breathable mortars and finishes are needed to avoid trapping salts behind impermeable coatings.
Why efflorescence appears: the simple science
Water is the transport mechanism. When moisture moves through porous brick, stone, or mortar, it dissolves naturally occurring salts — sulphates, carbonates, and chlorides — from within the masonry. As that moisture reaches the surface and evaporates, the dissolved salts are left behind as visible crystals. This process is called capillary action, and it operates in every direction: upward from the ground, inward from rain, and outward from condensation on cold surfaces.
Three moisture routes that cause efflorescence:
Rising damp occurs when groundwater is drawn upward through porous masonry via capillary action, frequently carrying salts to the surface, typically forming a horizontal band at low level above floor height. A failed or absent damp proof course (DPC) is the most common cause. The resulting deposits tend to appear as a consistent horizontal band at low level, and left untreated, the associated moisture can damage plaster and timber and encourage mould growth.
Penetrating damp enters laterally through defective pointing, cracked render, failed flashings, or poorly sealed window and door frames. Deposits from this route tend to follow the path of water ingress, appearing as patches rather than bands, often worsening after heavy rain.
Condensation forms when warm, humid air meets a cold surface. The resulting moisture can carry salts to the surface in the same way, though deposits from condensation tend to be lighter and more diffuse. Condensation is particularly common in poorly ventilated rooms and on external walls with low thermal mass.
Pro Tip: The pattern of deposits tells you a great deal about the route. A band at skirting level that rises and falls seasonally points to rising damp. A patch that appears only after prolonged rain, especially near a window or parapet, points to penetrating damp. Diffuse deposits across a cold external wall in winter suggest condensation.
New build properties sometimes show temporary efflorescence as fresh mortar and concrete cure. This type of deposit usually resolves as the materials dry out fully; persistent deposits in a newer property indicate continuing moisture ingress rather than normal curing.
Simple tests to distinguish efflorescence from active damp
The following checks can be carried out without any specialist equipment. They will not replace a professional survey, but they will help you describe the problem accurately and decide whether to act urgently.
-
Brush test. Use a dry, stiff-bristled brush on the deposit. If it comes away as dry powder with no wet residue beneath, the surface deposit is efflorescence. If the wall beneath is wet or stained, active moisture is present.
-
Touch test. Press the palm of your hand flat against the wall for five seconds. A cold, clammy, or wet sensation points to active damp. A wall that feels dry and at room temperature is less likely to have free water present.
-
Smell test. Stand close to the wall and breathe in. A musty, earthy, or mouldy odour indicates microbial activity driven by moisture. No smell is consistent with dry salt deposits.
-
Pattern and height check. Measure the height of any staining or deposit from floor level. A consistent horizontal band at low level, particularly on a ground-floor or basement wall, is consistent with rising damp. Patches that track from a specific joint, sill, or roof line suggest penetrating damp.
-
Seasonal behaviour. Note whether deposits appear or worsen after rain, or whether they are worse in winter and improve in summer. Seasonal variation helps distinguish penetrating damp from rising damp and from condensation.
-
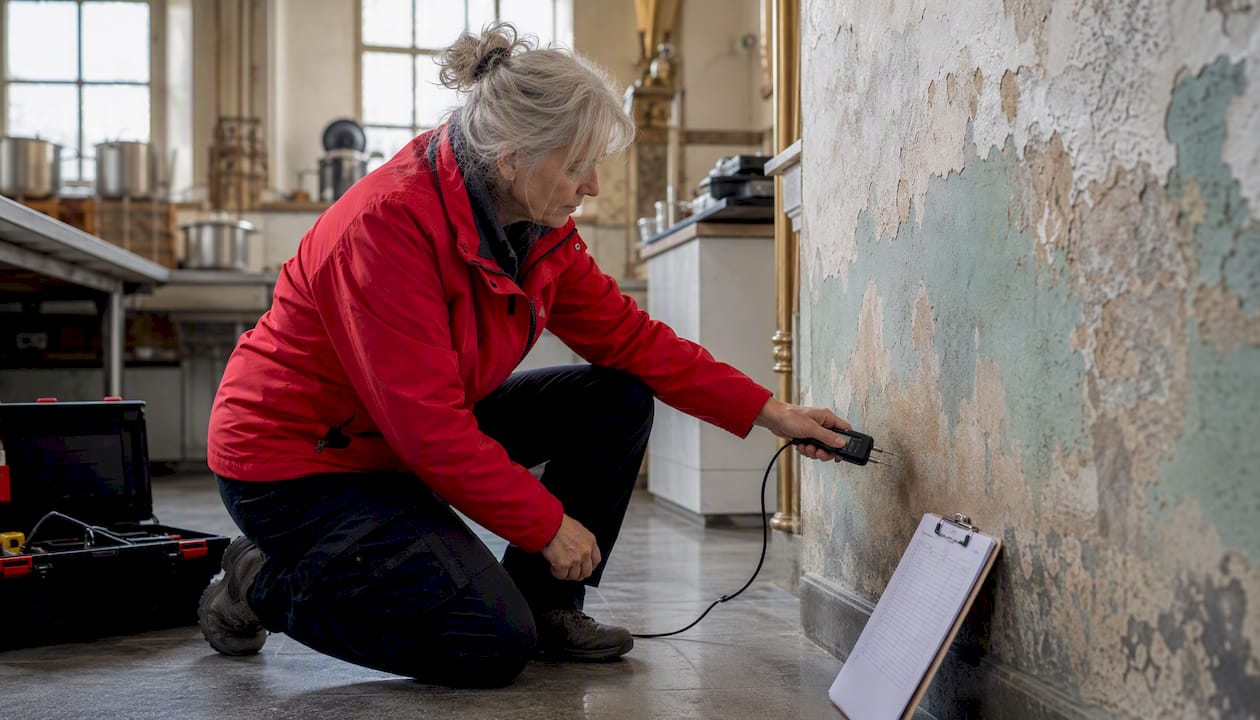
DIY moisture metre check — with caution. Handheld conductivity metres are widely available, but salt contamination increases electrical conductivity and can produce high readings even when little free water is present. A high reading on a wall with visible salt deposits does not automatically confirm active damp. Accurate diagnosis combines surface observation with relative substrate readings at multiple heights, moisture mapping, and, where necessary, chemical salt analysis to determine salt type and source.
-
Recurrence check. Clean the deposit and mark the date. If the same patch returns within a few weeks, a recurring deposit at the same spot is a strong indicator of an active moisture route that needs investigation rather than cosmetic repair.
Pro Tip: If your DIY metre reads high but the wall feels dry and the deposit brushes off cleanly, do not assume you have severe rising damp. Specialists warn that misattributing efflorescence to severe damp frequently leads to unnecessary damp-proofing works. Ask for moisture mapping and salt analysis before committing to any remedial treatment.
When to book a professional survey immediately:
- Deposits return within weeks of cleaning.
- The wall feels wet, soft, or the plaster is blown.
- You can smell mould or mustiness.
- Metre readings are high across a wide area.
- There is visible mould growth alongside the deposits.
Fix the moisture source before you clean or replaster
The single most common mistake homeowners make is cleaning the surface and redecorating without addressing what caused the deposit. Efflorescence will not go away permanently on its own; cleaning or weather may temporarily mask deposits, but they return unless the moisture source is resolved. Replastering over salt-contaminated substrate without removing the affected material simply delays the same failure.
The correct order of work is:
- Diagnose. Establish the moisture route through visual inspection, moisture mapping, and salt analysis. Do not skip this step.
- Stop the water. Repair the specific cause: reinstate or install a DPC for rising damp; repair pointing, render, flashings, or guttering for penetrating damp; improve ventilation and heating for condensation.
- Allow drying time. Masonry needs time to dry after the moisture source is removed. Rushing to replaster traps residual moisture.
- Remove salt-contaminated plaster. Where salts have penetrated the plaster substrate, the affected material must be removed. Salt-contaminated plaster removal is a specialist task: hygroscopic salts will continue to draw moisture from the air even after the original source is fixed, causing ongoing damage if left in place.
- Reinstate finishes. Use appropriate materials for the building type. Older and listed buildings generally require breathable lime-based plasters and renders rather than cement-based products, which can trap moisture and accelerate salt damage.
Pro Tip: Ask your surveyor to document the salt type identified during testing. Chloride salts often indicate a different moisture source than sulphate salts, and the distinction affects which remedial approach is appropriate. A written survey report with documented findings protects you if the work is ever disputed.
Typical repairs range from straightforward guttering and pointing maintenance at the lower end of cost, through to DPC installation, render repair, and full plaster reinstatement for more systemic problems. A diagnostic survey establishes the scope before any money is spent on treatment.
How to clean efflorescence safely (only after the moisture source is fixed)
Cleaning before the moisture source is resolved is pointless: deposits will return. Once the underlying cause is confirmed as resolved, follow these steps.
- Allow the wall to dry fully. Do not attempt cleaning on a wet or recently wetted surface.
- Dry brush first. Use a stiff natural-bristle brush to remove loose crystals. Work from top to bottom and collect the debris rather than spreading it. This step alone is sufficient for light, recent deposits.
- Rinse with clean water if needed. For more stubborn deposits on exterior masonry, a gentle rinse with clean water and a soft brush can help. Avoid high-pressure washing, which can drive salts deeper into the substrate.
- Use a specialist brick cleaner only where appropriate. Mild proprietary efflorescence removers are available for exterior brickwork. Follow the manufacturer’s instructions precisely, test on a small inconspicuous area first, and rinse thoroughly after application.
- Avoid acids on heritage masonry. Acid-based cleaners can damage soft brick, natural stone, and lime mortar. For listed buildings or pre-1919 properties, consult a specialist before using any chemical cleaner. Cleaning methods should be chosen carefully, with aggressive acids avoided on heritage fabric.
- Neutralise and dry before redecoration. Interior surfaces must be fully dry and neutralised before any paint or plaster is applied. Applying non-breathable coatings over residual salts will cause blistering and failure.
When not to clean yourself:
- Deposits keep returning despite previous cleaning.
- The plaster beneath is soft, blown, or crumbling.
- You suspect cryptoflorescence (sub-surface salt crystallisation that can blow the surface off masonry or plaster) — this requires specialist inspection and may need salt-contaminated plaster removal rather than surface cleaning.
- The building is listed or constructed before 1919.
How to prevent efflorescence returning
Prevention is largely a matter of keeping water out of the masonry in the first place and ensuring the building can breathe when moisture does enter.
Maintenance checklist:
- Check and clear gutters, downpipes, and hoppers at least twice a year, in autumn and spring.
- Inspect external pointing and render annually; repair cracks and open joints promptly.
- Check flashings around chimneys, dormers, and parapet walls after storms.
- Maintain correct ground levels around the building: soil or paving banked against the wall above DPC level allows moisture to bypass the damp proof course.
- Improve ventilation in kitchens, bathrooms, and any room where condensation is a recurring problem. An extractor fan assessment can identify whether existing fans are adequate.
- In outbuildings and summer houses, good insulation practice reduces the temperature differential that drives condensation on cold surfaces.
- Use breathable paints and renders on older properties. Cement-based coatings trap moisture and accelerate salt damage; lime-based products allow the wall to dry naturally.
- Log any repairs with dates and photographs. A maintenance record is useful evidence for a future survey and for insurance purposes.
Suggested seasonal schedule:
- Spring: Inspect pointing, render, and flashings after winter. Clear gutters. Check basement and ground-floor walls for new deposits.
- Autumn: Clear gutters before leaf fall. Check roof junctions and window seals before the wet season.
- After any storm: Inspect external walls, especially at parapet and chimney level, for new staining or wet patches.
Will efflorescence go away on its own?
Surface deposits can temporarily disappear in dry weather or after rain washes them away, but this is not resolution. The salts are still present in the masonry, and as soon as moisture moves through the wall again, they will reappear at the surface. In a newly built property, deposits from curing mortar often do resolve without intervention. In an existing building, persistent or recurring deposits almost always indicate a continuing moisture pathway.
Recurring efflorescence at the same location is not a cosmetic problem. It is evidence of a moisture route that is actively transporting salts through your masonry. Left unaddressed, hygroscopic salts draw moisture from the air even on dry days, accelerating plaster decay, promoting biological growth, and creating conditions for timber decay in adjacent joists or frames.
Ignoring the underlying cause carries real risks:
- Plaster decay. Hygroscopic salts absorb atmospheric moisture, keeping the substrate damp even after the original source is addressed. This leads to progressive plaster face loss.
- Cryptoflorescence. Sub-surface salt crystallisation exerts pressure from within the masonry, eventually blowing the surface off brick or plaster. This is more destructive than surface efflorescence and harder to reverse.
- Timber decay. Persistent moisture adjacent to floor joists, lintels, or window frames creates conditions for dry rot, wet rot, and woodworm. A damp and timber survey assesses both risks together.
- Mould growth. Sustained moisture supports black mould, which carries health implications and, for landlords, legal reporting obligations.
- Insurance and sale implications. Undisclosed recurring damp can affect property insurance claims and complicate conveyancing.
A recurring deposit warrants professional moisture mapping and salt analysis, not another coat of paint.
What Quaypointplastering does during a specialist damp survey
A survey-led approach avoids the two most common and expensive errors: treating efflorescence as severe rising damp and installing an unnecessary DPC, or dismissing active damp as cosmetic salt deposits and redecorating over a live moisture problem.
A Quaypointplastering specialist damp survey follows a structured process:
- Visual mapping. The surveyor records the location, pattern, height, and character of all deposits, staining, and damage across the property.
- Moisture mapping. Readings are taken at multiple heights and locations using calibrated instruments. Relative readings across a wall profile are more informative than a single high reading, and salt contamination is factored into the interpretation.
- Salt analysis. Where indicated, samples are taken to identify the salt types present. Chloride and sulphate salts point to different moisture sources and require different remedial approaches.
- Non-destructive inspection. Where possible, the survey avoids opening up walls unnecessarily. Findings are documented with photographs and metre readings.
- Written report and defined scope. You receive a documented report with findings, likely causes, and a defined scope of recommended work. This prevents unnecessary DPC installations or cosmetic-only fixes that fail within months.
Quaypointplastering’s surveys are carried out in line with BS 6576 (the British Standard for the diagnosis of rising damp) and PAS 2035 for retrofit and remedial planning. The PCA provides guidance on survey methodology and remediation standards that homeowners should expect any specialist to follow. When booking a survey, ask specifically for a report that references these standards and documents the salt analysis findings.
A written survey report is not just good practice — it is your protection against being sold remedial work you do not need. Ask for documented findings before you agree to any treatment.
Quaypointplastering covers Dorset, Hampshire, and Wiltshire. For a specialist vs RICS survey comparison, the key difference is that a specialist damp survey goes into the depth of investigation that a general RICS valuation report cannot.
Key takeaways
Efflorescence is a salt deposit, not damp itself, but recurring deposits at the same location are reliable evidence of an active moisture route that needs a survey-led diagnosis before any remedial work begins.
| Point | Details |
|---|---|
| Visual triage first | Dry, powdery, white deposits that brush off cleanly are efflorescence; wet, cold, or musty walls indicate active damp. |
| DIY metres can mislead | Salt contamination raises conductivity readings; combine metre data with visual checks and salt analysis for an accurate diagnosis. |
| Fix moisture before cleaning | Cleaning or replastering without resolving the moisture source causes the same failure to recur within weeks or months. |
| Recurring deposits need a survey | A deposit that returns after cleaning is evidence of an active moisture route; moisture mapping and salt analysis are the correct next step. |
| Quaypointplastering survey process | Survey-led diagnosis across Dorset, Hampshire, and Wiltshire, with written findings, salt analysis, and guaranteed remedial work. |
The mistakes we see most often — and how to avoid them
The most frequent and costly error we encounter is a homeowner who has already had a wall replastered twice before calling us. Both times, the contractor cleaned the surface, applied a sand-and-cement render, and painted over it. Both times, the deposits returned within a season. The moisture source, in one recent case a failed parapet flashing, was never investigated.
The second most common mistake is trusting a single handheld metre reading. A high reading on a salt-contaminated wall does not confirm rising damp. We have surveyed properties where a previous contractor installed a chemical DPC based on metre readings alone, charged accordingly, and the deposits returned because the actual cause was penetrating damp through cracked render at first-floor level. Salt analysis and moisture mapping at multiple heights would have identified that within the first survey visit.
The third mistake is using non-breathable materials on older properties. Cement render and modern vinyl paints trap moisture behind an impermeable layer. The salts then crystallise beneath the surface rather than at it, causing cryptoflorescence and accelerating the very damage the homeowner was trying to prevent.
The corrective approach is straightforward: observe carefully, document what you see, run the simple checks in this article, and do not spend money on treatment until you have a written survey report that identifies the moisture source and the salt type. That report is what separates a permanent fix from a repeated temporary patch.
Book a specialist damp survey with Quaypointplastering
If the checks in this article have left you with recurring deposits, a wet or soft wall, or simply uncertainty about what you are looking at, a documented specialist survey is the right next step. Quaypointplastering provides survey-led diagnosis across Dorset, Hampshire, and Wiltshire, with written findings, moisture mapping, salt analysis, and a defined scope of work before any treatment is recommended.

The survey covers visual mapping, calibrated moisture readings, salt testing where indicated, and a written report you can use for insurance, conveyancing, or landlord compliance. Written guarantees are provided on all remedial work that follows. You will not be sold a DPC or a replastering job without documented evidence that it is needed.
To book or to describe what you can see, visit the damp and timber survey page or browse the full range of damp treatments available. Have your photos, a note of when the deposits first appeared, and details of any recent repairs ready before the visit.
Useful sources and further reading
The sources below are authoritative starting points for homeowners and property managers who want to understand the standards and guidance that frame professional damp diagnosis in the UK. Keep any survey reports and source links on file for insurance or landlord records.
- Property Care Association (PCA) — the trade body for specialist damp and timber contractors in the UK. Its guidance on survey methodology and remediation standards is what homeowners should expect any qualified specialist to follow.
- Cambridge Dictionary: efflorescence — a clear definition of the term for reference when reading survey reports or contractor quotes.
- Insitu Scoping & Consultancy: efflorescence decoded — detailed technical guidance on distinguishing surface salts from active moisture, including notes on cryptoflorescence and moisture mapping methodology.
- Refresh PSC: what is efflorescence — practical guidance on cleaning methods and the difference between temporary new-build deposits and persistent moisture-driven salts.
- Sussex Damp Experts: rising damp or salt damage — explains why DIY moisture metres can mislead when salts are present and what accurate diagnosis requires.
- London Damp Proofing Ltd: understanding efflorescence — covers the capillary action mechanism, the 1.5-metre rising damp indicator, and the risks of leaving deposits unaddressed.
BS 6576 (diagnosis of rising damp) and PAS 2035 (retrofit and remedial planning) are the relevant British Standards for survey methodology. Ask any specialist you engage to reference these in their written report.